Every Australian Road Sign Explained
May 29, 2025
Understanding Australian Road Signs can sometimes feel like deciphering a complex language. Road signs play a crucial role in guiding drivers, cyclists, and pedestrians, ensuring everyone’s safety and maintaining an orderly flow of traffic.
In this blog, we’ll delve into some essential road signs that you’re likely to encounter. Understanding these signs not only helps in obeying traffic laws but also enhances road safety for all users.
There are a lot of road signs and information in this list so we recommend using the search function on your phone or computer to find a specific sign. We have categorised them into 5 main categories which are:
Road Work Signs
Warning Signs
Route Markers
Guide Signs
Regulatory Signs
If we have missed any Australian road signs, then please let us know!
Road Work Signs
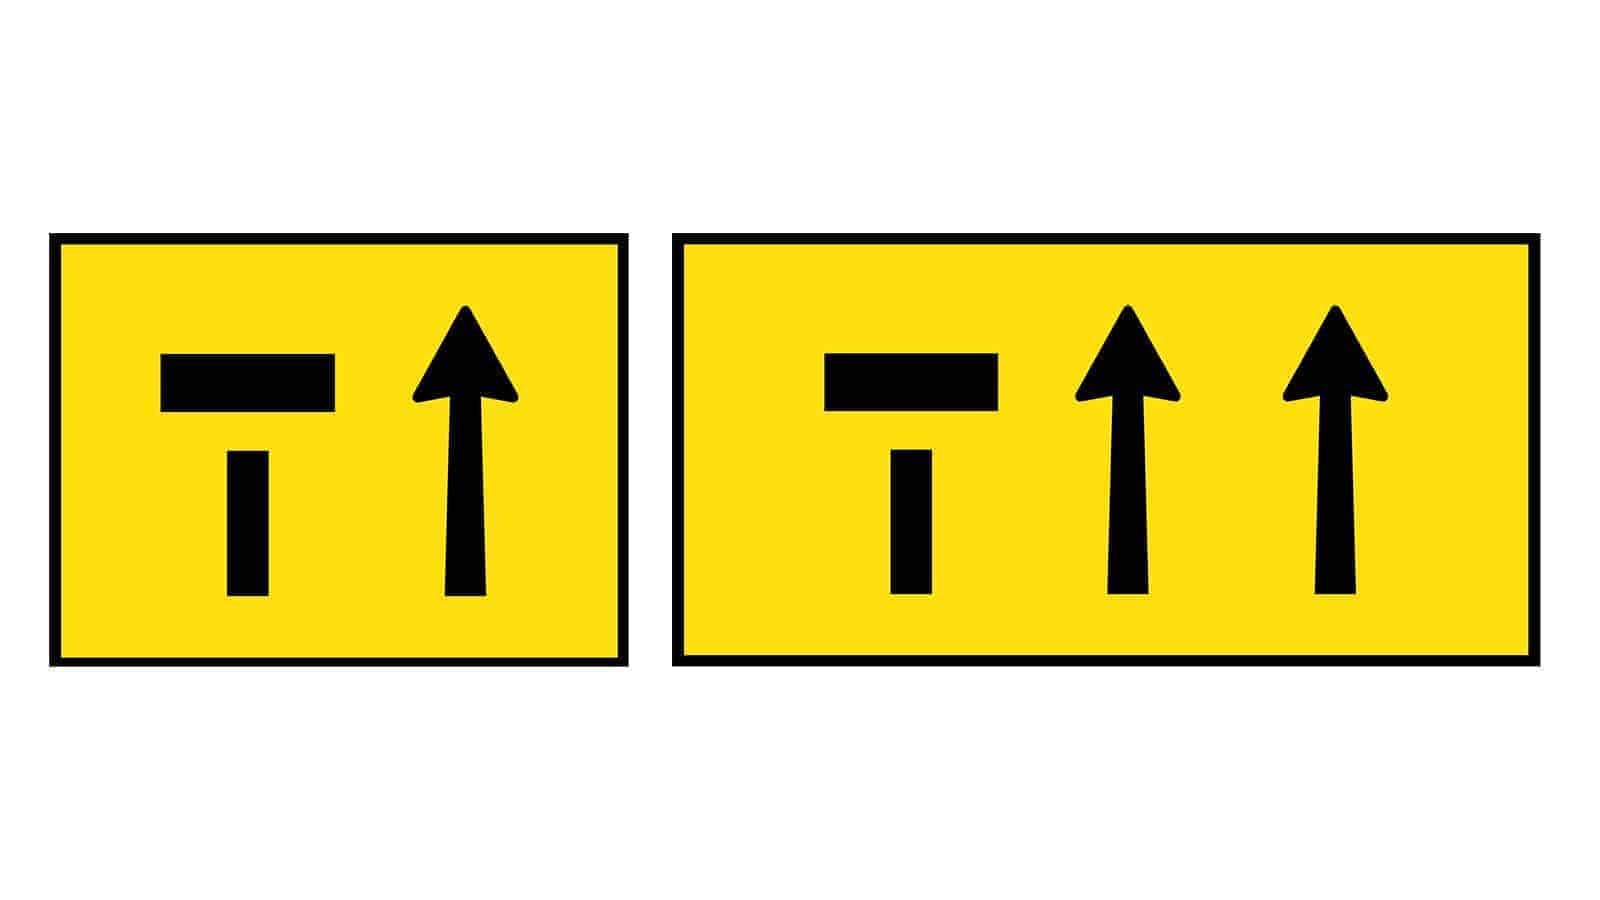
Close Lane(s) Ahead Sign
What the Sign Indicates
The “Close Lane(s) Ahead” road signs inform drivers that one or more lanes ahead are closed, typically due to construction or maintenance.
Where It Is Commonly Seen
• Near construction zones
• During road maintenance On highways and motorways with temporary closures
Driving Tips
1. Stay Alert: Notice the sign early and prepare to merge.
2. Signal Early: Indicate your lane change well in advance.
3. Merge Smoothly: Move into the open lane(s) safely and steadily.
4. Adjust Speed: Slow down as needed for safe merging.
5. Follow Instructions: Obey road workers and additional signs.
6. Stay Calm: Be patient and courteous to other drivers.
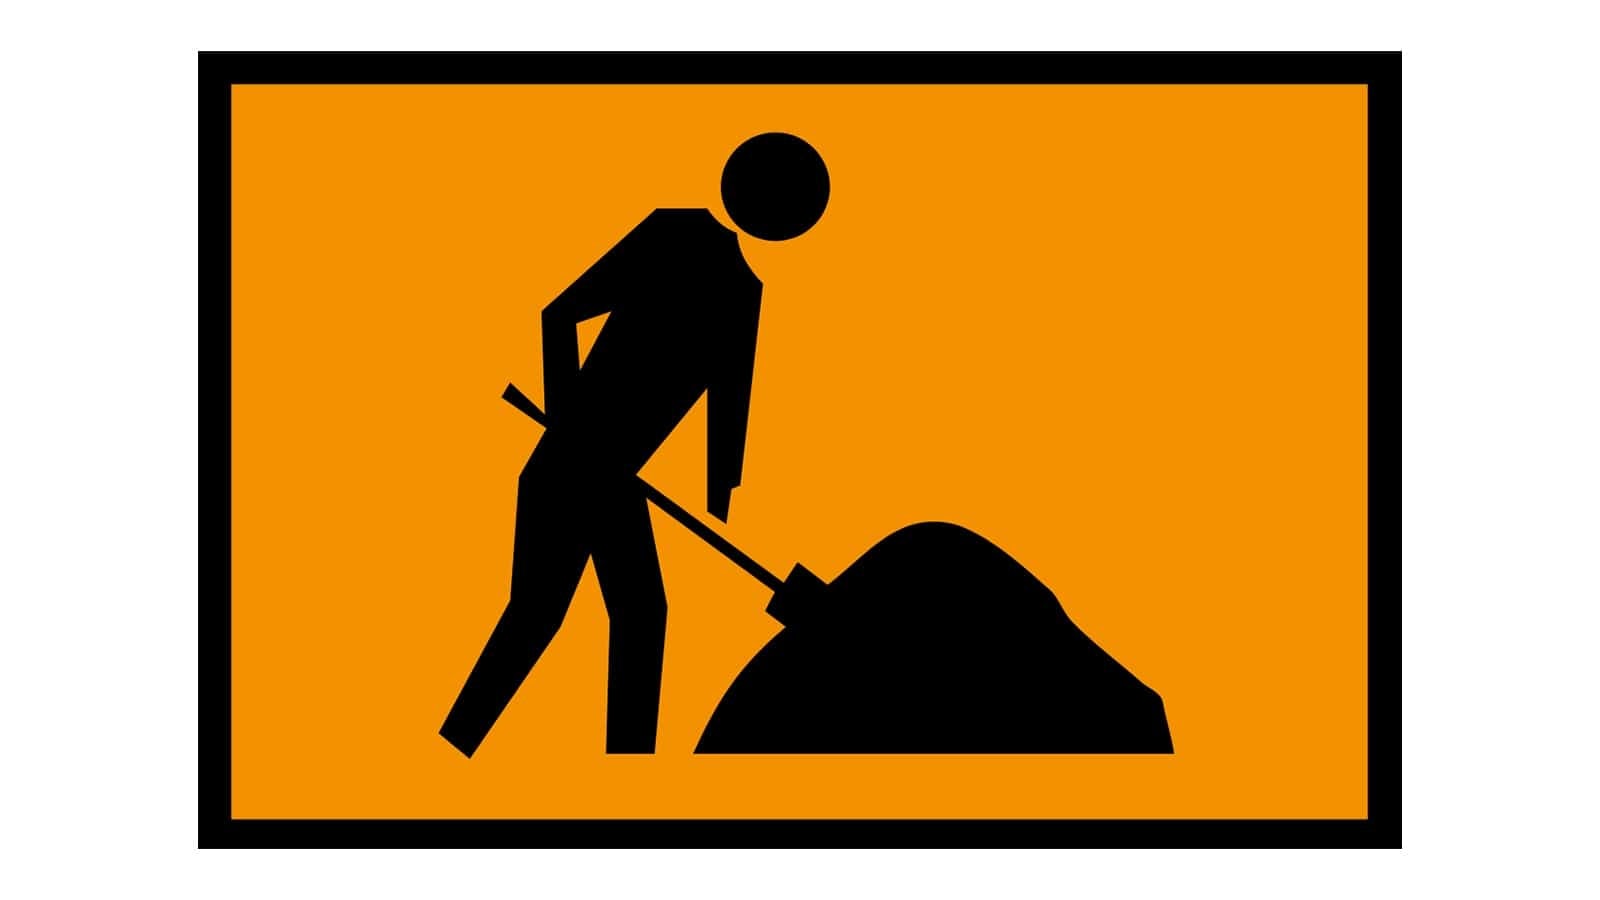
Workers Ahead Sign
What the Sign Indicates
The “Workers Ahead” road signs warn drivers of road workers ahead and the need to proceed with caution due to the potential presence of people and machinery on or near the road.
Where It Is Commonly Seen
• Near construction and maintenance zones
• On highways and motorways with ongoing road work, the workers ahead sign is a common sight.
• In urban areas with utility work or infrastructure projects
Driving Tips
1. Reduce Speed: Observe the speed limit as you approach the area to ensure the safety of workers.
2. Stay Alert: Watch for workers, machinery, and any changes in traffic patterns on seeing these safety signs.
3. Obey Instructions: Follow any instructions given by road signs or workers directing traffic.
4. Avoid Distractions: Stay focused on the road and avoid using your phone or other distractions when you see the workers ahead sign.
5. Be Patient: Road work can cause delays, so allow extra travel time and stay calm.
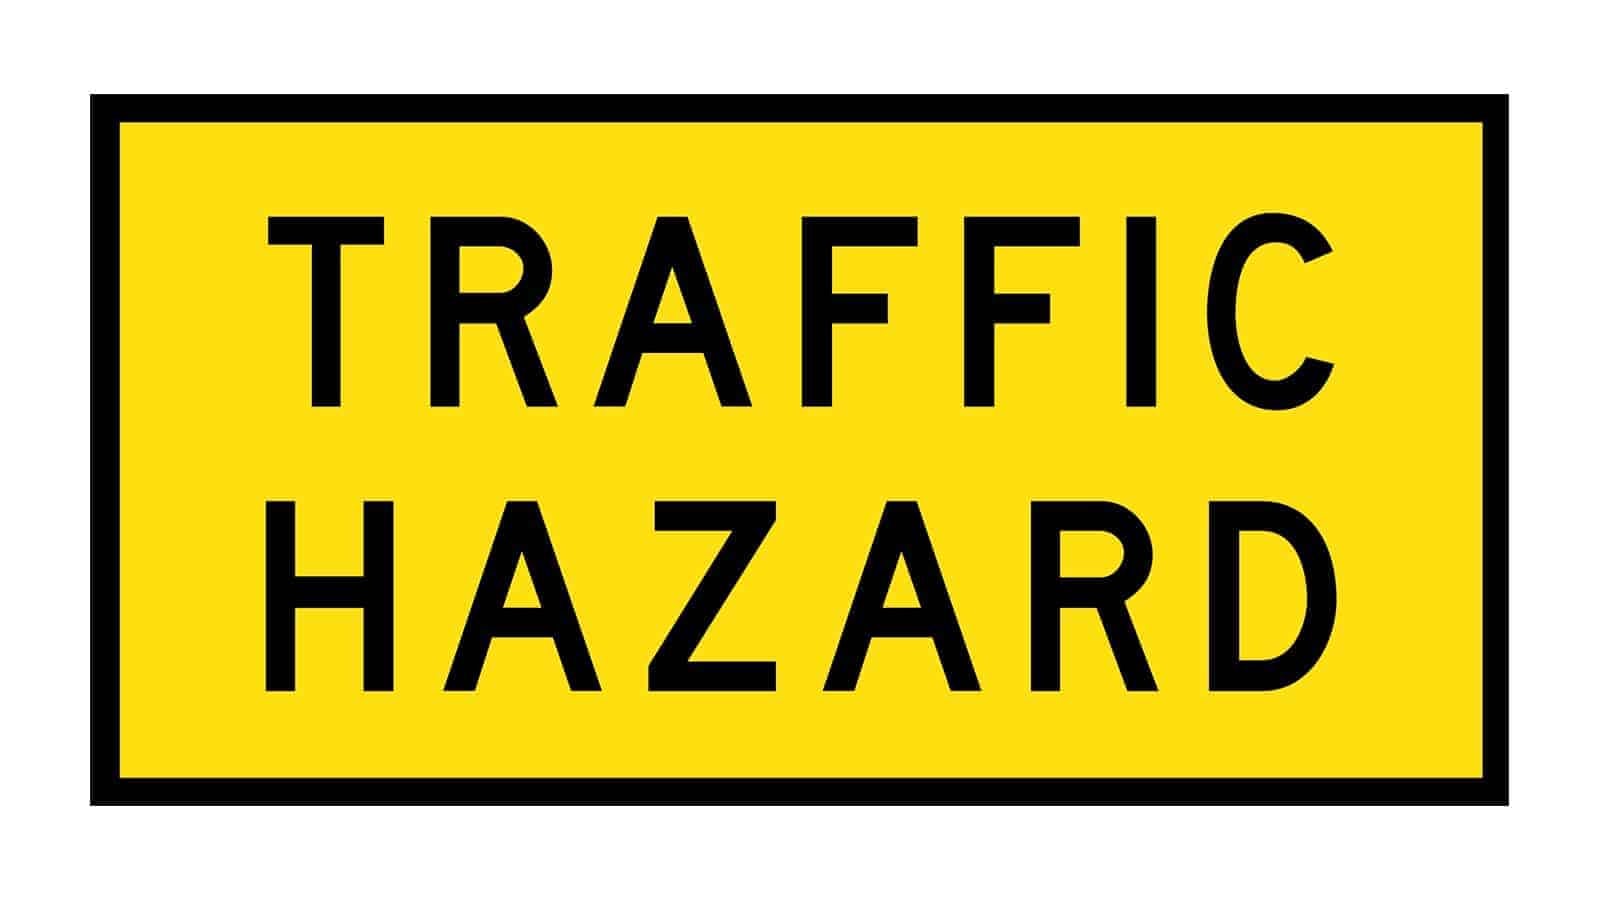
Traffic Hazard Ahead Sign
What the Sign Indicates
The “Traffic Hazard Ahead” road signs alerts drivers to potential dangers on the road ahead, such as debris, accidents, or other unexpected obstacles.
Where It Is Commonly Seen
• On highways and motorways
• In areas with frequent accidents or hazards
• Near construction zones or roadworks, these safety signs are a must.
Driving Tips
1. Stay Alert: These safety signs suggest that you stay close attention to the road and be prepared for sudden stops or changes in traffic.
2. Reduce Speed: Slow down to give yourself more time to react to any hazards.
3. Increase Following Distance: Leave extra space between your vehicle and the one in front of you.
4. Avoid Distractions: Stay focused on driving and avoid using your phone or other distractions.
5. Follow Instructions: Obey any additional signs or instructions from road workers.
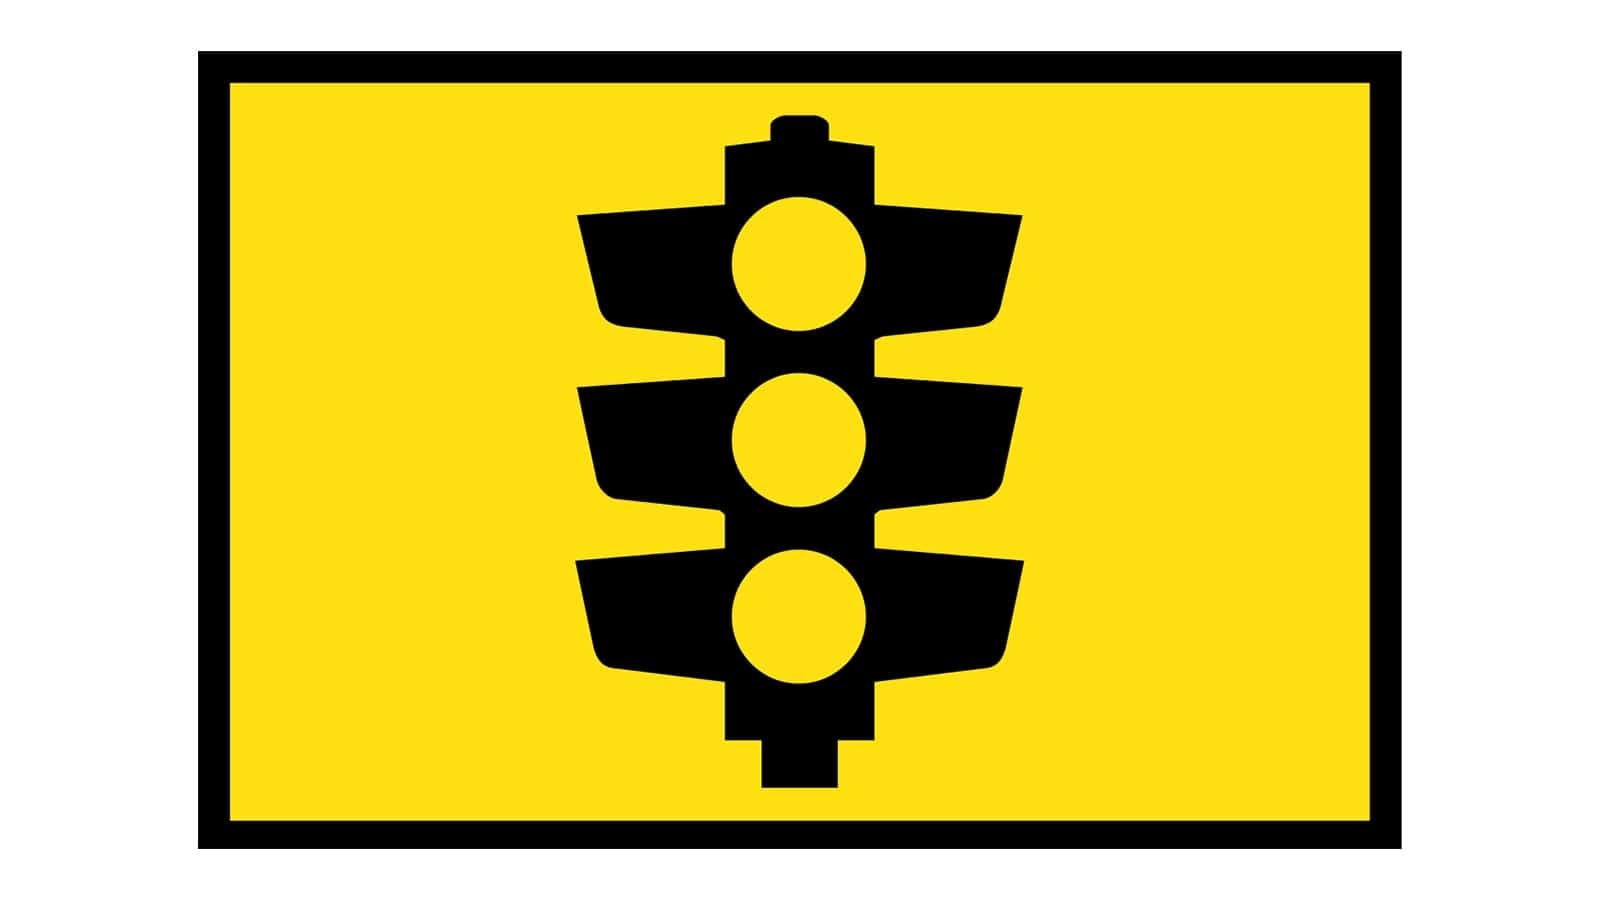
Temporary Traffic Signals Ahead Sign
What the Sign Indicates
The “Temporary Traffic Signals Ahead” road signs alerts drivers to the presence of temporary traffic signals ahead, often used to control traffic flow during road works or emergencies.
Where It Is Commonly Seen
• Near construction zones, the temporary traffic signals are a common sight.
• During road maintenance or repairs
• At sites of temporary road closures or diversions
Driving Tips
1. Stay Alert: Notice the temporary traffic signals early and be prepared to stop.
2. Obey Signals: Follow the temporary traffic signs and lights just as you would permanent ones as must-follow safety signs.
3. Reduce Speed: Slow down as you approach the signals to ensure safe stopping.
4. Be Patient: Temporary signals can cause delays, so allow extra travel time.
5. Follow Instructions: Pay attention to any additional signs or directions from road workers.
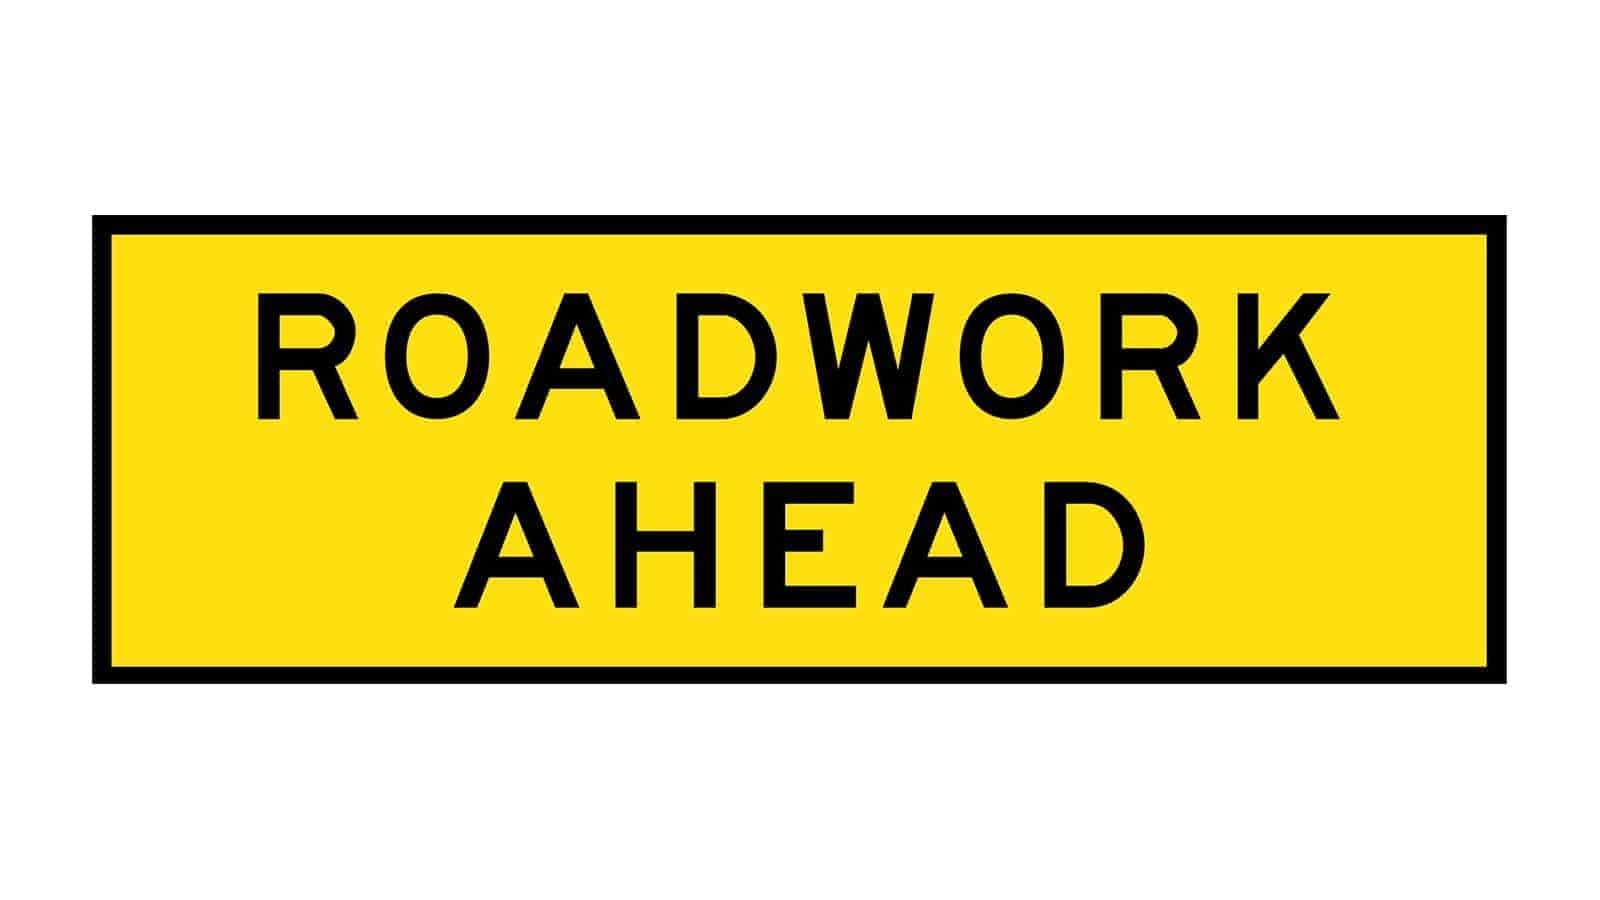
Roadwork Ahead Sign
What the Sign Indicates
The “Roadwork Ahead” road signs inform drivers that roadwork is taking place ahead, and they should be prepared for changes in traffic patterns, reduced speed limits, and potential delays.
Where It Is Commonly Seen
• Near construction and maintenance zones
• On highways and motorways, the roadwork ahead sign is quite common.
• In urban and rural areas with ongoing infrastructure projects
Driving Tips
1. Reduce Speed: Slow down as you approach the roadwork zone to ensure safety, just as you see the roadwork ahead sign.
2. Stay Alert: Pay attention to workers, machinery, and any changes in traffic patterns.
3. Follow Signs: Obey all posted signs and signals.
4. Increase Following Distance: Allow more space between your vehicle and the one in front of you as indicated by these safety signs.
5. Be Patient: Expect delays and plan for extra travel time.
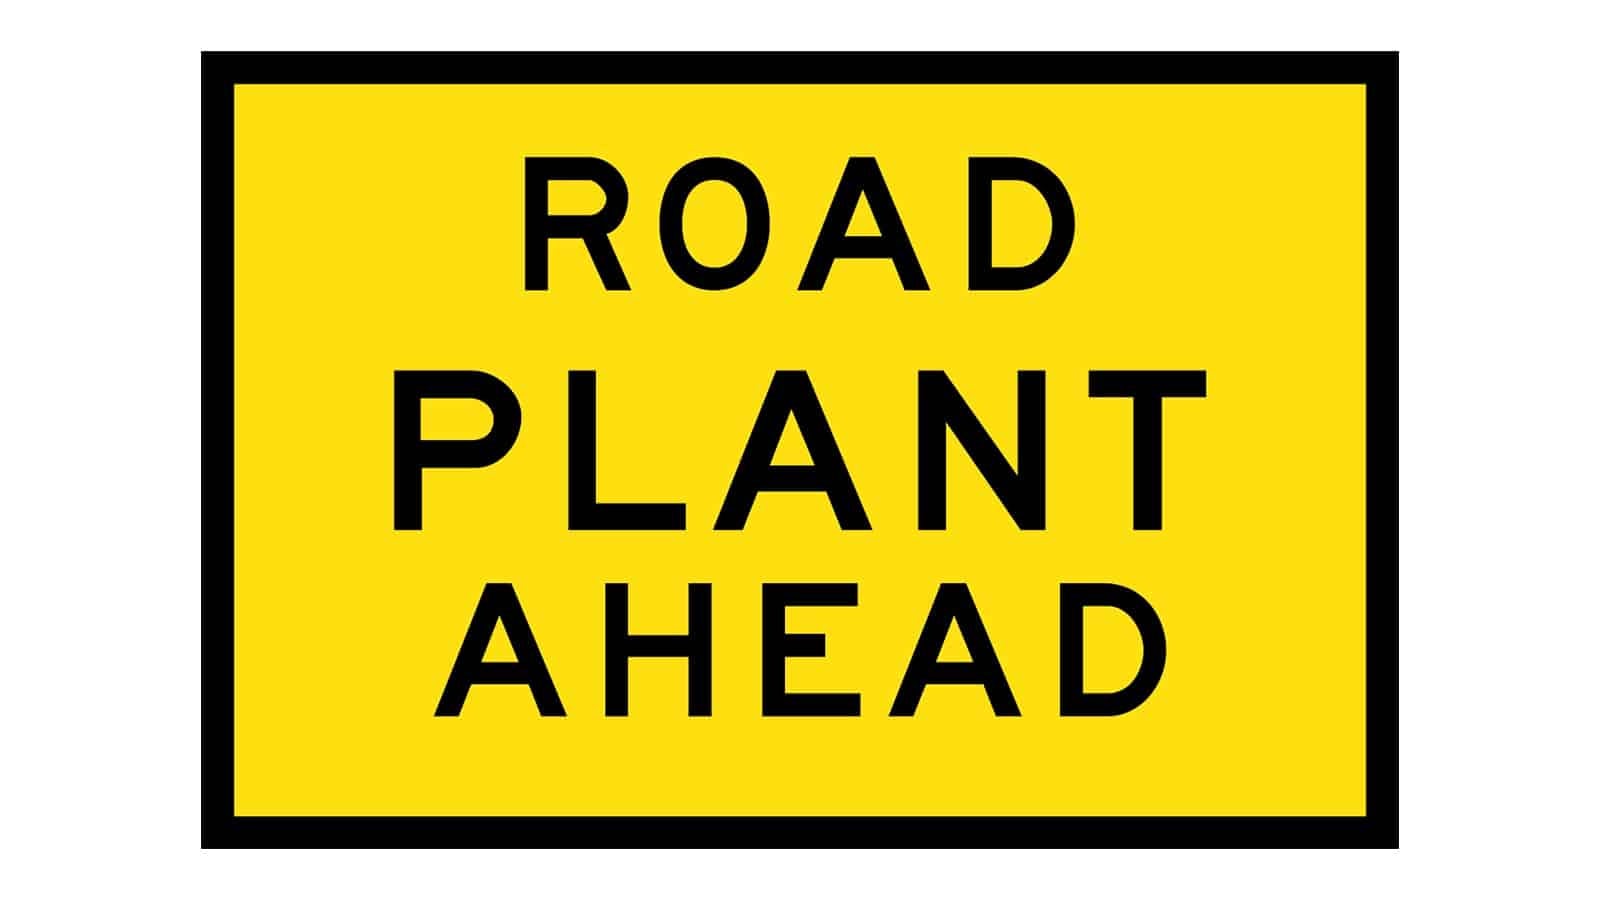
Road Plant Ahead Sign
What the Sign Indicates
The “Road Plant Ahead” road signs warn drivers of machinery and construction equipment operating on or near the road ahead.
Where It Is Commonly Seen
• Near construction sites
• In maintenance zones
• On roads undergoing repairs or upgrades
Driving Tips
1. Reduce Speed: Slow down as you approach the area to maintain control and avoid accidents once these safety signs appear.
2. Stay Alert: Watch for construction equipment and workers.
3. Obey Signs: Follow any additional traffic signs or instructions from road workers.
4. Increase Following Distance: Keep extra space between your vehicle and the one in front to react to any sudden stops.
5. Be Patient: Expect possible delays and plan for extra travel time because not following the safety signs is no option at all.
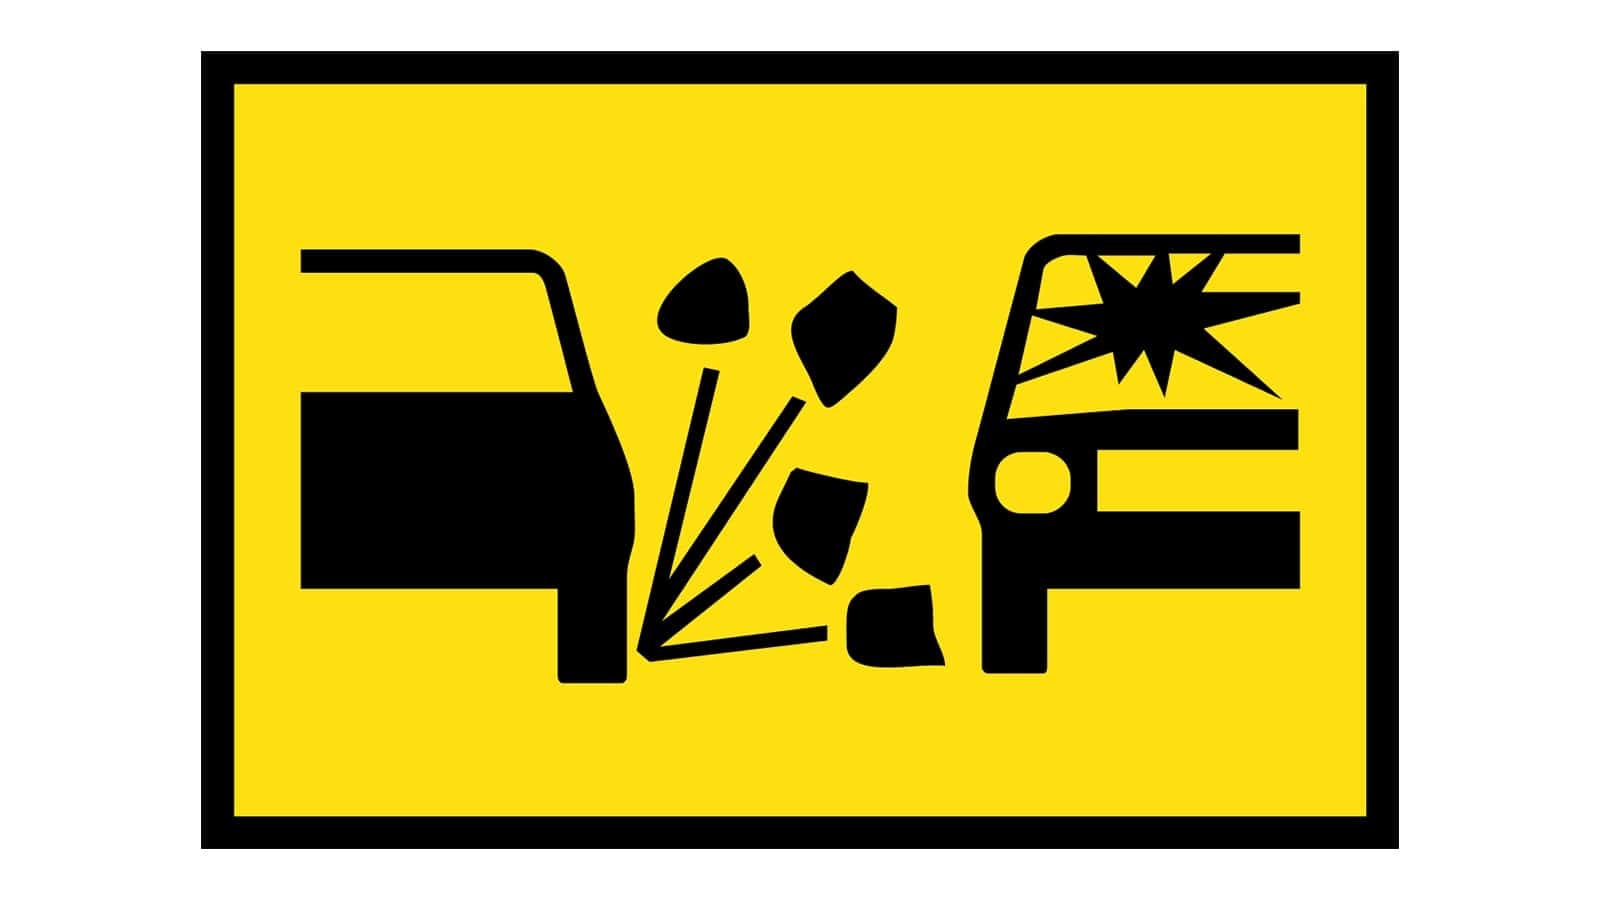
Loose Stones or Gravel Ahead Sign
What the Sign Indicates
The “Loose Stones or Gravel Ahead” road signs warn drivers of loose stones or gravel on the road ahead, which can cause damage to vehicles and create hazardous driving conditions.
Where It Is Commonly Seen
• Near construction zones
• On rural roads
• In areas with recent roadwork or resurfacing, these traffic signs are a must.
Driving Tips
1. Reduce Speed: Slow down to prevent stones from being thrown up and damaging your vehicle or others, which is what these safety signs are meant to avoid.
2. Increase Following Distance: Leave more space between your vehicle and the one in front to avoid debris.
3. Avoid Sudden Movements: Drive smoothly and avoid sudden braking or sharp turns to maintain control.
4. Be Cautious of Other Vehicles: Watch for vehicles pulling over to check for damage or adjusting their driving.
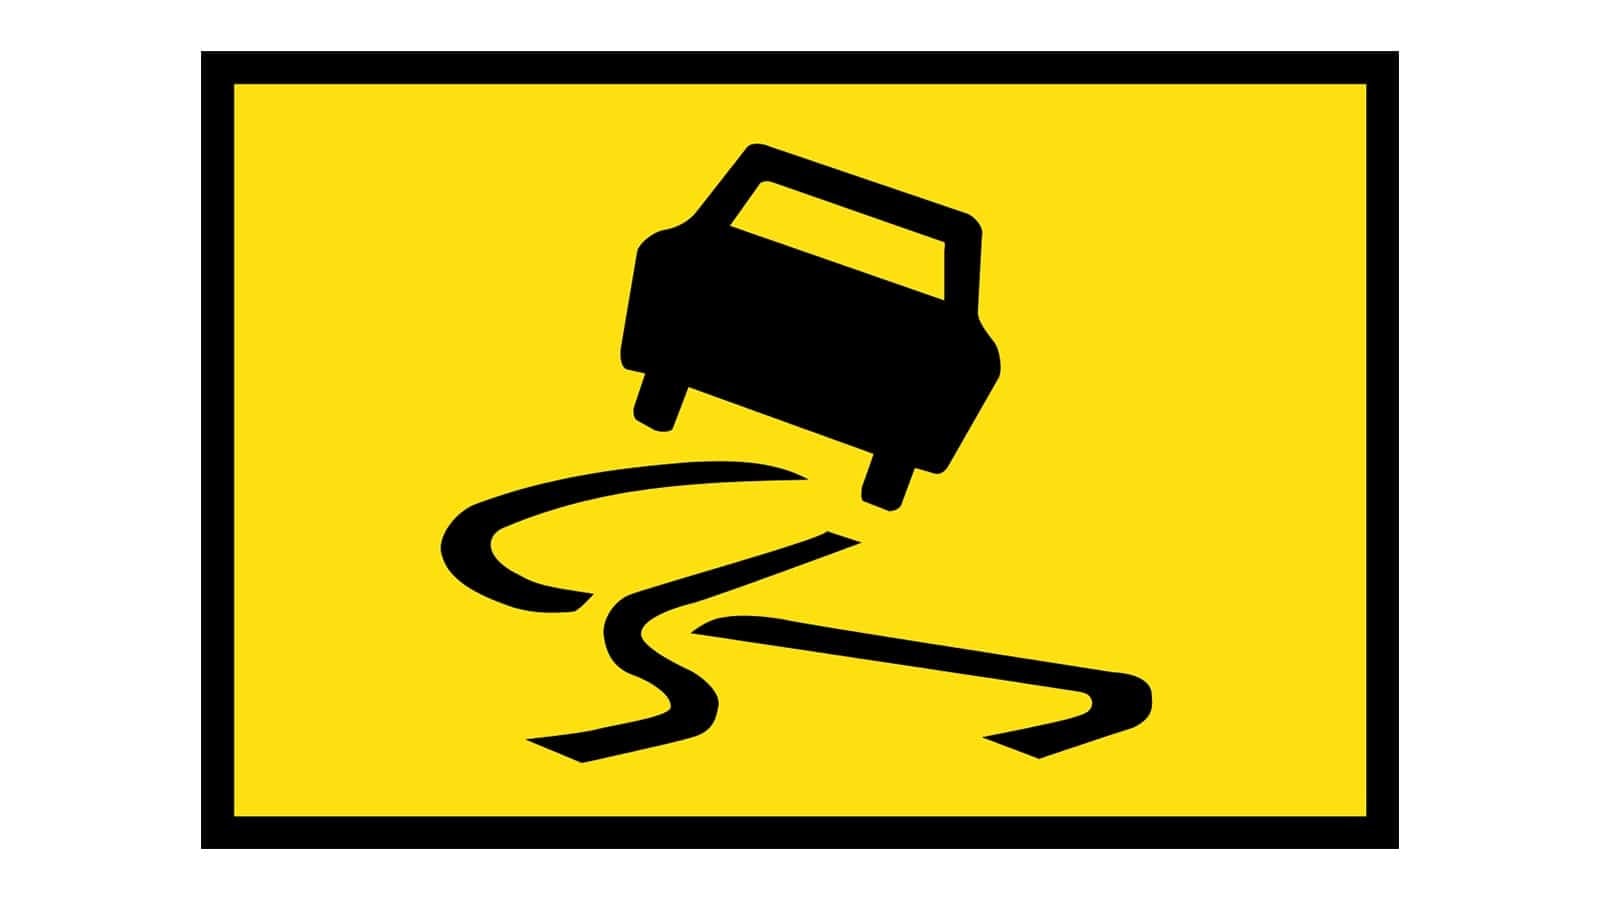
Hazardous Road Surface Conditions Ahead
What the Sign Indicates
The “Hazardous Road Surface Conditions Ahead” road signs warn drivers of potentially slippery or dangerous road surfaces ahead, often due to weather conditions like rain, ice, or snow.
Where It Is Commonly Seen
• Construction zones with recently reworked roads
• Areas prone to weather changes
• Near bridges and overpasses
• Roads known to become slippery when wet or icy
Driving Tips
1. Reduce Speed: Slow down to maintain better control of your vehicle as you abide by these safety signs.
2. Avoid Sudden Movements: Avoid hard braking or sharp turns to prevent skidding.
3. Increase Following Distance: Give yourself more time to react to the vehicle ahead.
4. Be Mindful of Shaded Areas and Bridges: These areas can be icy even when other parts of the road are clear.
Warning Signs
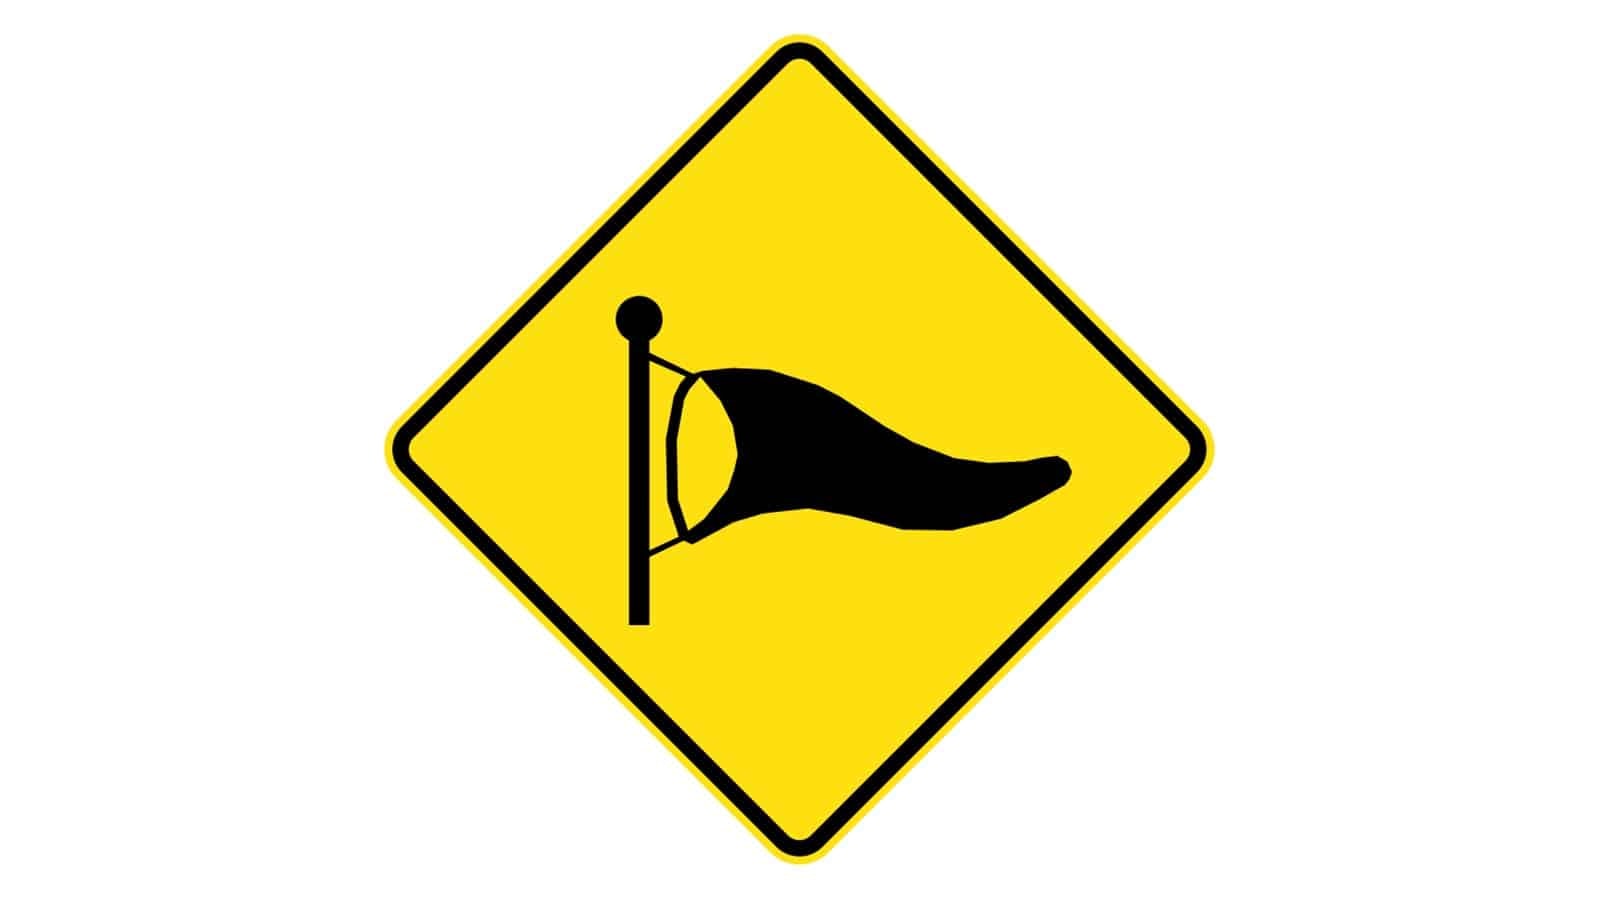
Wind Gust Sign
The “Wind Gust” road signs warn drivers of strong wind gusts that may affect vehicle control, particularly for high-sided vehicles.
Where It Is Commonly Seen
• On bridges and overpasses
• In open, exposed areas
• Along coastal roads
Driving Tips
1. Reduce Speed: Slow down to maintain better control of your vehicle.
2. Hold Steering Wheel Firmly: Grip the wheel securely to counteract sudden gusts as indicated by these safety signs.
3. Increase Following Distance: Leave extra space between your vehicle and others to allow more reaction time.
4. Be Cautious with High-sided Vehicles: Be extra vigilant around lorries, vans, and buses, as they are more affected by wind.
5. Avoid Sudden Movements: Drive smoothly to maintain stability.
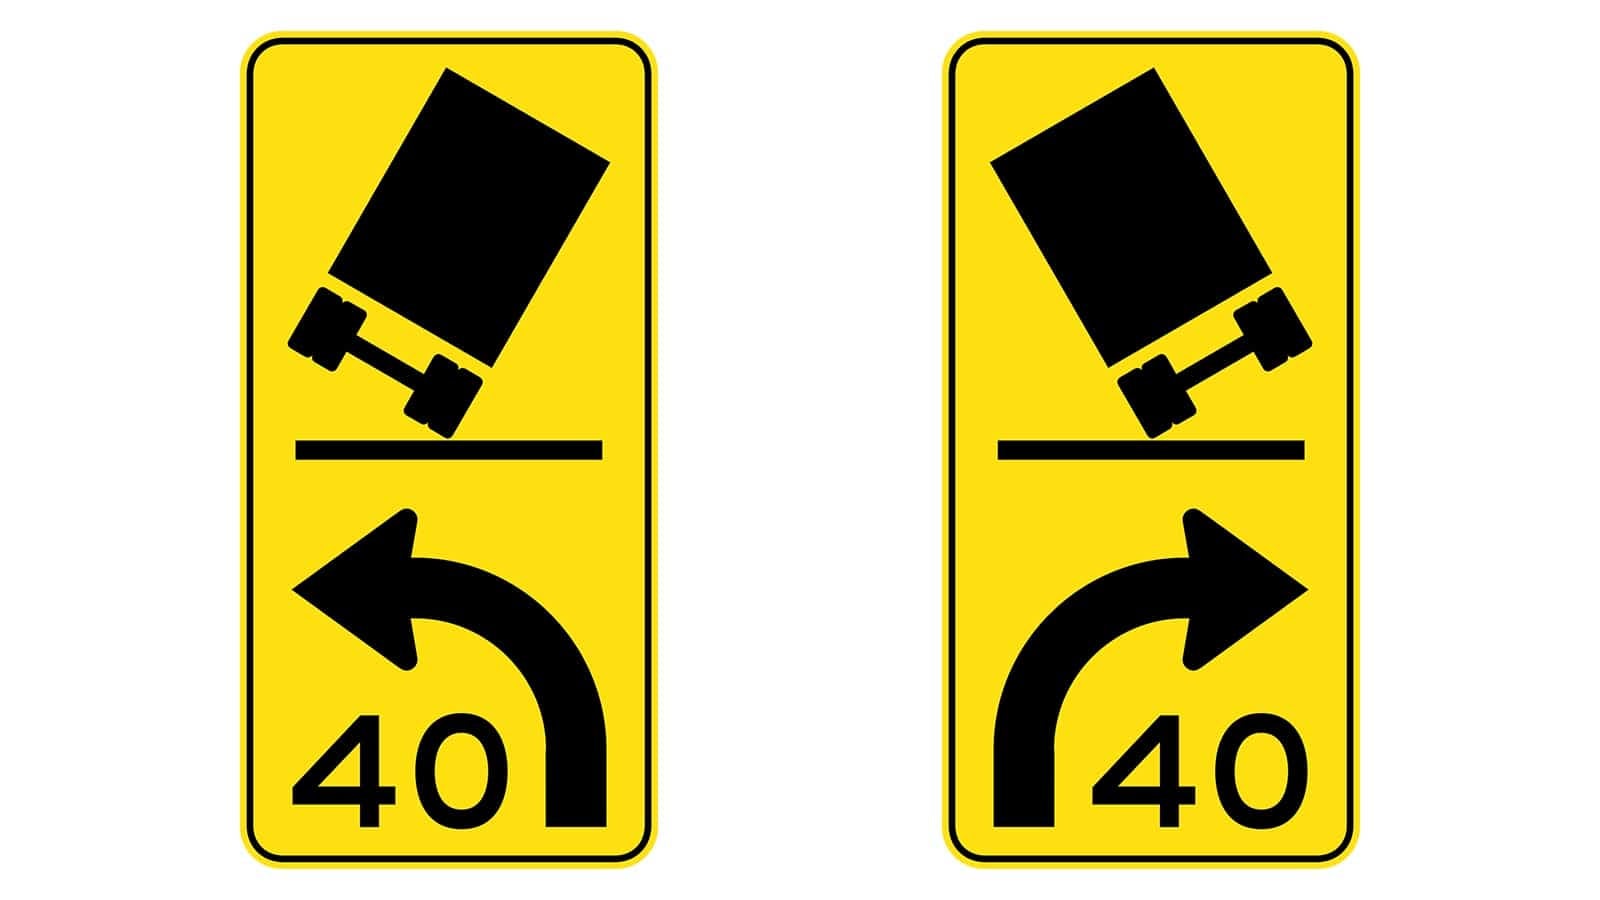
Tilting Truck Sign
The “Tilting Truck” sign warns drivers, especially those operating heavy vehicles, of a sharp curve ahead that could cause trucks to tip over if taken at high speed. The sign often includes a recommended speed limit.
Where It Is Commonly Seen
• On highways with sharp curves
• Near mountainous or hilly terrain
• In areas with frequent truck traffic
Driving Tips
1. Reduce Speed: Slow down to the recommended speed limit indicated on the sign.
2. Take Turns Carefully: Navigate curves smoothly and avoid sudden movements as pointed out by these safety signs.
3. Stay Alert: Pay extra attention to road conditions and signage.
4. Increase Following Distance: Allow more space between your vehicle and others, particularly if you are driving a heavy vehicle.
5. Be Mindful of Vehicle Load: Ensure your load is secure and properly balanced.
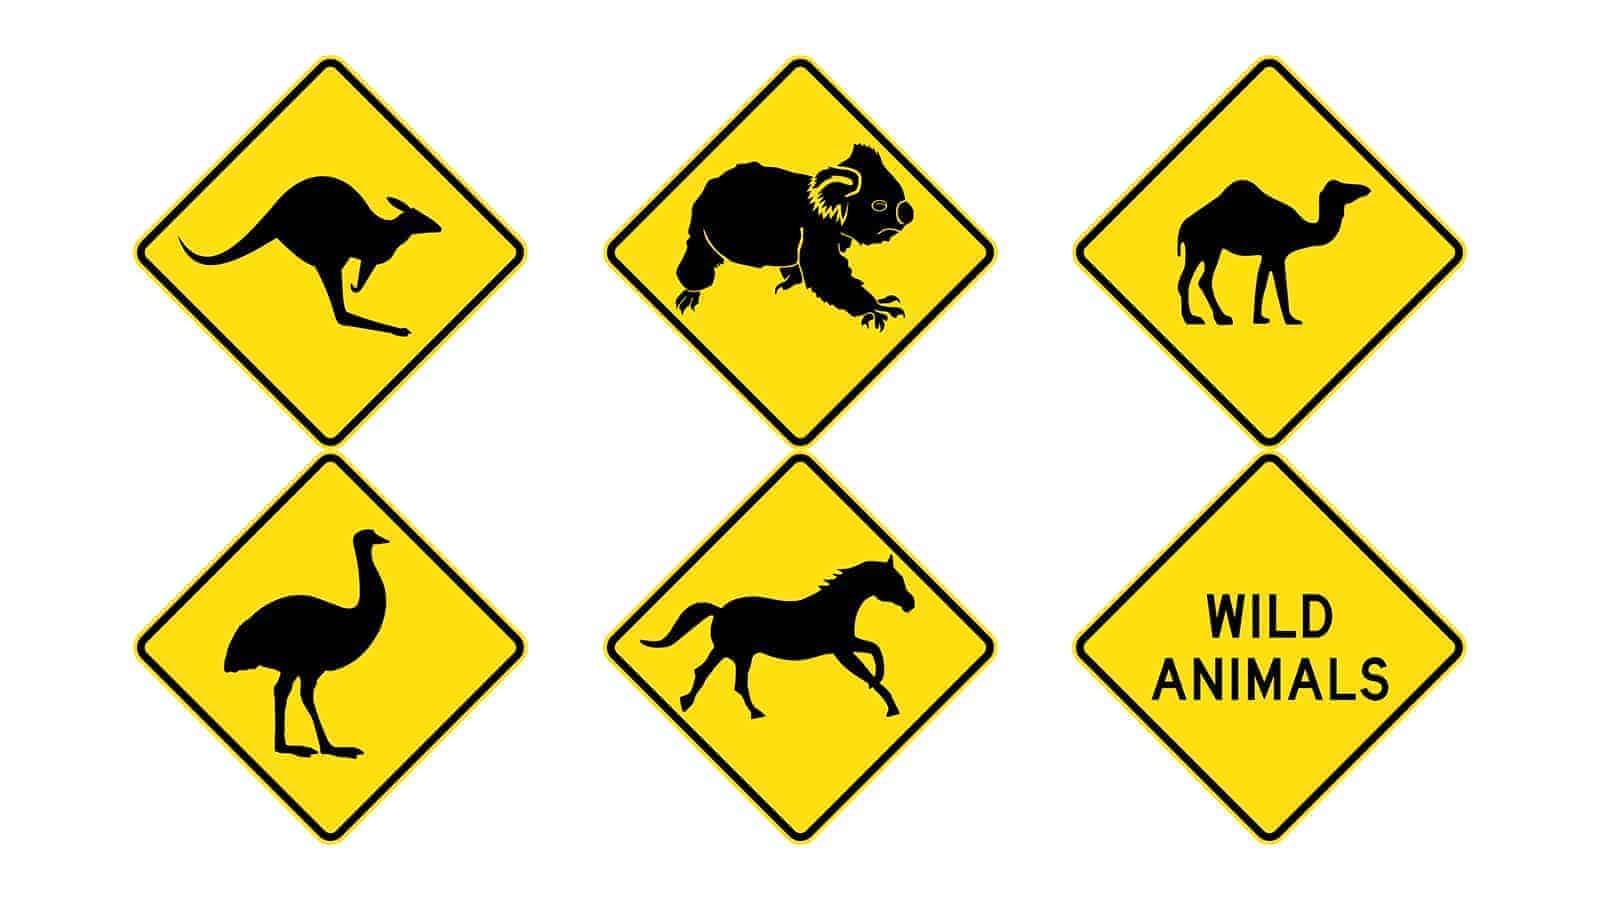
Warning for Animals Sign
The “Warning for Animals” road signs alert drivers to the presence of wild animals that may cross the road. These warning signs depict specific animals common to the area, such as kangaroos, koalas, camels, emus, horses, and a general “wild animals” warning.
Where It Is Commonly Seen
• In rural or wilderness areas
• Near wildlife reserves or parks
• On roads known for frequent animal crossings
Driving Tips
1. Reduce Speed: Observe the speed limit to give yourself more time to react if an animal appears.
2. Stay Alert: Pay close attention to the road and surrounding areas, especially at dawn and dusk when animals are most active.
3. Use High Beams: When driving at night, use high beams to better illuminate the road ahead (but dim them for oncoming traffic).
4. Do Not Swerve: If an animal is in your path, brake firmly and remain in your lane. Swerving can cause more severe accidents.
5. Follow Additional Signage: Obey any extra warning signs indicating animal activity.
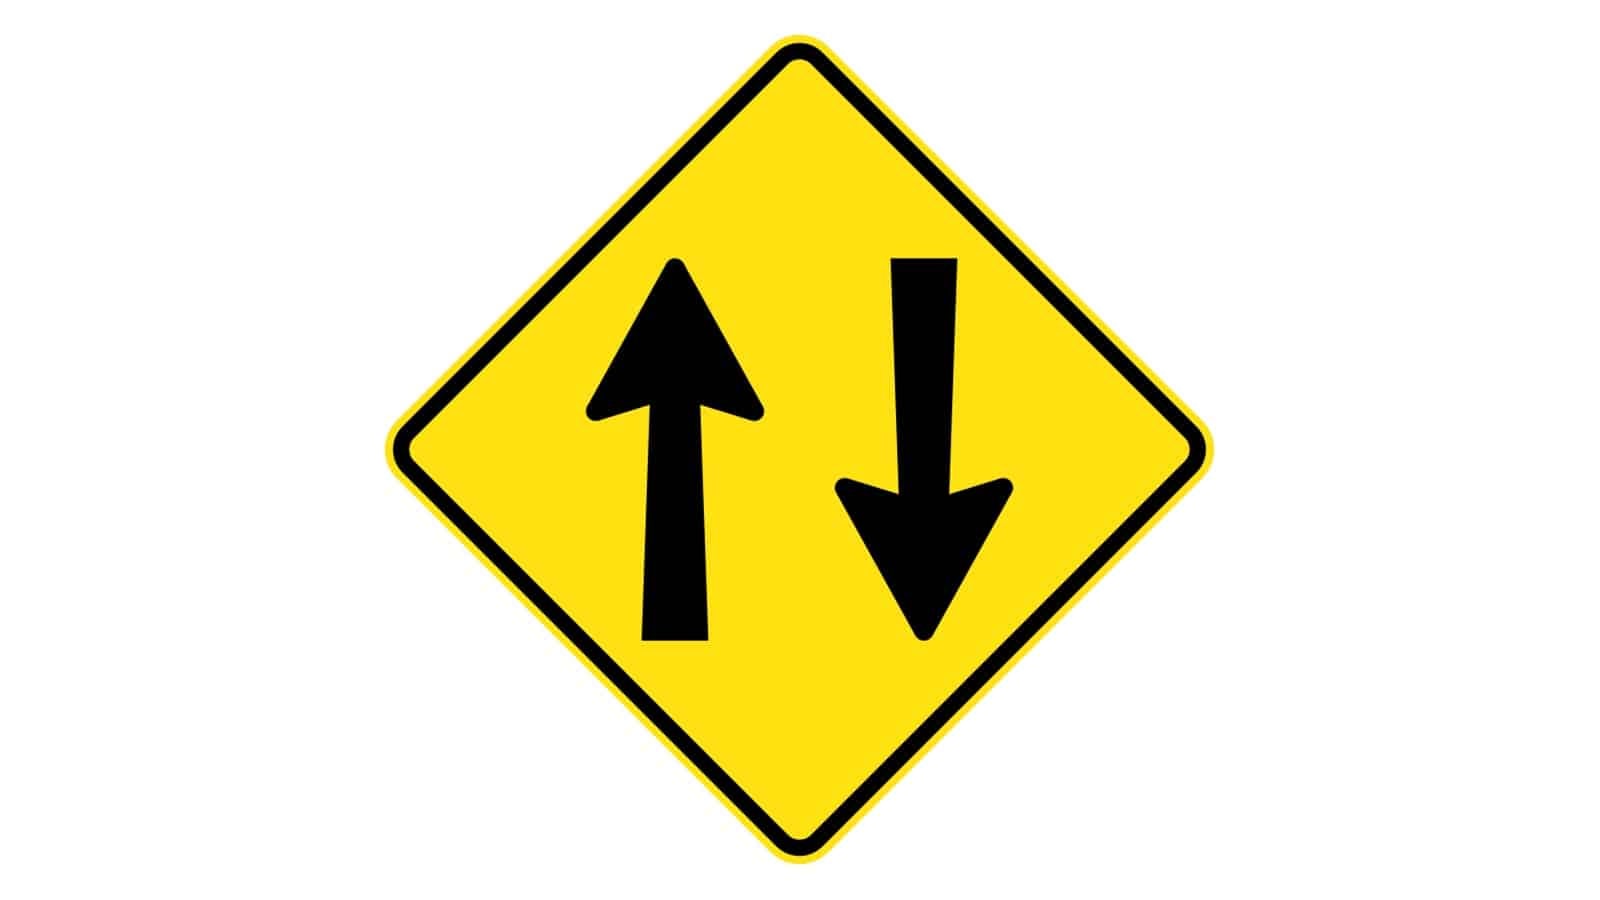
Two-Way Traffic Ahead Sign
The “Two-Way Traffic Ahead” road signs warn drivers that the road ahead will switch from one-way to two-way traffic, requiring extra caution as vehicles will be coming from the opposite direction.
Where It Is Commonly Seen
• At the end of one-way streets, a two-way traffic ahead sign is a must.
• Near roadworks or diversions
• In areas where road layouts change
Driving Tips
1. Stay Alert: Pay attention to the transition from one-way to two-way traffic.
2. Keep Right/Left: Maintain your lane position according to the country’s driving rules (right in some countries, left in others).
3. Reduce Speed: Observe the speed limit to safely navigate the new traffic pattern as per these warning signs.
4. Increase Awareness: Watch for oncoming vehicles and be prepared for unexpected stops when you see this two-way traffic ahead sign.
5. Follow Signs: Obey any additional signs or road markings indicating the new traffic flow.
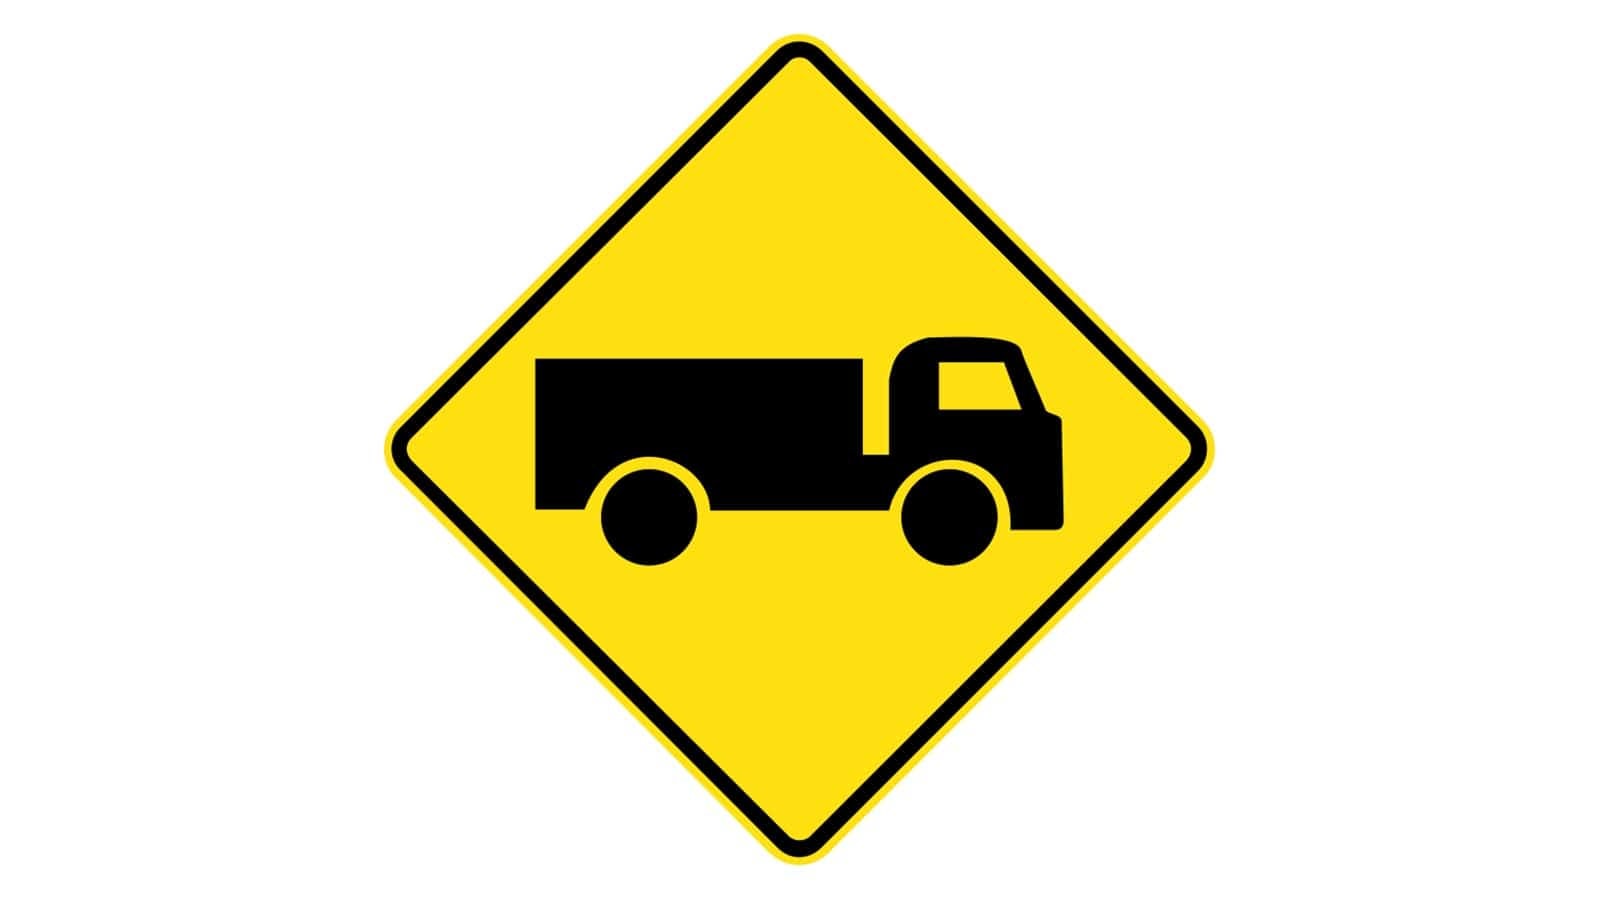
Trucks Crossing or Entering Sign
The “Trucks Crossing or Entering” road signs warn drivers that trucks may be crossing or entering the road ahead, requiring extra caution due to the potential presence of slow-moving or large vehicles.
Where It Is Commonly Seen
• Near industrial areas, these safety signs are a must.
• Close to warehouses and distribution centers
• Along highways with frequent truck traffic
Driving Tips
1. Stay Alert: Watch for trucks entering or crossing the road, especially at intersections or entrances.
2. Reduce Speed: Observe the speed limit to give yourself more time to react to trucks.
3. Maintain Safe Distance: Keep a safe following distance behind trucks to ensure visibility and reaction time.
4. Be Patient: Trucks may move slowly or take wide turns; allow them the space they need.
5. Signal Clearly: Use your indicators well in advance when changing lanes or turning near trucks as you see one of these warning signs.
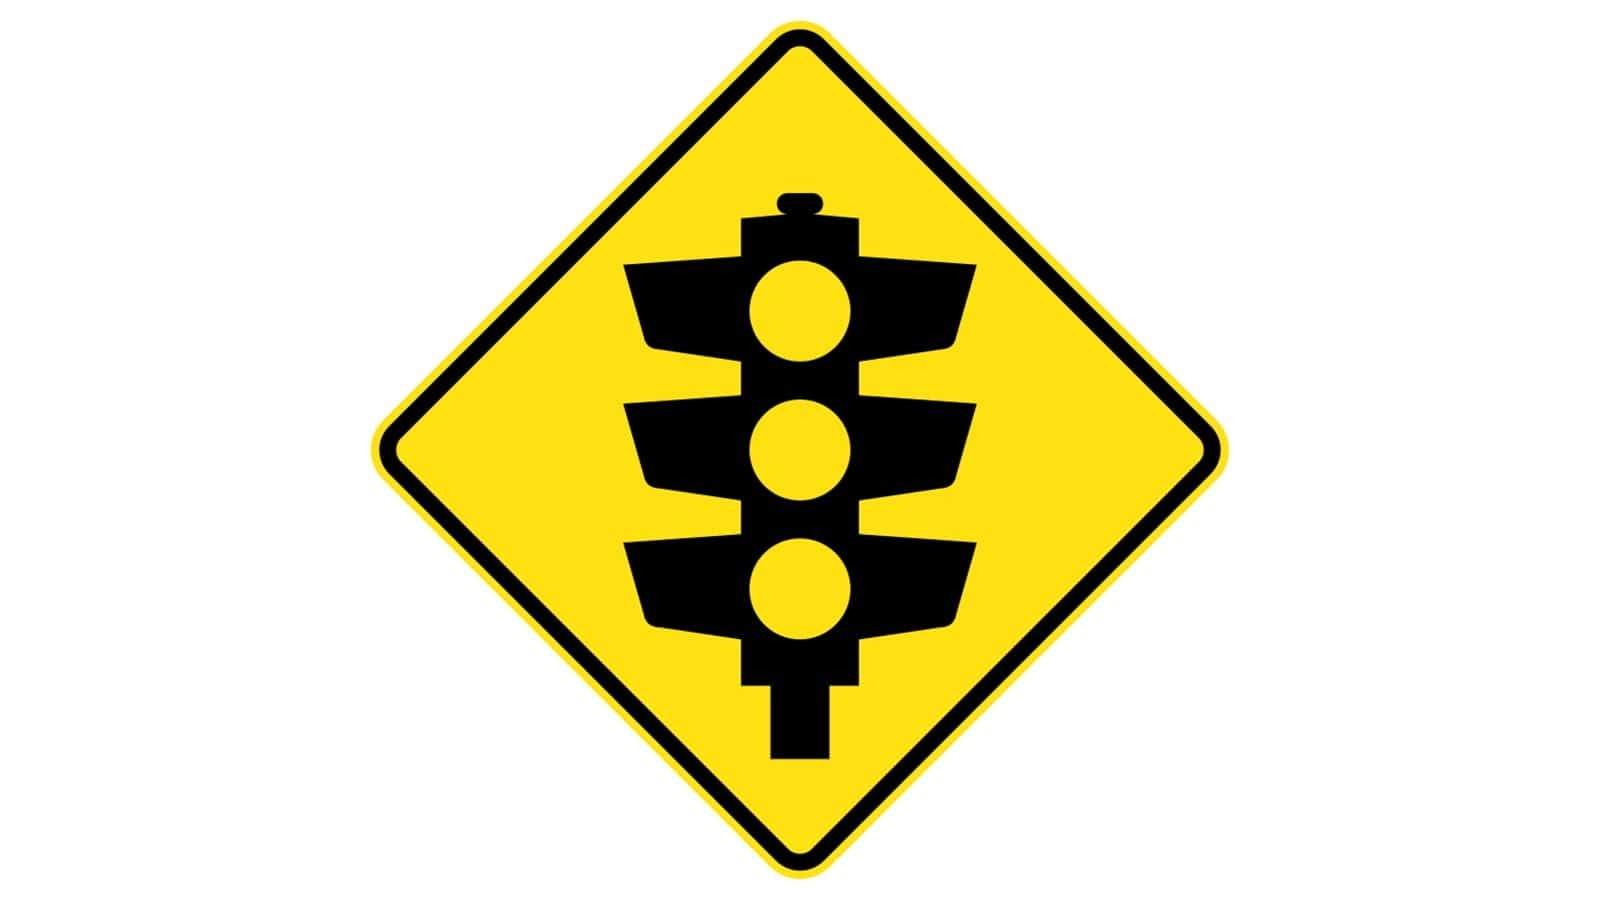
Traffic Signals Ahead
The “Traffic Signals Ahead” road signs warn drivers of upcoming traffic lights, indicating they should be prepared to stop or adjust their speed accordingly.
Where It Is Commonly Seen
• Approaching intersections
• Near busy pedestrian crossings
• In urban areas with frequent traffic light-controlled junctions, the traffic signals ahead is one of the common safety signs.
Driving Tips
1. Stay Alert: Be aware of the upcoming traffic signals and prepare to stop if necessary just as you see the traffic signals ahead sign.
2. Reduce Speed: Observe the speed limit as you approach the intersection to ensure you can stop safely if the light changes.
3. Maintain Safe Distance: Keep a safe following distance to allow for sudden stops when the traffic signals ahead signs appear.
4. Observe Traffic Flow: Watch for changes in traffic patterns and pedestrians as indicated by these warning signs.
5. Follow Signals: Obey the traffic lights and any additional signage or road markings as indicated by the traffic signals ahead sign.
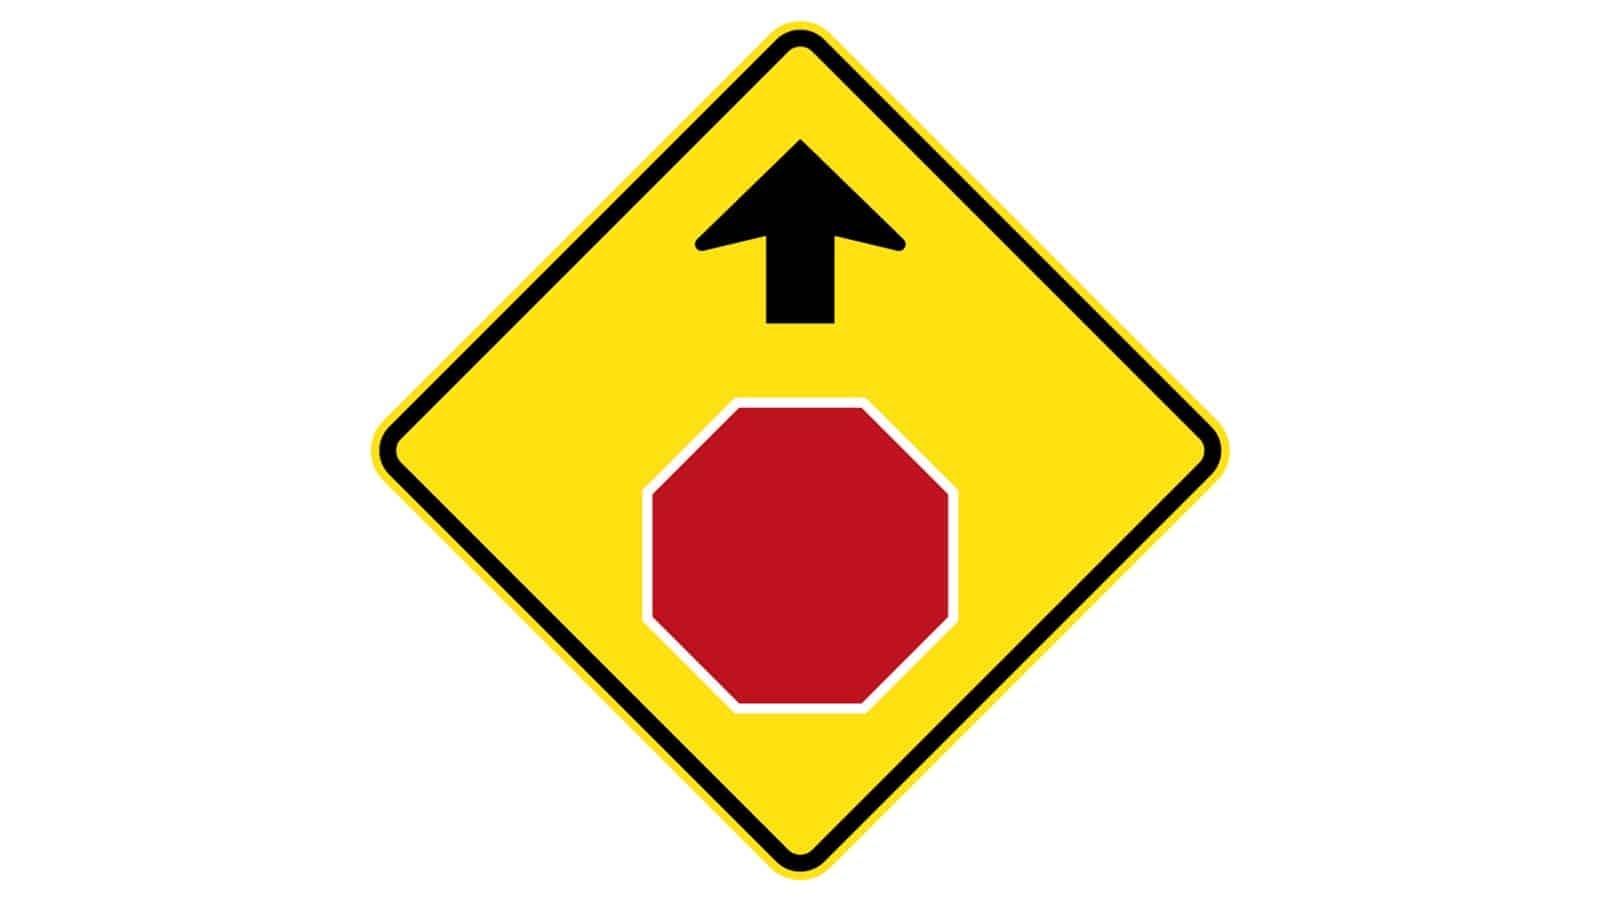
Stop Sign Ahead Sign
The “Stop Sign Ahead” road signs alert drivers to an upcoming stop sign, indicating they should prepare to come to a complete stop.
Where It Is Commonly Seen
• Approaching intersections
• Near pedestrian crossings
• In areas with limited visibility
Driving Tips
1. Stay Alert: Watch for the stop sign ahead and be prepared to stop when these safety signs appear.
2. Reduce Speed: Check your speed limit as you approach the intersection.
3. Complete Stop: Come to a full stop at the stop sign, even if there is no visible traffic.
4. Observe Right-of-Way: Follow right-of-way rules when proceeding after the stop.
5. Check for Pedestrians: Look for pedestrians before continuing after you see the sign ahead.
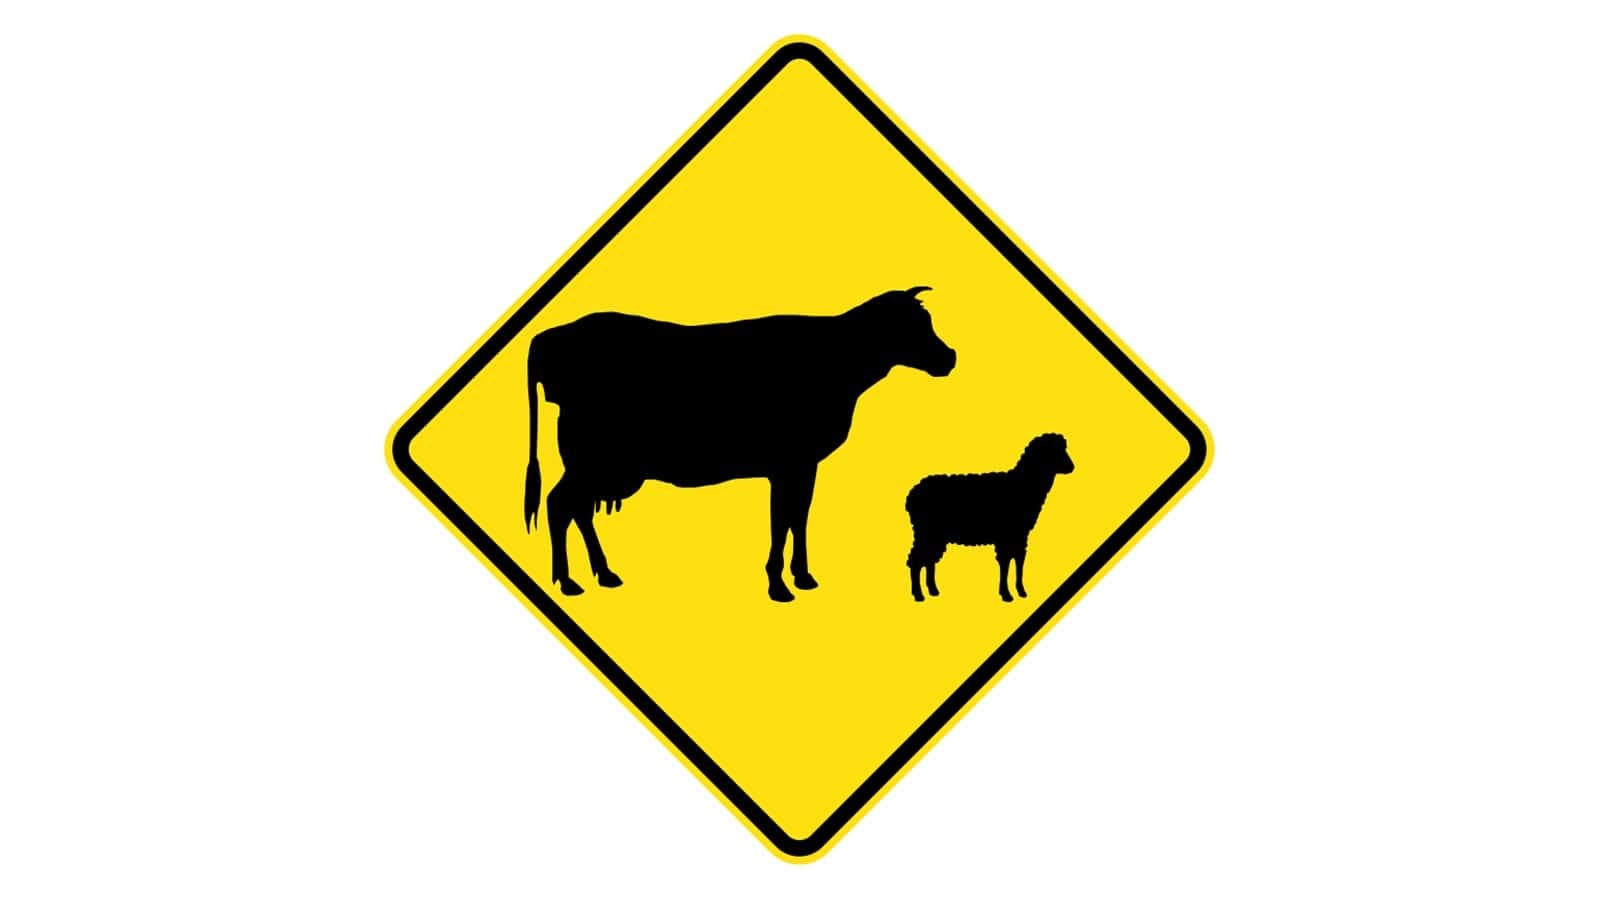
Stock Crossing Sign
The “Stock Crossing” road signs alert drivers to the presence of livestock such as cattle and sheep that may be crossing the road.
Where It Is Commonly Seen
• In rural areas
• Near farms and pastures
• On roads frequently used for moving livestock
Driving Tips
1. Reduce Speed: Check the speed limit to give yourself more time to react if livestock are on the road.
2. Stay Alert: Watch for animals near the roadside and be prepared for them to cross suddenly. This is very important when you see these warning signs.
3. Use High Beams: At night, use high beams to better spot animals (but dim them for oncoming traffic).
4. Do Not Honk: Avoid honking once you spot these safety signs, as it may startle the animals and cause unpredictable behaviour.
5. Be Patient: Wait for livestock to clear the road before proceeding.
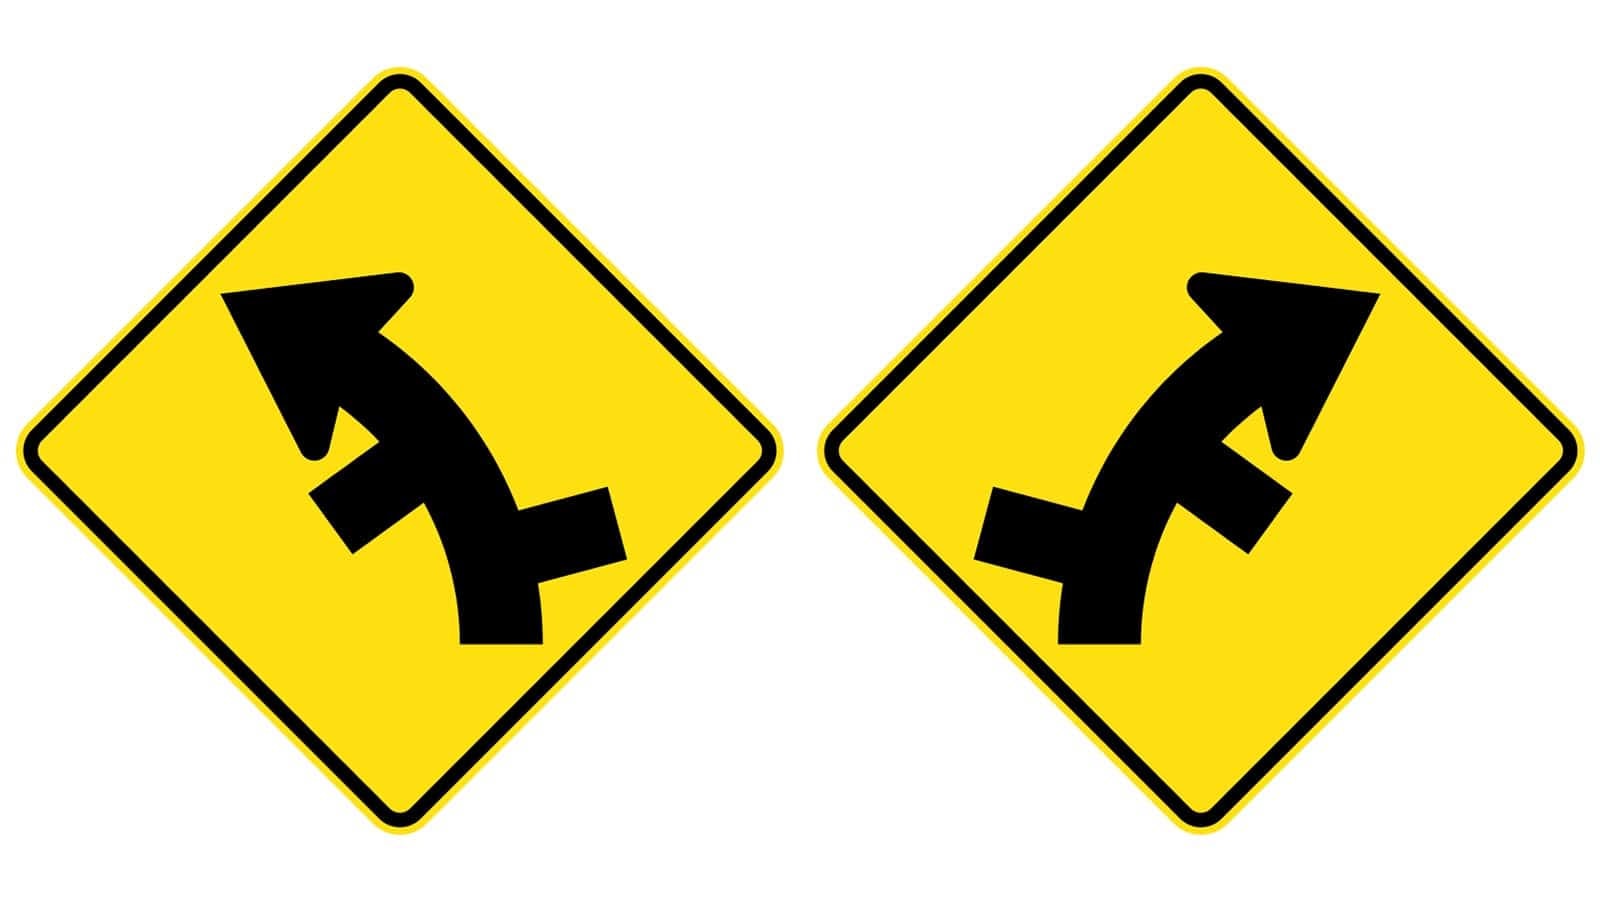
Staggered Side Road Junction Sign
The “Staggered Side Road Junction” sign warns drivers of upcoming side roads that join the main road in a staggered manner, meaning they do not align directly opposite each other.
Where It Is Commonly Seen
• On rural roads
• Near residential areas with multiple access points
• In areas where side roads join the main road at different points
Driving Tips
1. Stay Alert: Watch for vehicles entering or exiting the side roads.
2. Reduce Speed: Observe the speed limit to navigate the junctions safely when you see this sign ahead.
3. Check Mirrors: Be aware of other vehicles that may be turning or merging.
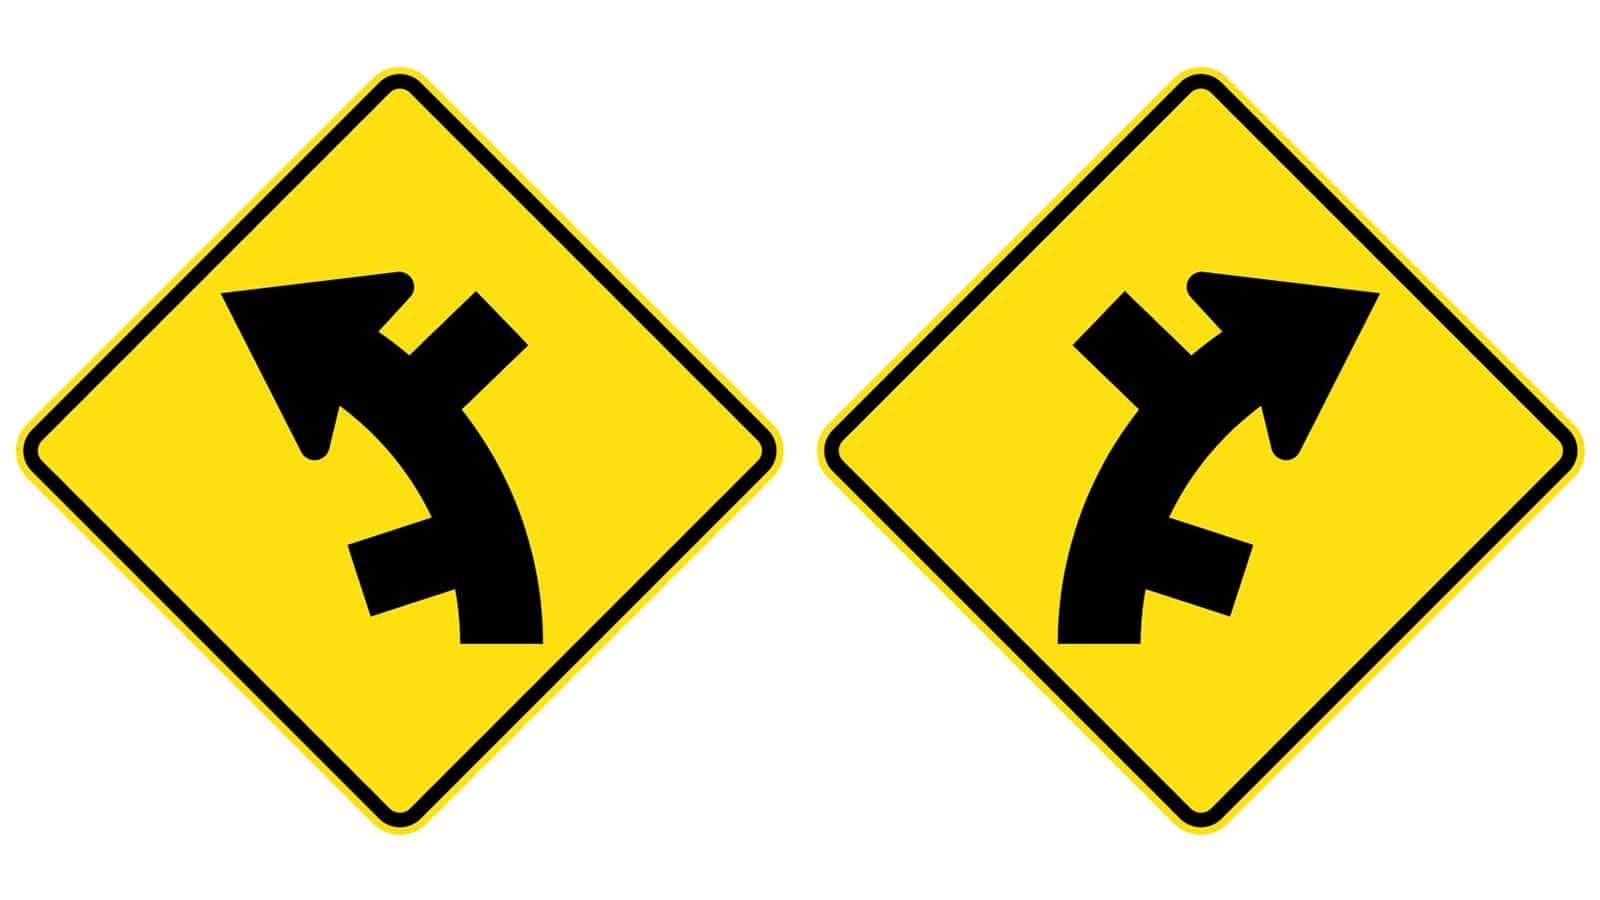
Staggered Side Road Intersection, First From Left/Right
The “Staggered Side Road Intersection, First From Left/Right” road signs indicate that there are staggered side road intersections ahead, with the first side road appearing from the left or right, respectively.
Where It Is Commonly Seen
• On rural roads with multiple access points
• In suburban areas with staggered road intersections.
• Near residential neighborhoods
Driving Tips
1. Stay Alert: Be aware of vehicles entering or exiting from staggered side roads.
2. Reduce Speed: Observe the speed limit as you approach the intersections to ensure safe navigation as pointed out by these warning signs.
3. Check Mirrors: Monitor your mirrors for vehicles turning or merging from the side roads with the appearance of these safety signs.
4. Signal Clearly: Use your indicators well in advance if you plan to turn onto one of the side roads.
5. Yield Right-of-Way: Follow right-of-way rules and be prepared to stop if necessary.
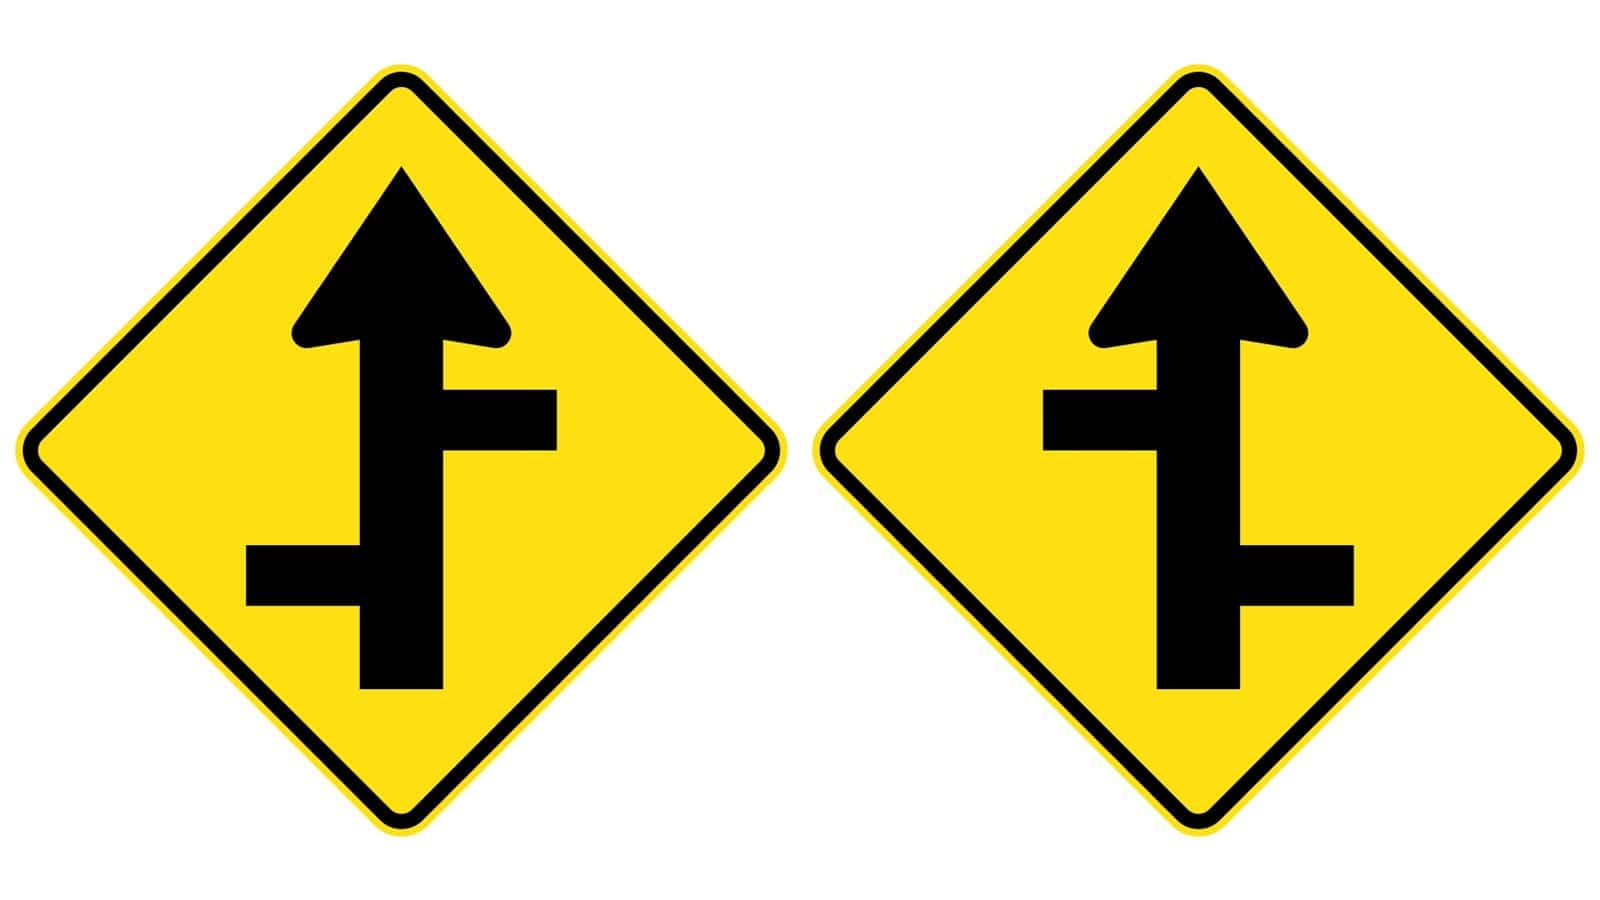
Staggered Side Road Intersection, First from Left/Right (Straight)
The “Staggered Side Road Intersection, First from Left/Right” road signs indicates staggered side road intersections ahead, with the first side road appearing from the left or right, respectively.
Where It Is Commonly Seen
• On rural roads with multiple access points
• In suburban areas with staggered intersections
• Near residential neighborhoods
Driving Tips
1. Stay Alert: Watch for vehicles entering or exiting from staggered side roads when these warning signs appear.
2. Reduce Speed: Observe the speed limit as you approach the road intersections to ensure safe navigation.
3. Check Mirrors: Monitor your mirrors for vehicles turning or merging from the side roads.
4. Signal Clearly: Use your indicators well in advance if you plan to turn onto one of the side roads.
5. Yield Right-of-Way: Follow right-of-way rules and be prepared to stop if necessary.
Side Road Intersection Sign
The “Side Road Intersection” warning signs warns drivers of a side road intersecting with the main road ahead, indicating a potential merging point for vehicles.
Where It Is Commonly Seen
• On rural roads
• Near residential areas with side streets, road intersection signs are common.
• In areas where side roads meet the main road at an angle
Driving Tips
1. Stay Alert: Watch for vehicles entering or exiting the side road.
2. Reduce Speed: Check the speed limit to navigate the intersection safely.
3. Check Mirrors: Be aware of other vehicles that may be turning or merging causing road intersections.
4. Signal Clearly: Use your indicators well in advance if you plan to turn onto the side road.
5. Yield Right-of-Way: Follow right-of-way rules and be prepared to stop if necessary.
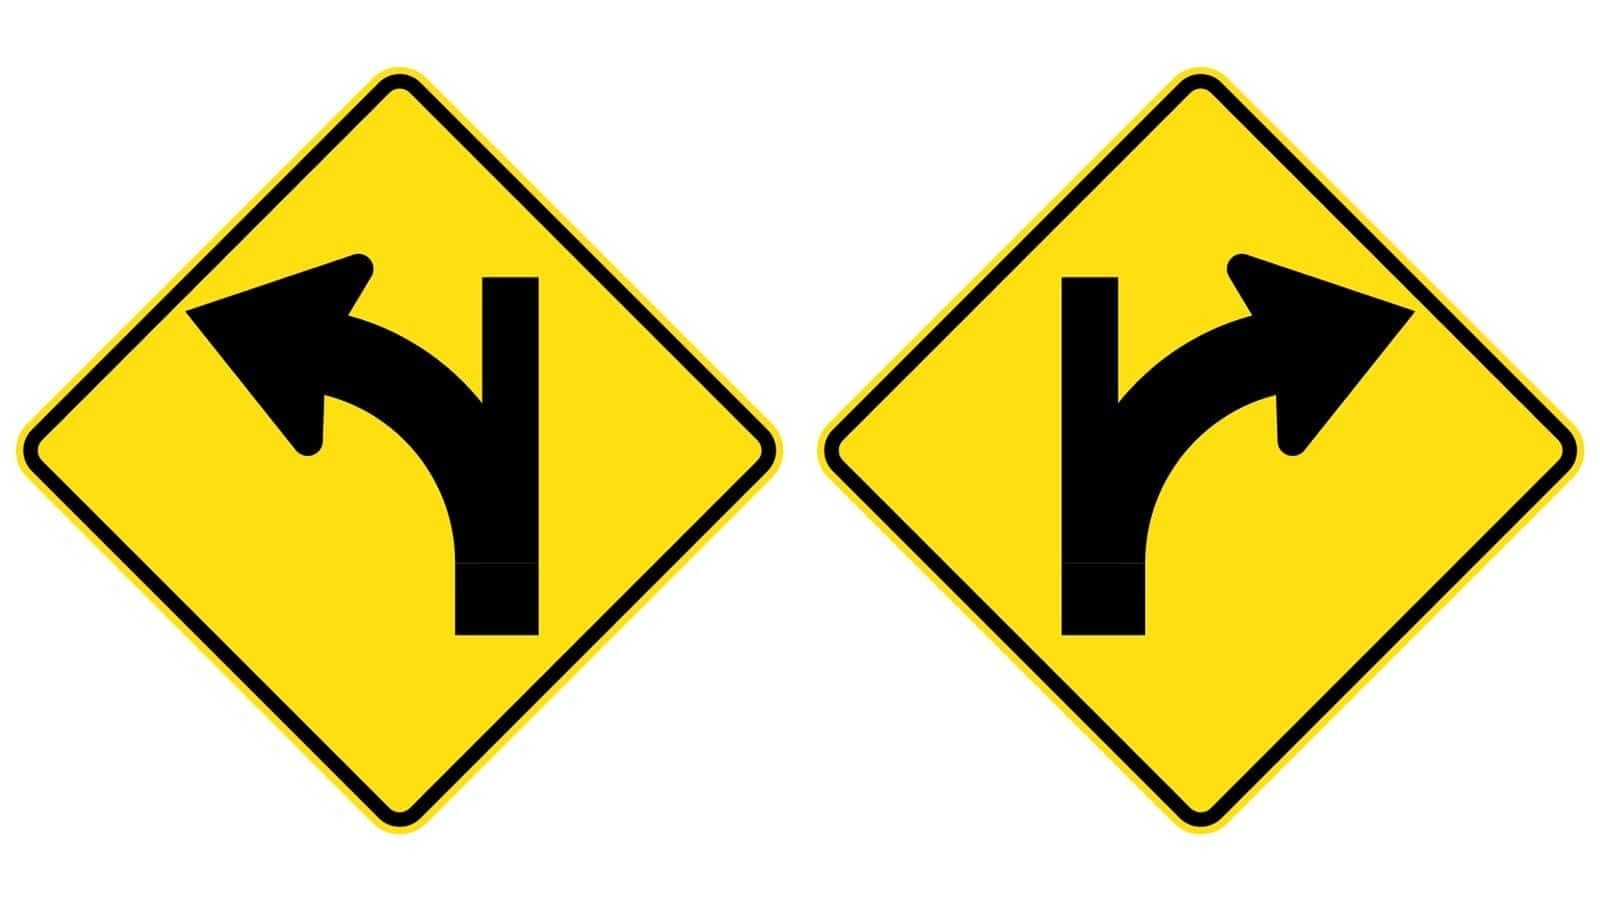
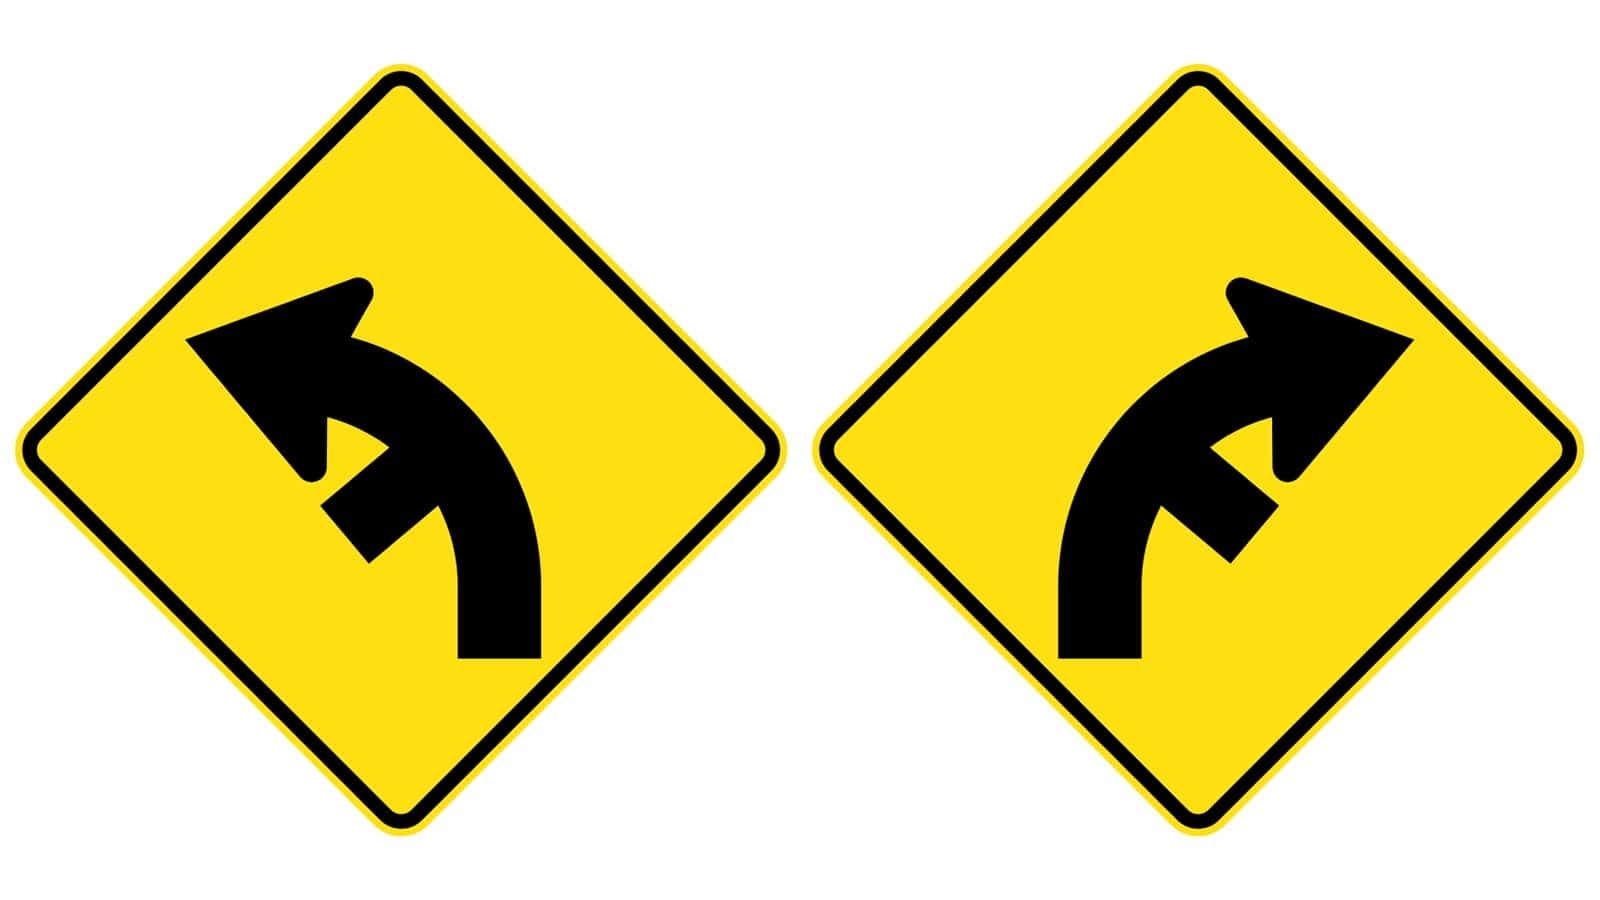
Side Road Intersection on a Curve to Left/Right
The “Side Road Intersection on a Curve to Left/Right” road signs warn drivers of a side road intersecting with the main road on a curve, either to the left or right.
Where It Is Commonly Seen
• On winding rural roads, the safety signs are a must.
• In areas with curvy road layouts
• Near residential areas with side streets on curves
Driving Tips
1. Stay Alert: Watch for slow moving vehicles entering or exiting from the side road, especially on curves where visibility may be reduced.
2. Reduce Speed: Observe the speed limit to navigate the intersection safely.
3. Check Mirrors: Be aware of other vehicles that may be turning or merging from the side road.
4. Signal Clearly: Use your indicators well in advance if you plan to turn onto the side road.
5. Yield Right-of-Way: Follow right-of-way rules and be prepared to stop if necessary.
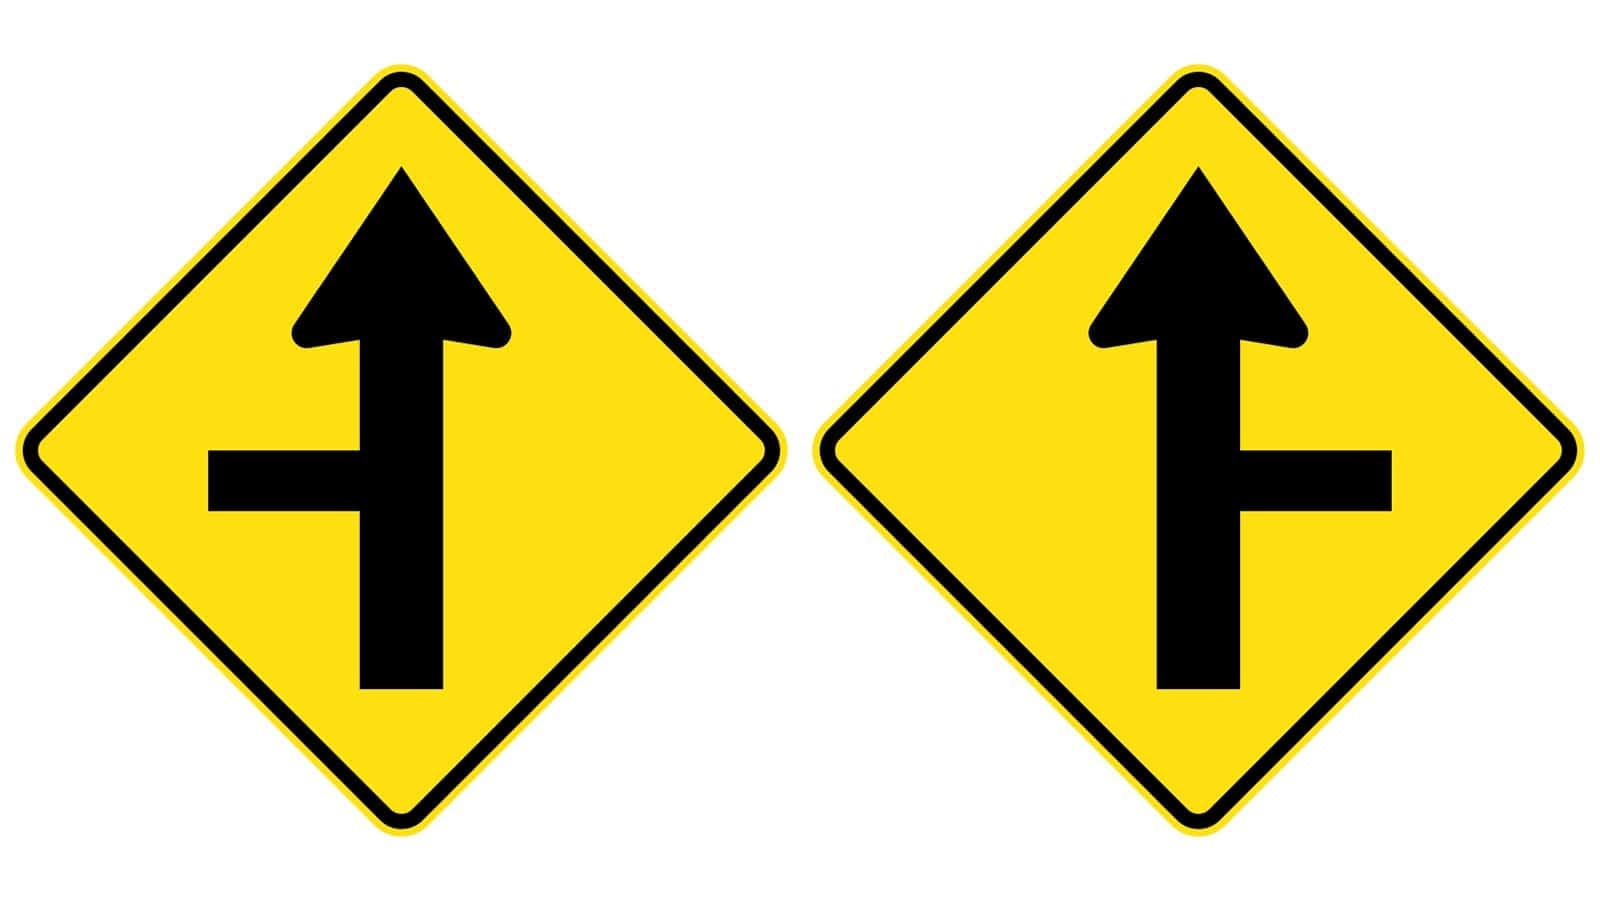
Side Road Intersection from Left or Right
The “Side Road Intersection from Left or Right” road signs warn drivers of a side road intersecting with the main road from either the left or the right.
Where It Is Commonly Seen
• On rural roads
• Near residential areas with side streets
• In areas where side roads meet the main road at right angles
Driving Tips
1. Stay Alert: Watch for vehicles entering or exiting from the side road.
2. Reduce Speed: Observe the speed limit to navigate the intersection safely.
3. Check Mirrors: Be aware of other vehicles that may be turning or merging from the side road.
4. Signal Clearly: Use your indicators well in advance if you plan to turn onto the side road on seeing these safety signs.
5. Yield Right-of-Way: Follow right-of-way rules and be prepared to stop if necessary.
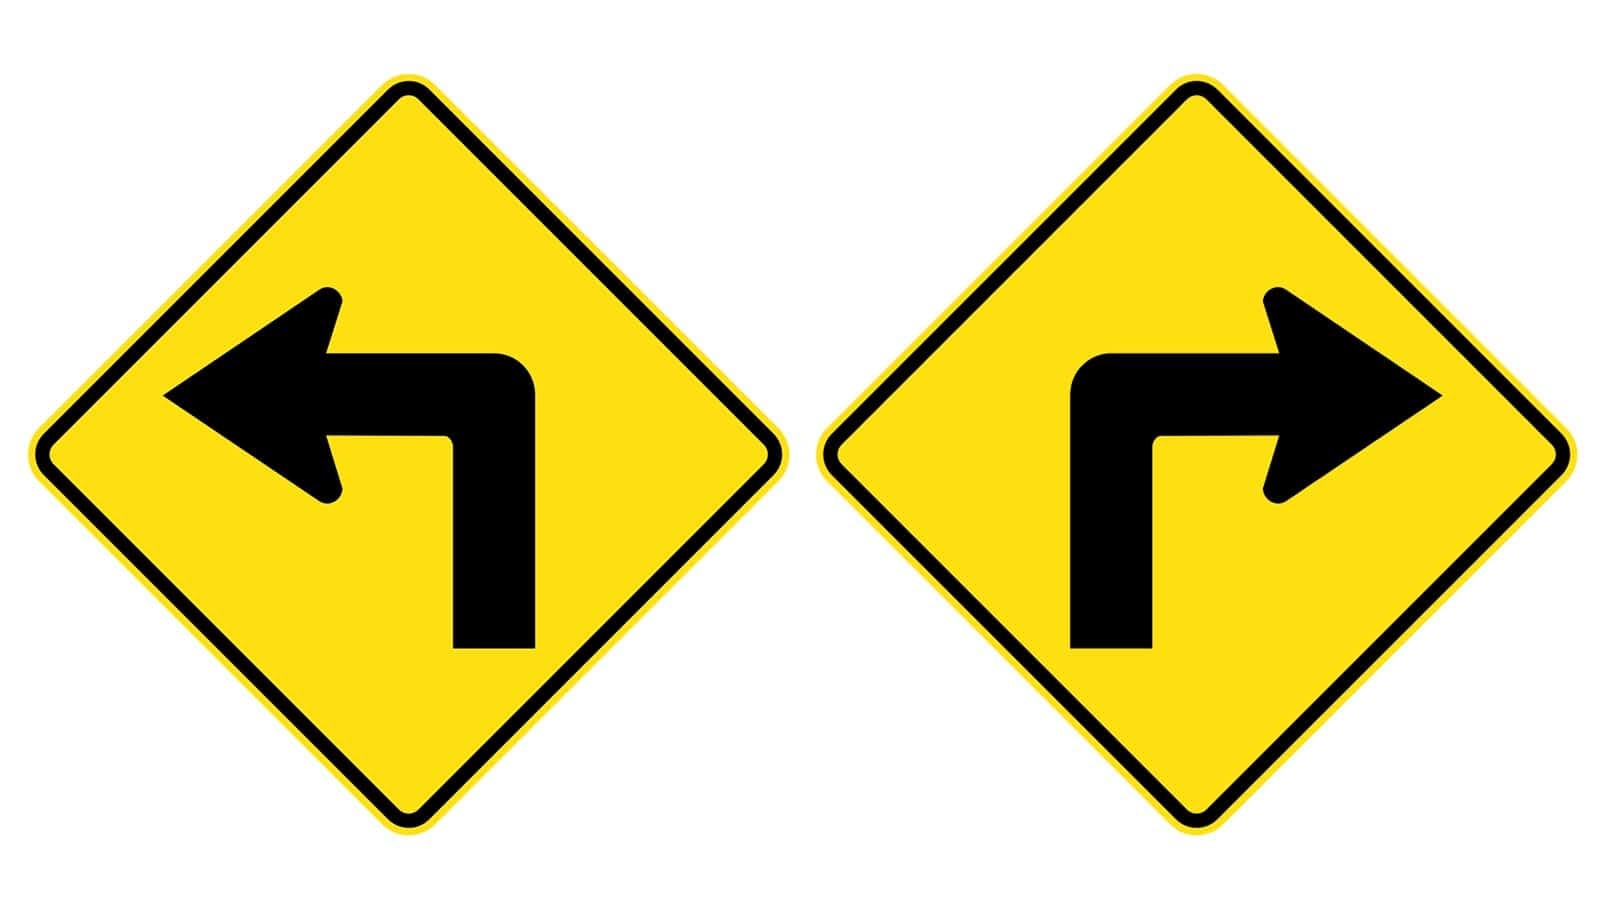
Sharp Left or Right Turn Sign
The “Sharp Left or Right Turn” warning signs warn drivers of an upcoming sharp turn in the road, either to the left or right.
Where It Is Commonly Seen
• On winding rural roads
• In mountainous or hilly terrain
• In areas with sharp changes in road direction
Driving Tips
1. Reduce Speed: Monitor the speed limit significantly to navigate the sharp turn safely.
2. Stay Alert: Focus on the road and be prepared for the turn.
3. Check Mirrors: Be aware of vehicles behind you that may be affected by your reduction in speed.
4. Use Indicators: Signal well in advance to inform other drivers of your intention to turn.
5. Maintain Control: Keep a firm grip on the steering wheel and make smooth, controlled movements through the turn.
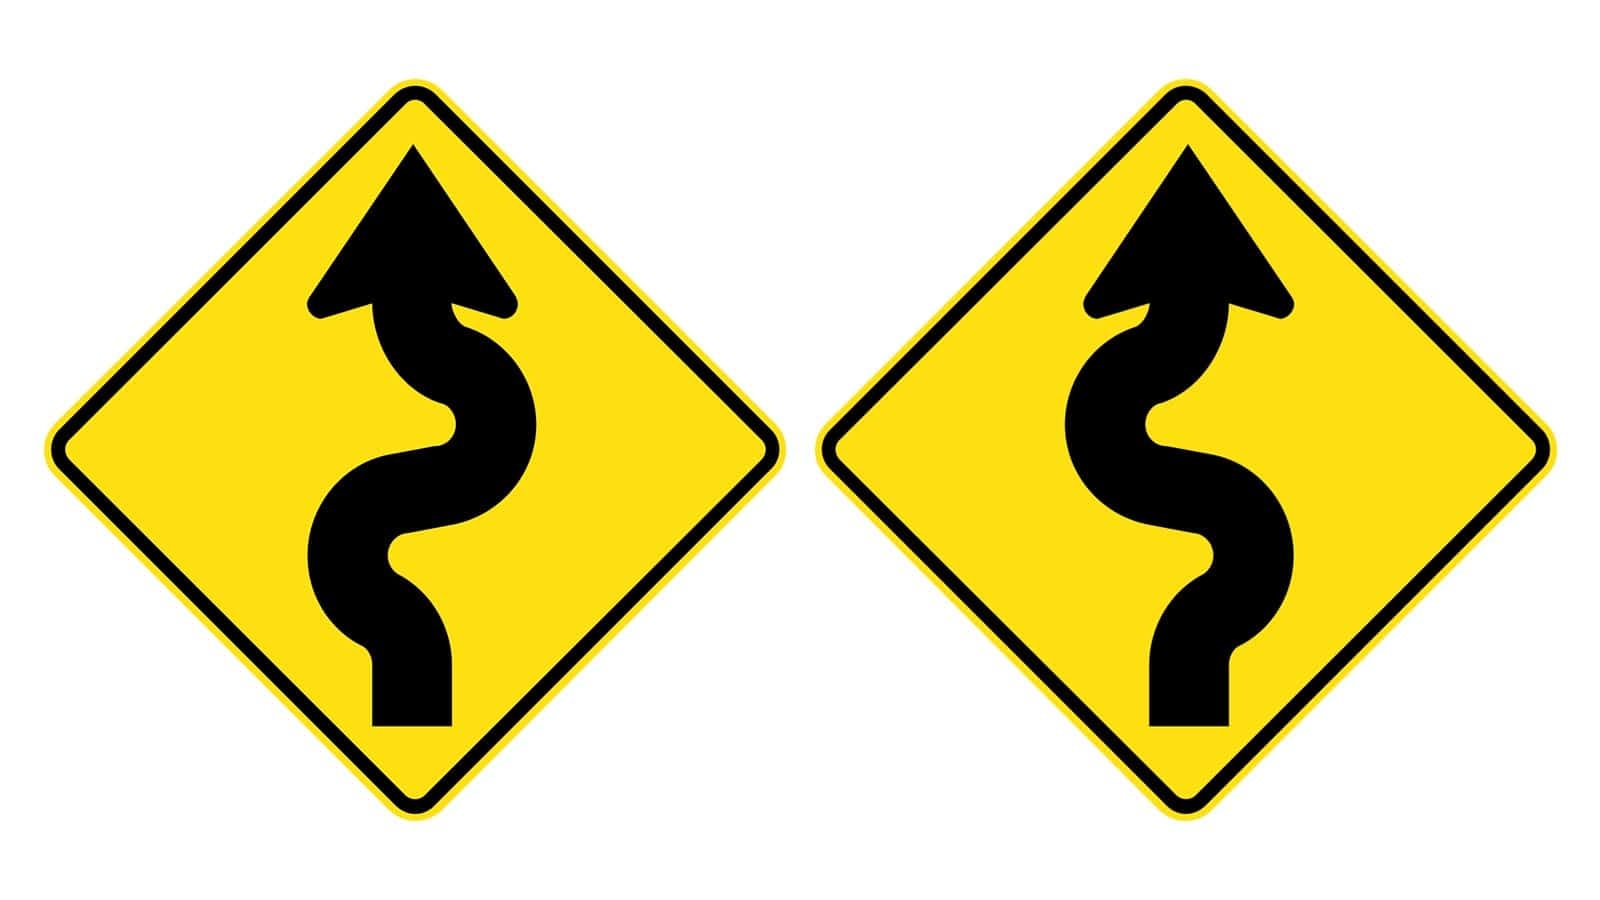
Series of Curves Ahead, First to Left/Right
The “Series of Curves Ahead, First to Left/Right” road signs warn drivers of a series of upcoming curves in the road, with the first curve being to the left or right.
Where It Is Commonly Seen
• On mountainous or hilly roads
• In areas with winding road layouts
• On scenic routes with natural terrain changes
Driving Tips
1. Reduce Speed: Observe the speed limit to navigate the curves safely.
2. Stay Alert: Pay attention to the road and be prepared for multiple curves.
3. Check Mirrors: Be aware of vehicles behind you that may be affected by your reduction in speed.
4. Use Indicators: Signal well in advance if you plan to turn or change lanes.
5. Maintain Control: Keep a firm grip on the steering wheel and make smooth, controlled movements through the curves.
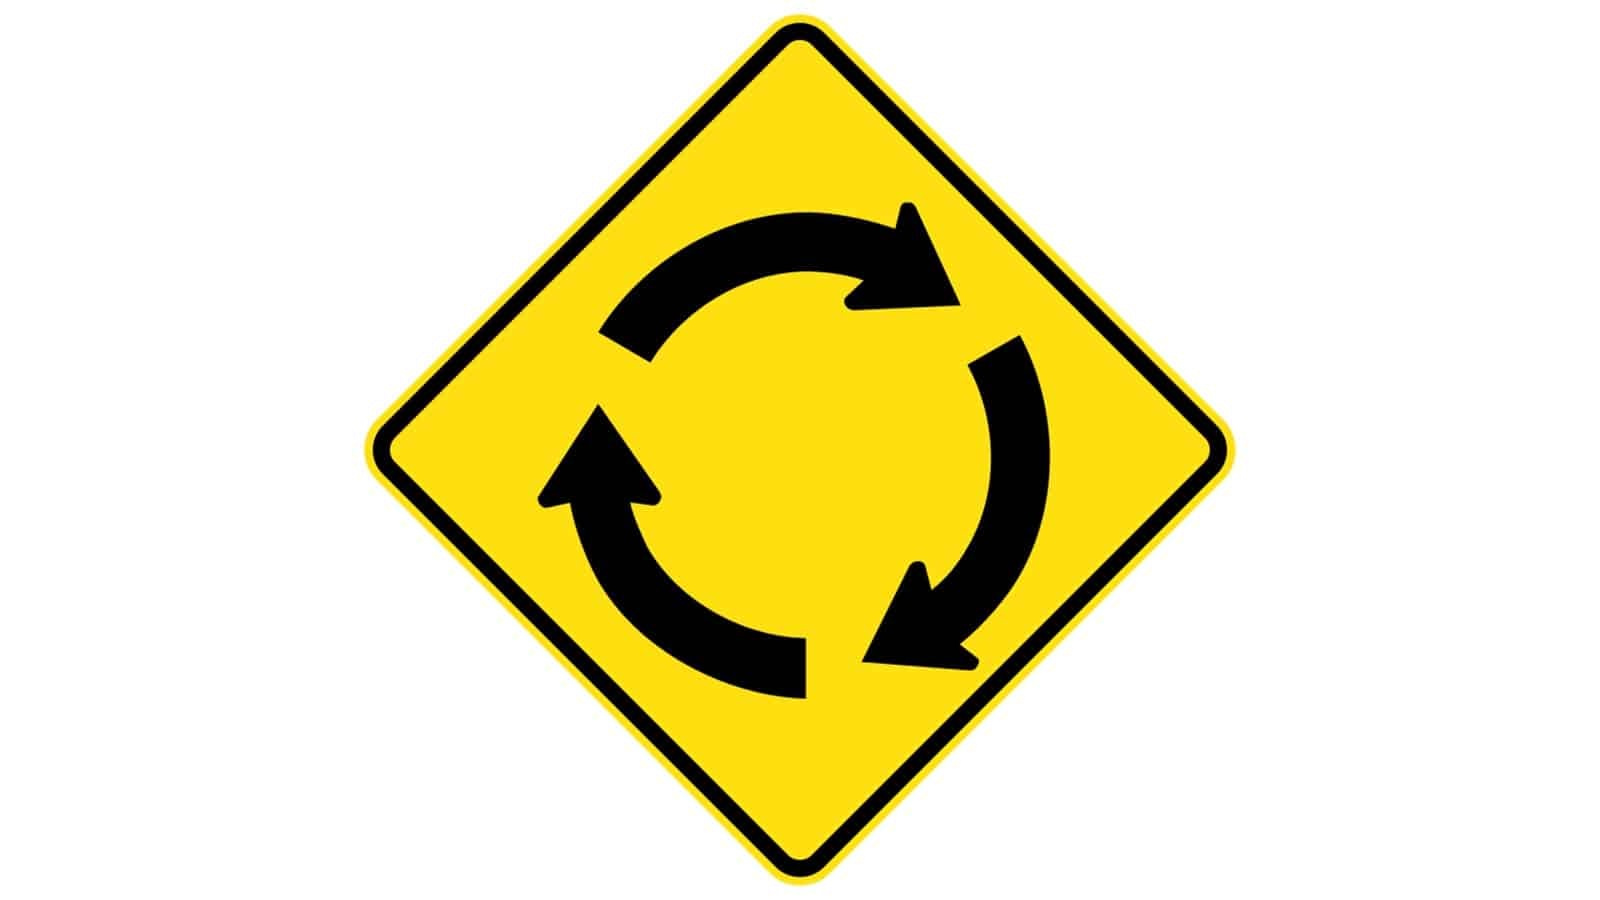
Roundabout Ahead Sign
The “Roundabout Ahead” road signs alert drivers that they are approaching a roundabout and should prepare to give way to traffic already in the roundabout.
Where It Is Commonly Seen
• At major intersections
• Near residential and commercial areas
• On highways and main roads approaching a roundabout
Driving Tips
1. Reduce Speed: Slow down as you approach the roundabout.
2. Yield to Traffic: Give way to vehicles already in the roundabout.
3. Signal Clearly: Use indicators to show your intended exit from the roundabout.
4. Stay in Lane: Follow lane markings and stay in your designated lane.
5. Be Cautious of Pedestrians: Watch for pedestrians crossing near the roundabout.
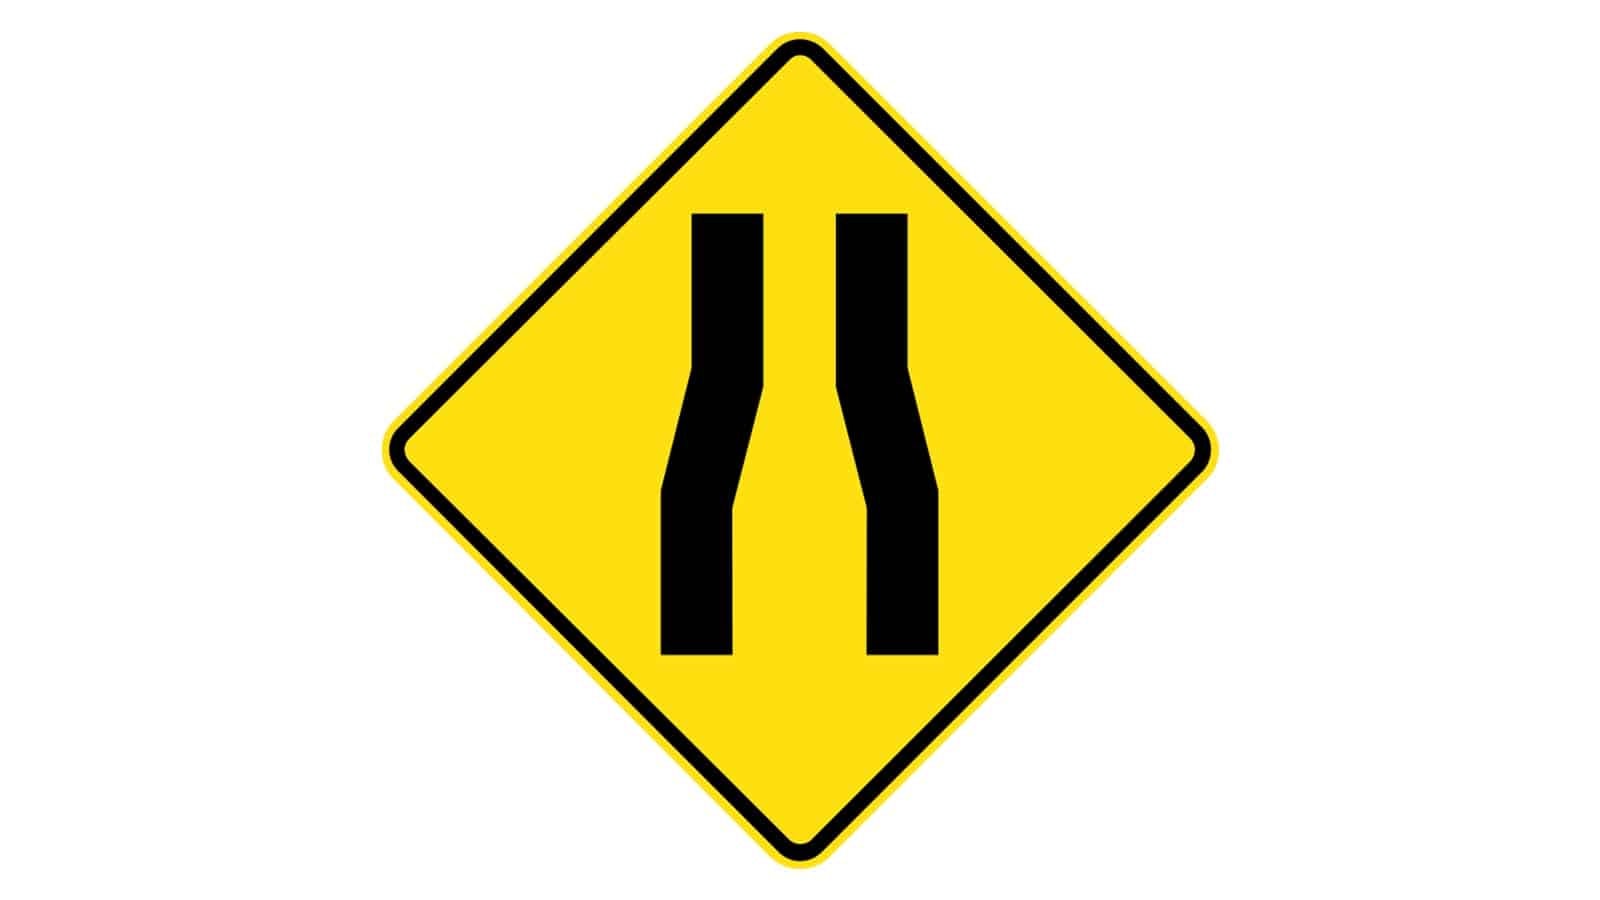
Road Narrows Sign
The “Road Narrows” road signs warn drivers that the road ahead will become narrower, indicating that there will be less room for vehicles to pass.
Where It Is Commonly Seen
• On rural roads
• Near construction zones
• In areas where the road changes from multiple lanes to a single lane
Driving Tips
1. Reduce Speed: Slow down to navigate the narrowing road safely.
2. Stay Alert: Watch for oncoming traffic and be prepared for tighter passing conditions.
3. Maintain Control: Keep a firm grip on the steering wheel and stay within your lane when you spot these safety signs.
4. Yield When Necessary: If the road narrows to a single lane, be prepared to yield to oncoming traffic.
5. Avoid Overtaking: Do not attempt to overtake other vehicles when the road is narrowing.
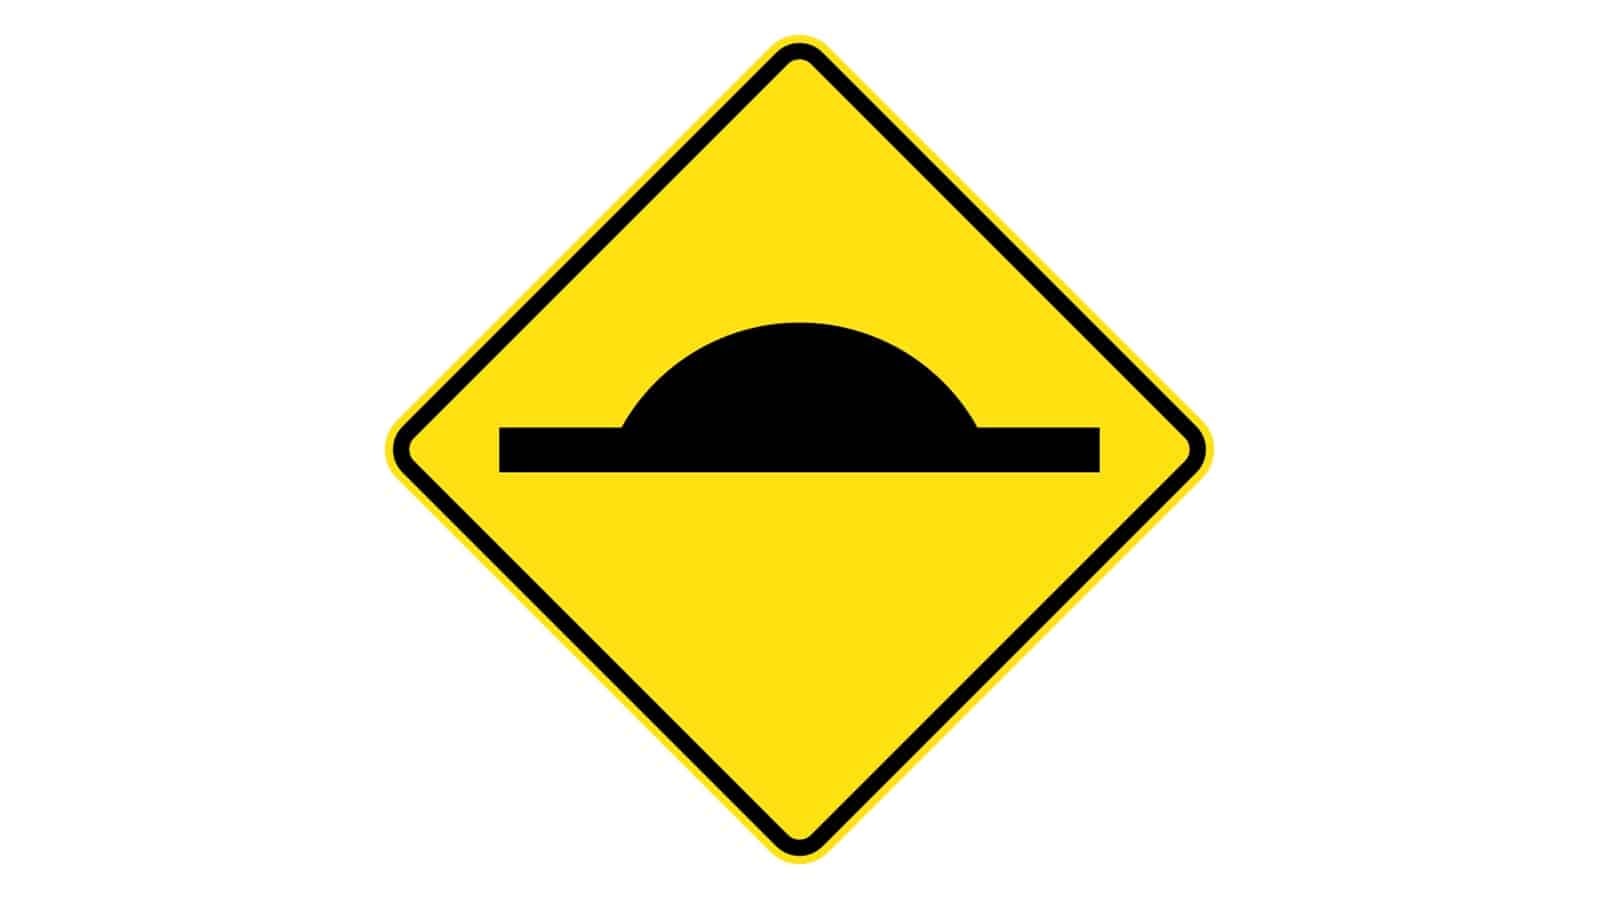
Road Hump Sign
The “Road Hump Sign” one of the popular road signs, warn drivers of a road hump ahead on the road.
Where It Is Commonly Seen
• In residential areas to control speed, the road hump sign is very common.
• Near schools or playgrounds
• On roads with a history of speeding issues
Driving Tips
1. Reduce Speed: Slow down to safely drive over the hump.
2. Maintain Control: Keep a steady grip on the steering wheel to navigate the hump smoothly.
3. Avoid Sudden Brakes: Do not brake abruptly while driving over the hump.
4. Observe Surroundings: Be cautious of pedestrians, especially near schools or playgrounds as you notice this road hump sign.
5. Follow Signage: Pay attention to additional signage indicating the presence of multiple humps.
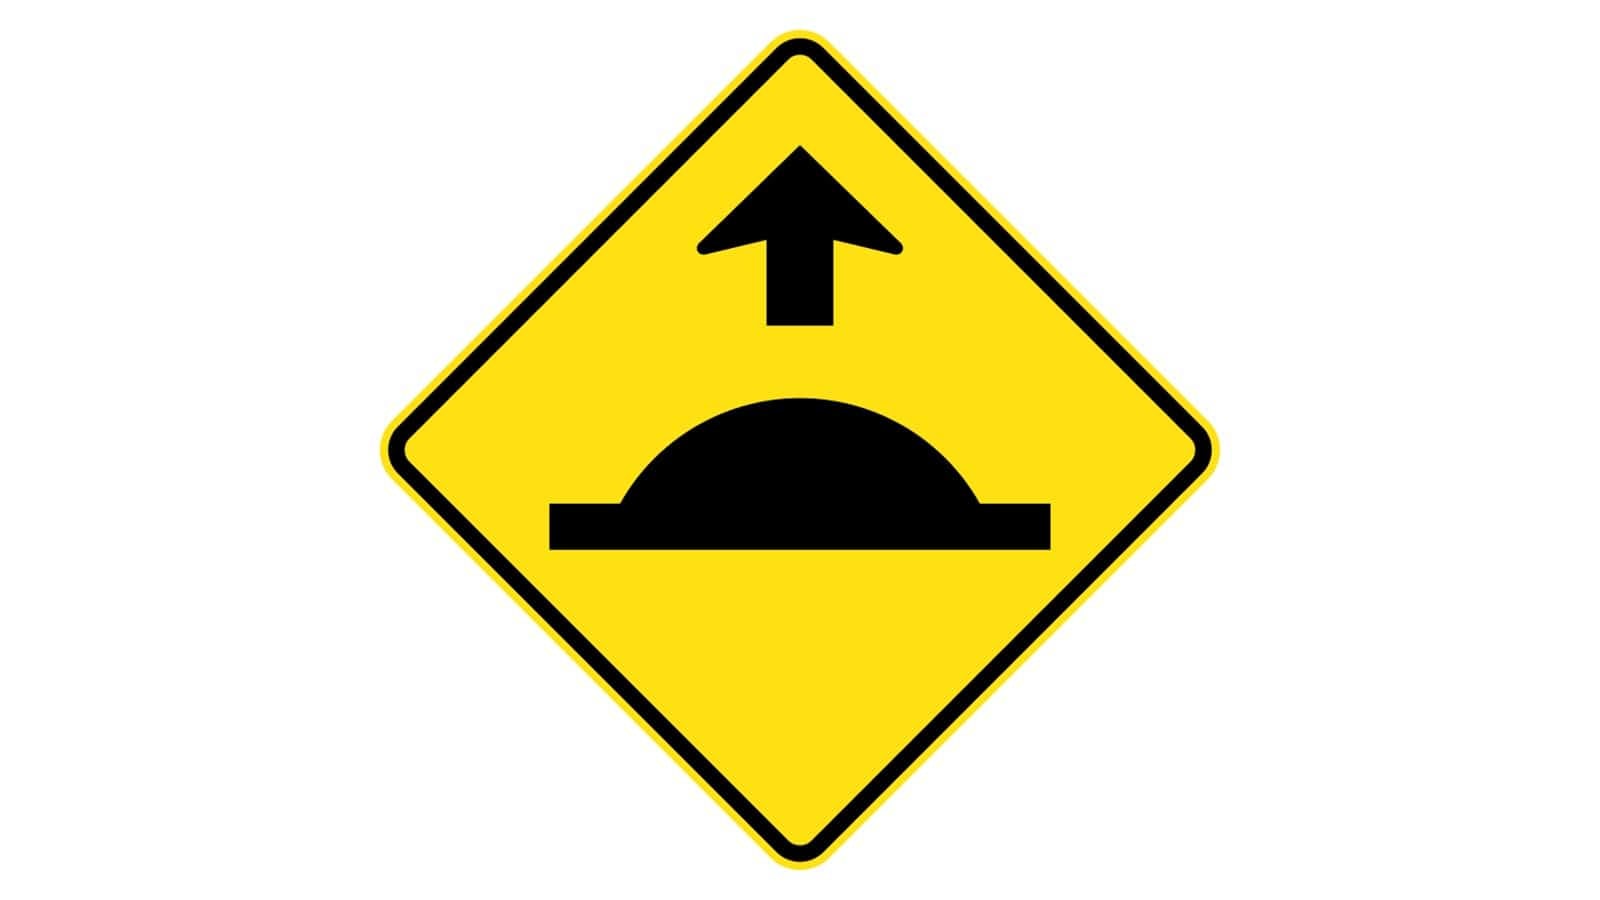
Road Hump Ahead Sign
The “Road Hump Ahead Sign” is one of the common road signs and it warns drivers of a road hump ahead on the road.
Where It Is Commonly Seen
• In residential areas to control speed
• Near schools or playgrounds
• On roads with a history of speeding issues
Driving Tips
1. Reduce Speed: Slow down to safely drive over the hump.
2. Maintain Control: Keep a steady grip on the steering wheel to navigate the hump smoothly.
3. Avoid Sudden Brakes: Do not brake abruptly while driving over the hump.
4. Observe Surroundings: Be cautious of pedestrians, especially near schools or playgrounds.
5. Follow Signage: Pay attention to additional signage and safety signs indicating the presence of multiple humps.
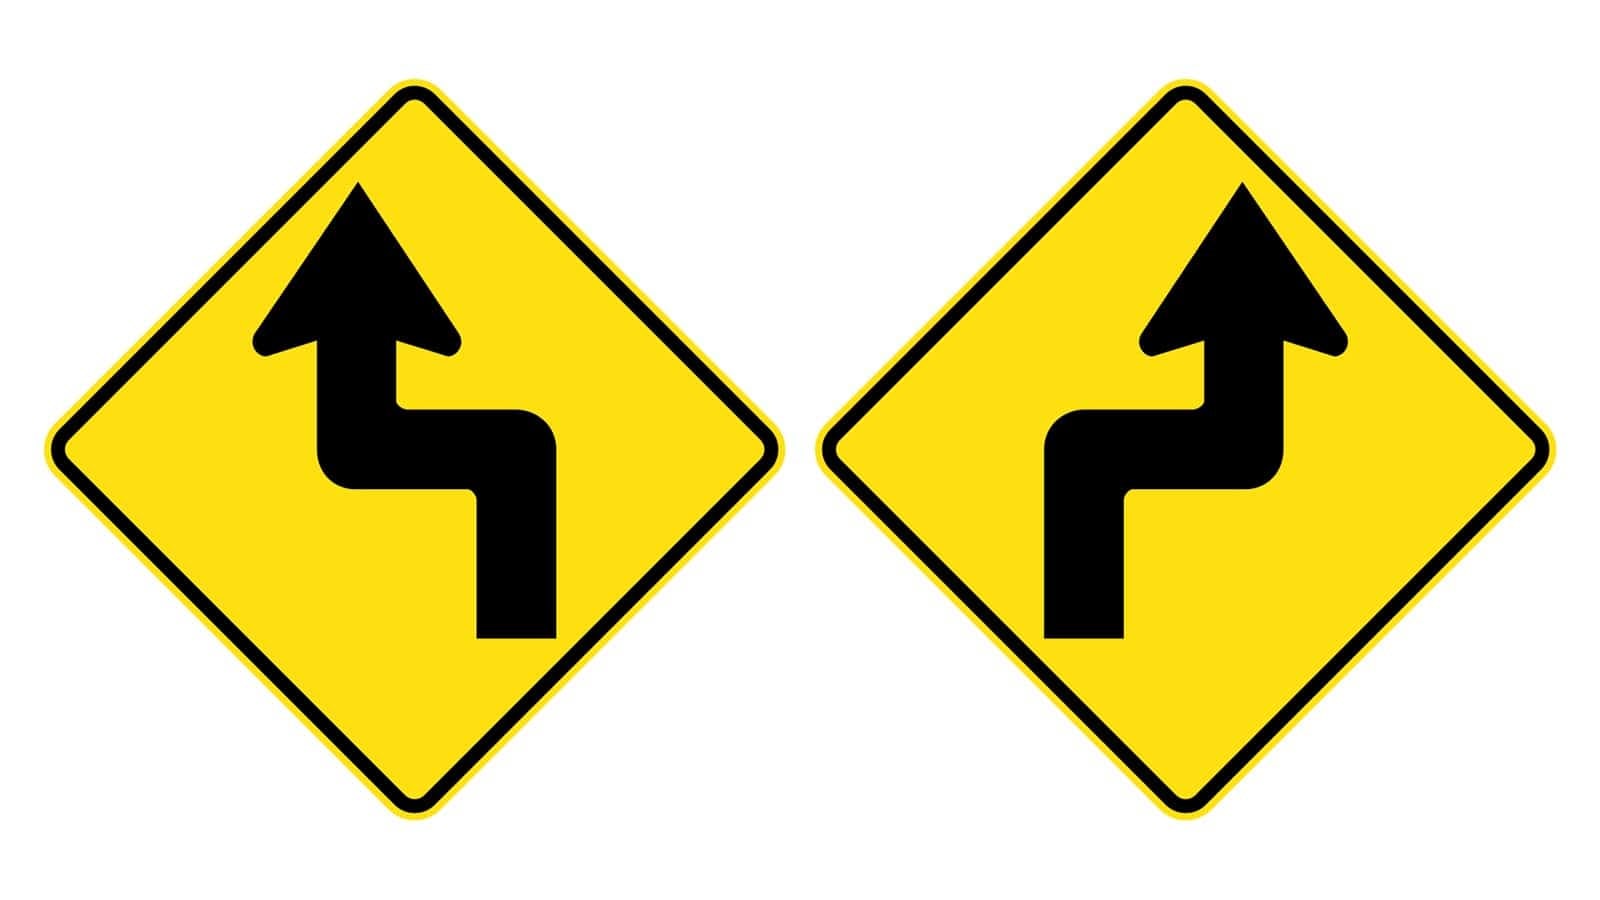
Reverse Turn Sign, First to Left or Right
The “Reverse Turn Sign, First to Left or Right” road signs warn drivers of a reverse turn ahead, indicating a sharp change in direction.
Where It Is Commonly Seen
• On winding mountain roads
• Near sharp curves on highways
• In rural areas with narrow roads
Driving Tips
1. Reduce Speed: Slow down before approaching the reverse turn.
2. Stay in Your Lane: Maintain your lane to avoid oncoming traffic.
3. Use Headlights: Turn on your headlights to increase visibility, especially in poor conditions.
4. Signal Early: Use your indicators to signal your intention to other drivers.
5. Be Cautious: Watch for any pedestrians or cyclists on the road when you see these safety signs.
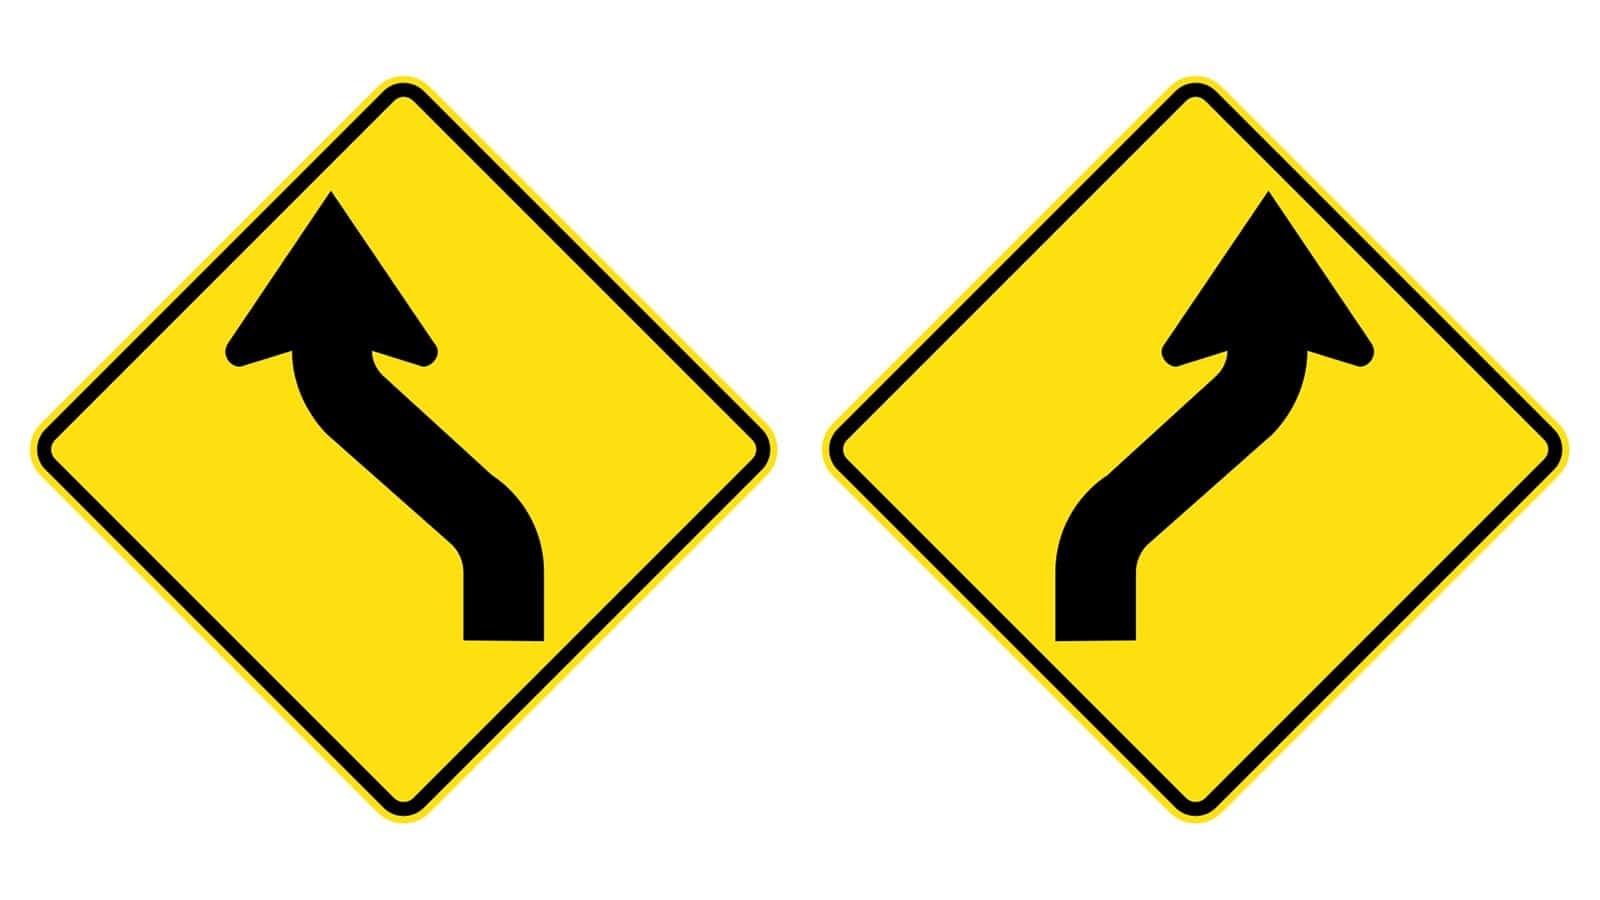
Reverse Curve Sign, First to Left or Right
The “Reverse Curve Sign, First to Left or Right” road signs warn drivers of an upcoming series of curves, first bending to the left and then to the right (or vice versa).
Where It Is Commonly Seen
• On hilly or mountainous roads
• In rural areas with winding roads
• Near rivers or coastal roads with natural curves
Driving Tips
1. Reduce Speed: Keep track of your speed limit before entering the curve to maintain control.
2. Stay Alert: Be prepared for the change in direction and other vehicles.
3. Maintain Lane Position: Keep your vehicle within your lane and avoid swerving.
4. Use Headlights: Turn on headlights if visibility is low or if it’s dark.
5. Avoid Overtaking: Do not overtake other vehicles while navigating the curves.
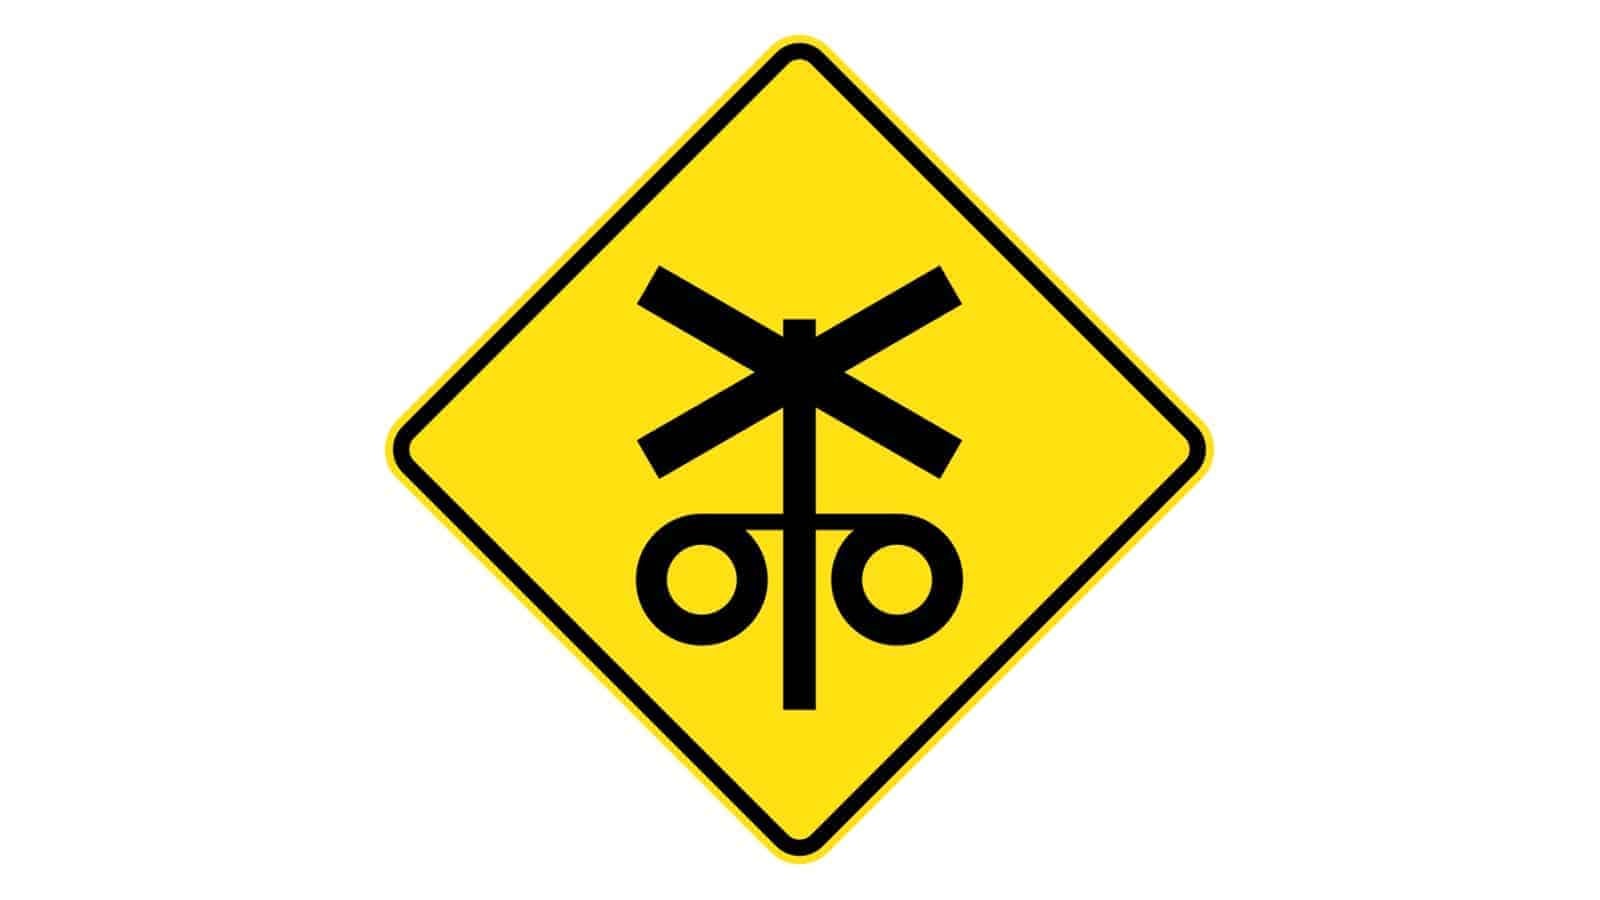
Railway Level Crossing with Flashing Signals Ahead
The “Railway Level Crossing with Flashing Signals Ahead” road signs warn drivers of an upcoming railway crossing that is equipped with flashing signals to indicate the approach of a train.
Where It Is Commonly Seen
• Near railway tracks intersecting with roads
• At rural and suburban crossings
• In areas with frequent train traffic
Driving Tips
1. Slow Down: Monitor the speed limit as you approach the crossing.
2. Observe Signals: Pay attention to the flashing signals and be prepared to stop.
3. Stop When Required: If the signals are flashing, stop well before the tracks.
4. Look and Listen: Even if the signals are not flashing, look and listen for approaching trains.
5. Proceed with Caution: Cross the tracks only when it is safe to do so.
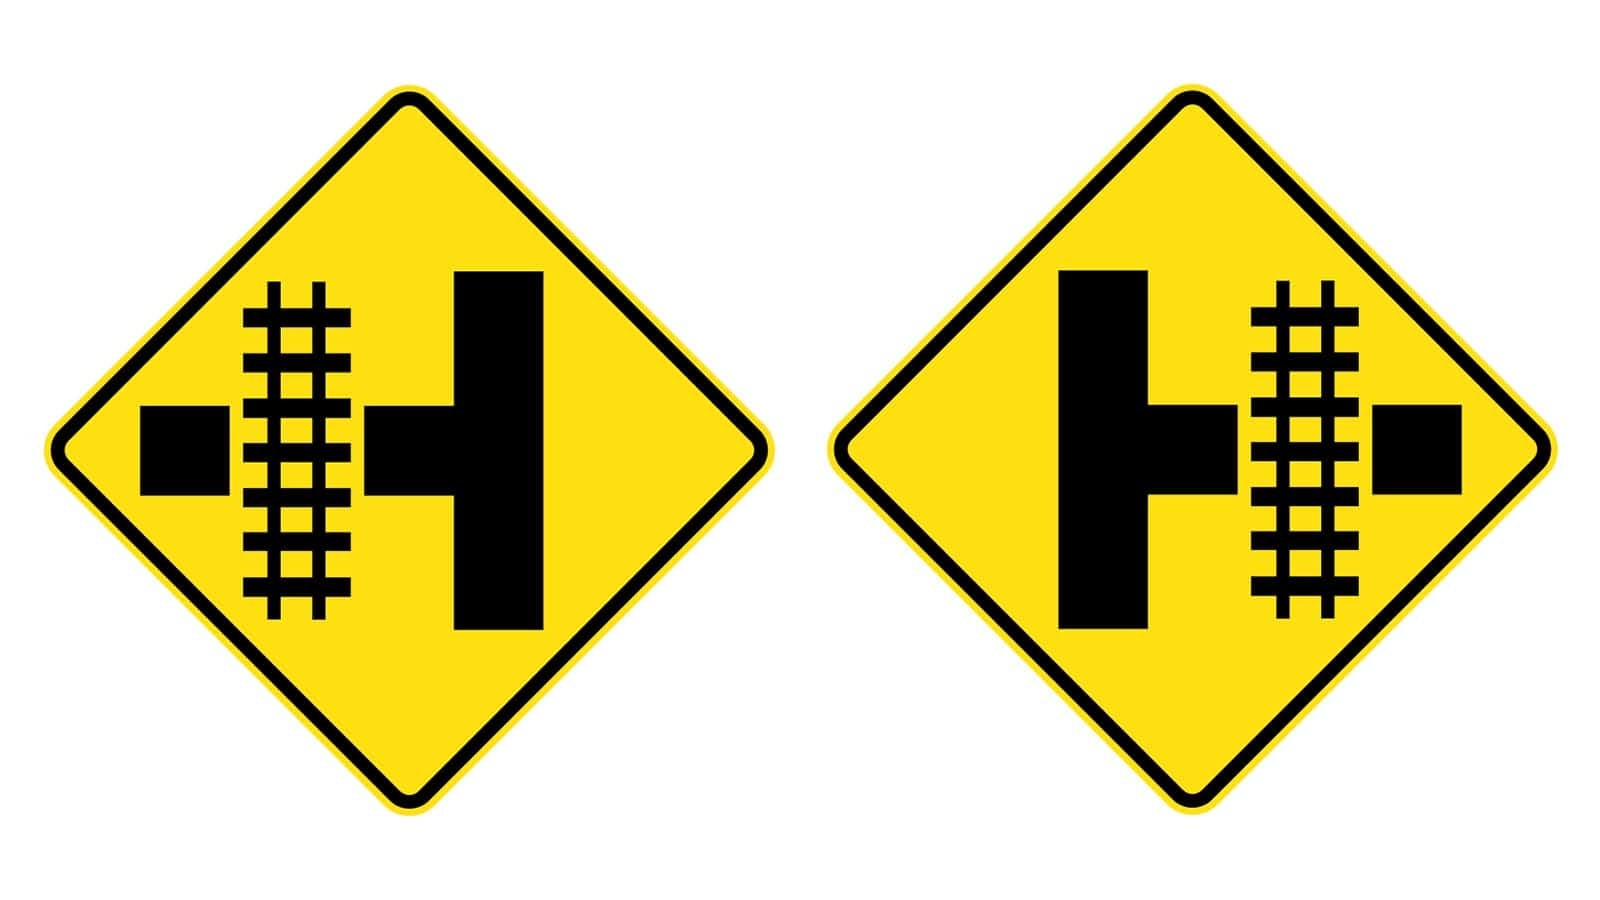
Railway Level Crossing on Side Road
The “Railway Level Crossing on Side Road” road signs warn drivers of a railway crossing located on a side road, either to the left or right of the main road.
Where It Is Commonly Seen
• Near intersections where a side road crosses railway tracks
• In rural or suburban areas with railway lines, the railway level crossing sign is a must.
• At locations where railway tracks run parallel to the main road, these safety signs avoid accidents.
Driving Tips
1. Slow Down: Check your speed limit as you approach the intersection.
2. Check for Trains: Look out for trains on the side road just as you see the railway level crossing sign.
3. Stop if Necessary: Be prepared to stop if a train is approaching.
4. Observe Traffic: Watch for vehicles entering or exiting from the side road when this railway level crossing sign appears.
5. Proceed with Caution: Cross the railway tracks only when it is safe to do so.
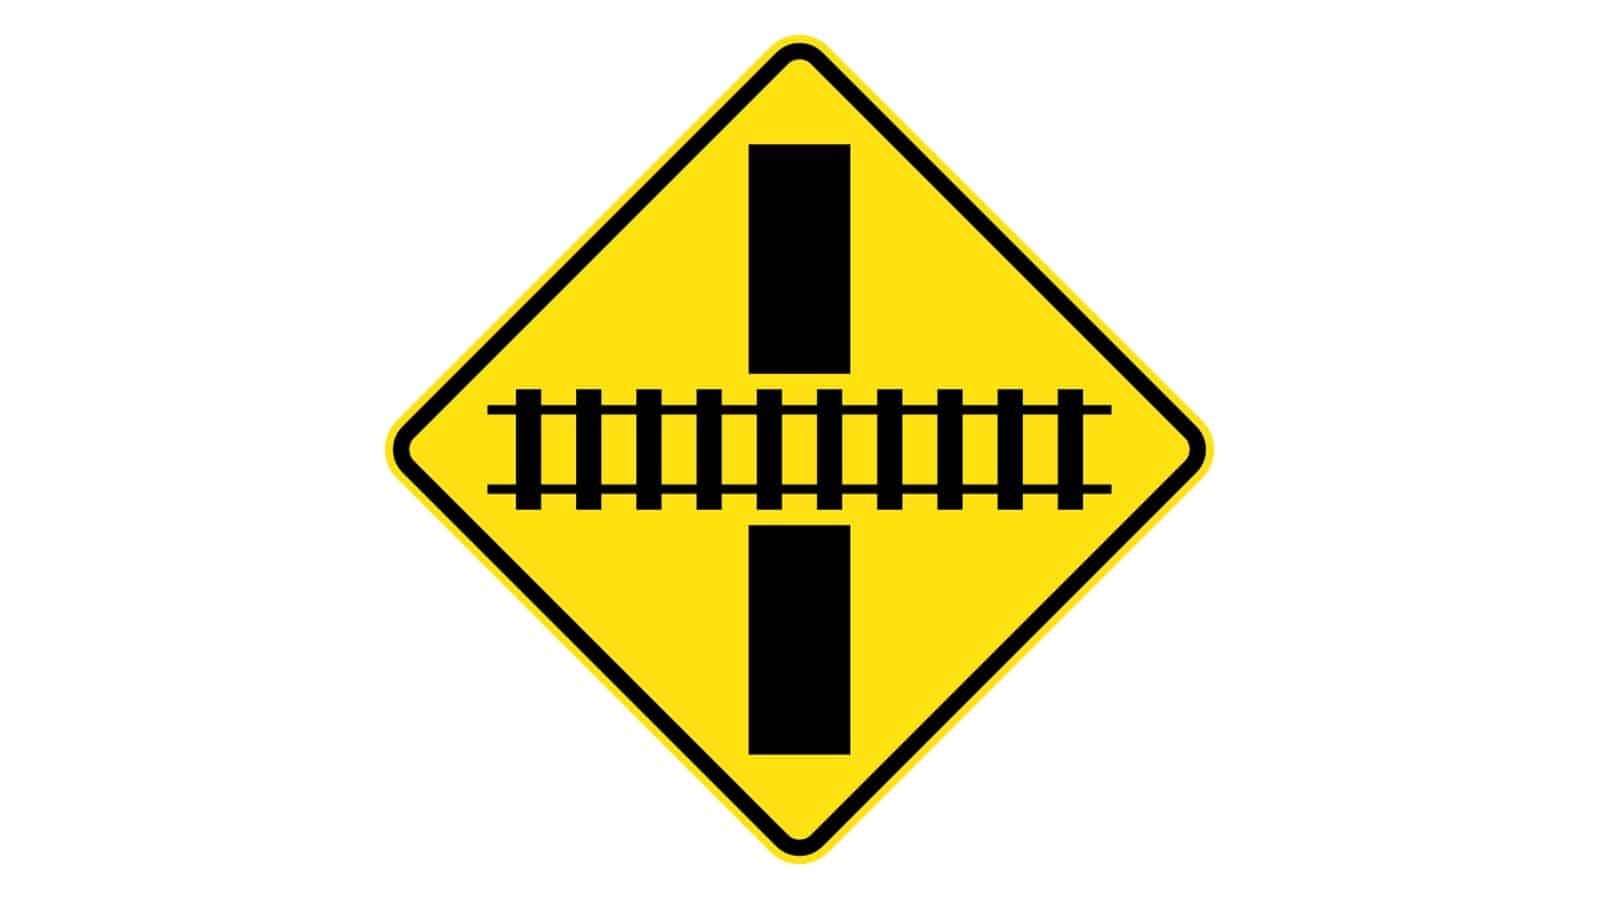
Railway Level Crossing Ahead
The “Railway Level Crossing Ahead” road signs alert drivers that they are approaching a railway level crossing.
Where It Is Commonly Seen
• On rural and suburban roads with railway crossings
• Near intersections where roads cross railway lines
• In areas where railway tracks are close to the road
Driving Tips
1. Slow Down: Check your speed limit as you approach the railway level crossing sign.
2. Look and Listen: Check both directions for approaching trains.
3. Prepare to Stop: Be ready to stop if a train is approaching or if the railway level crossing warning signals are activated.
4. Observe Signals: Follow all signals and barriers at the crossing.
5. Cross Quickly: Cross the tracks safely and promptly once it is clear.
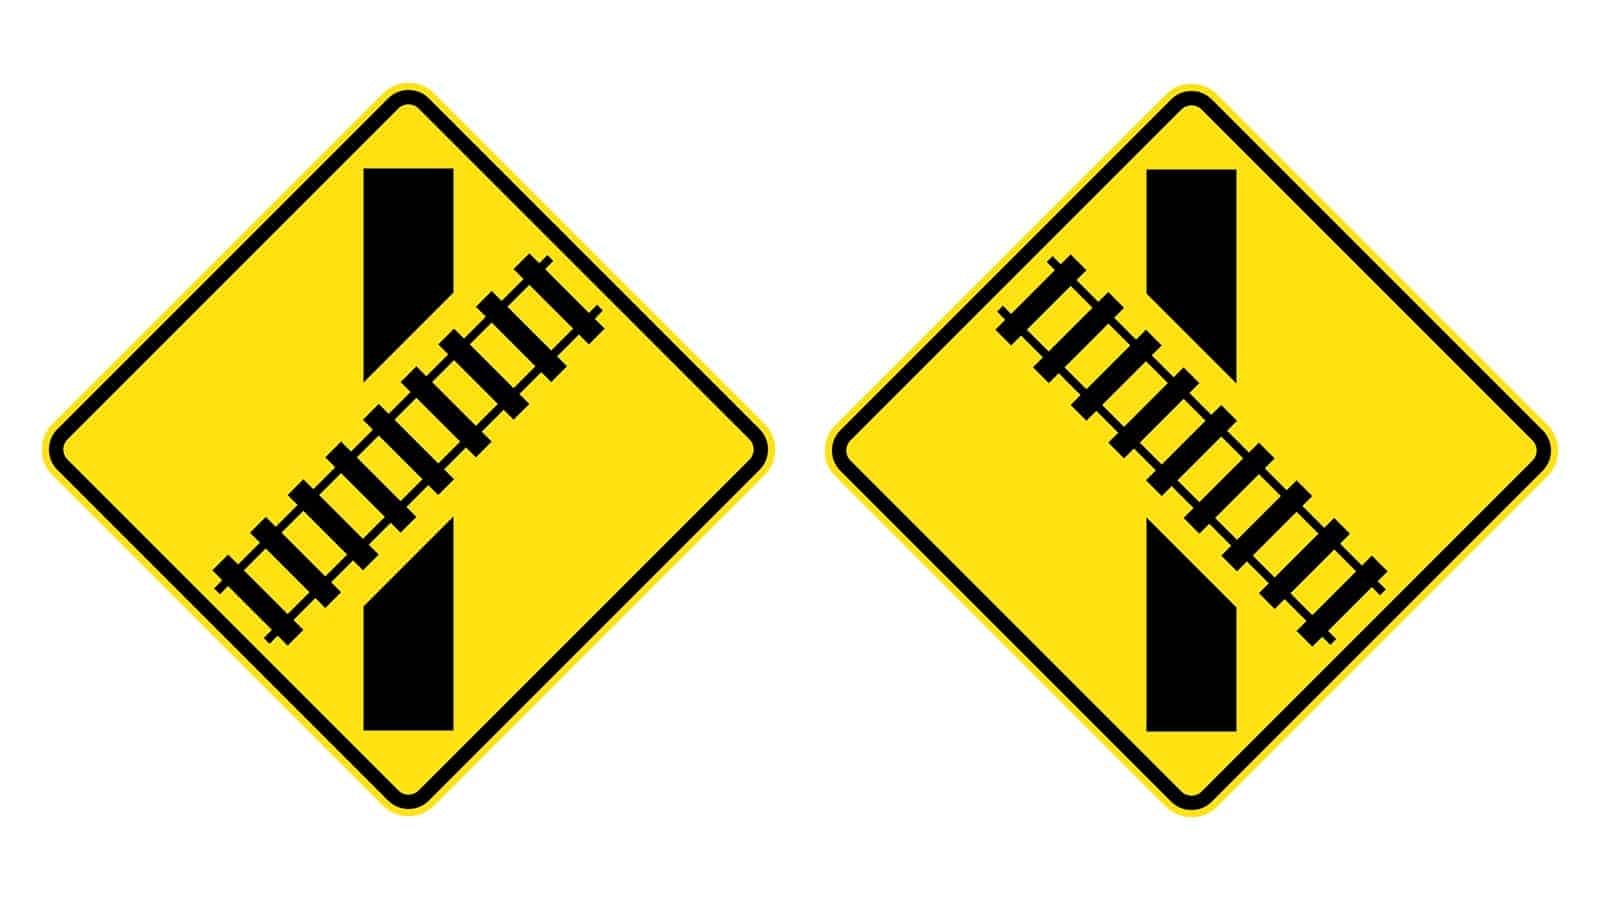
Railway Level Crossing on Road Ahead (Skewed)
The “Railway Level Crossing on Road Ahead (Skewed)” road signs alert drivers that they are approaching a railway level crossing where the tracks cross the road at an angle.
Where It Is Commonly Seen
• On rural and suburban roads with railway crossings, these safety signs are a must.
• Near intersections where roads cross railway lines at an angle, the railway level crossing sign is a must.
• In areas where railway tracks intersect the road diagonally
Driving Tips
1. Slow Down: Observe the speed limit as you approach the crossing.
2. Look and Listen: Check both directions for approaching trains.
3. Prepare to Stop: Be ready to stop if a train is approaching or if the warning signals are activated.
4. Observe Signals: Follow all signals and barriers at the crossing.
5. Cross Quickly: Cross the tracks safely and promptly once it is clear.
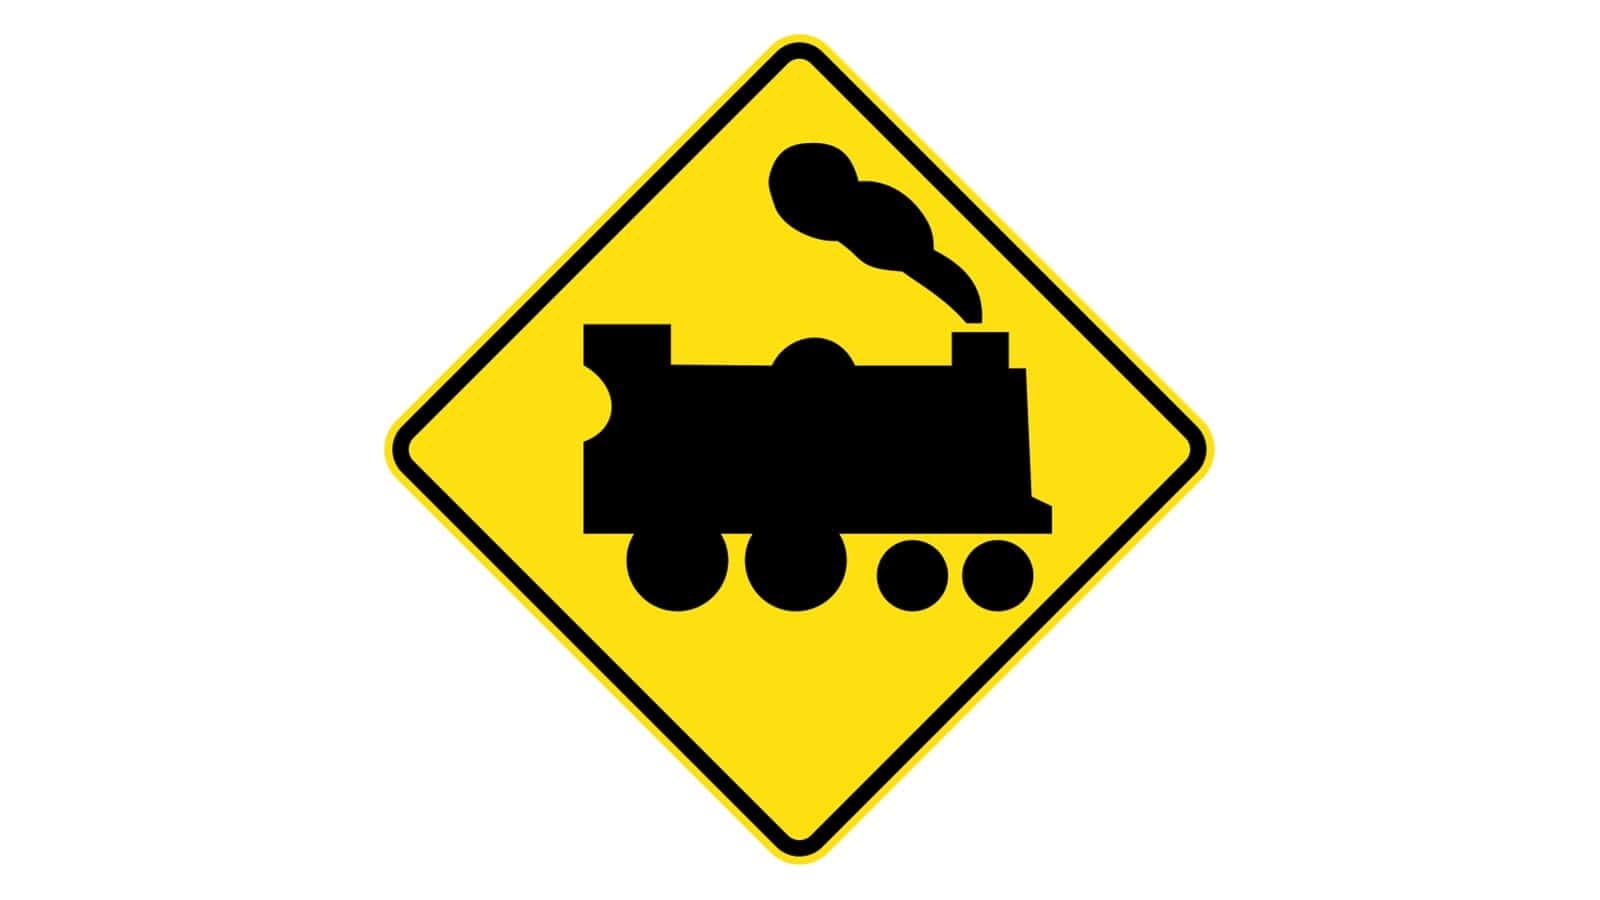
Railway Level Crossing Ahead
The “Railway Level Crossing Ahead” road signs warn drivers that they are approaching a railway level crossing.
Where It Is Commonly Seen
• On rural and suburban roads with railway crossings
• Near intersections where roads cross railway lines
• In areas with frequent train traffic, the safety signs avoid major accidents.
Driving Tips
1. Slow Down: Observe the speed limit as you approach the crossing.
2. Look and Listen: Check both directions for approaching trains.
3. Prepare to Stop: Be ready to stop if a train is approaching or if the warning signals are activated.
4. Observe Signals: Follow all signals and barriers at the crossing.
5. Cross Quickly: Cross the tracks safely and promptly once it is clear.
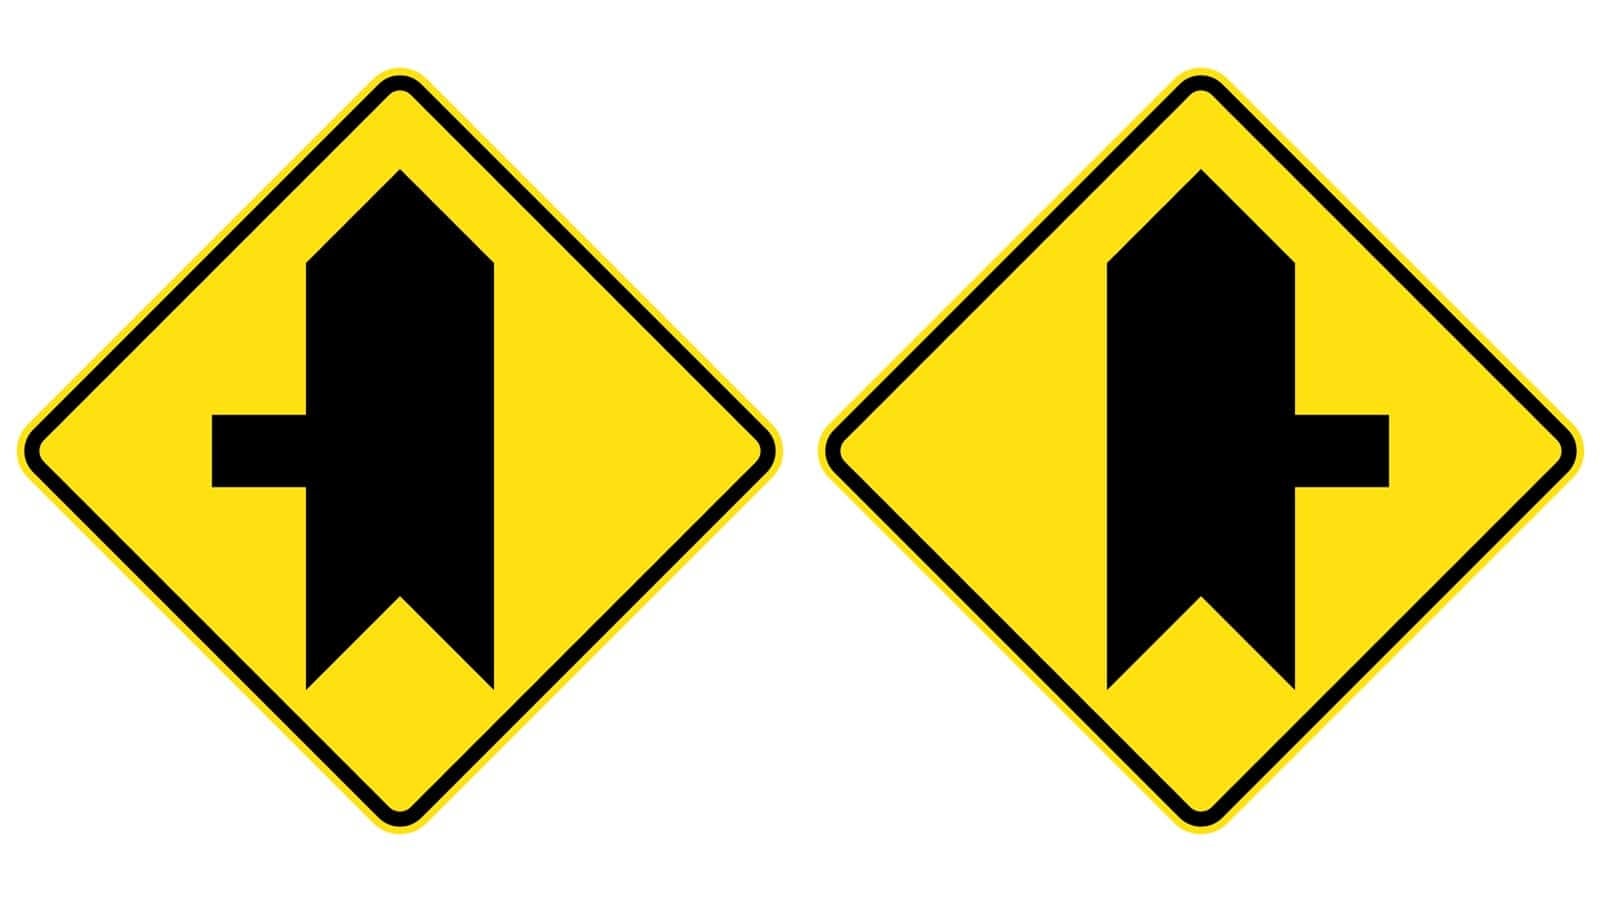
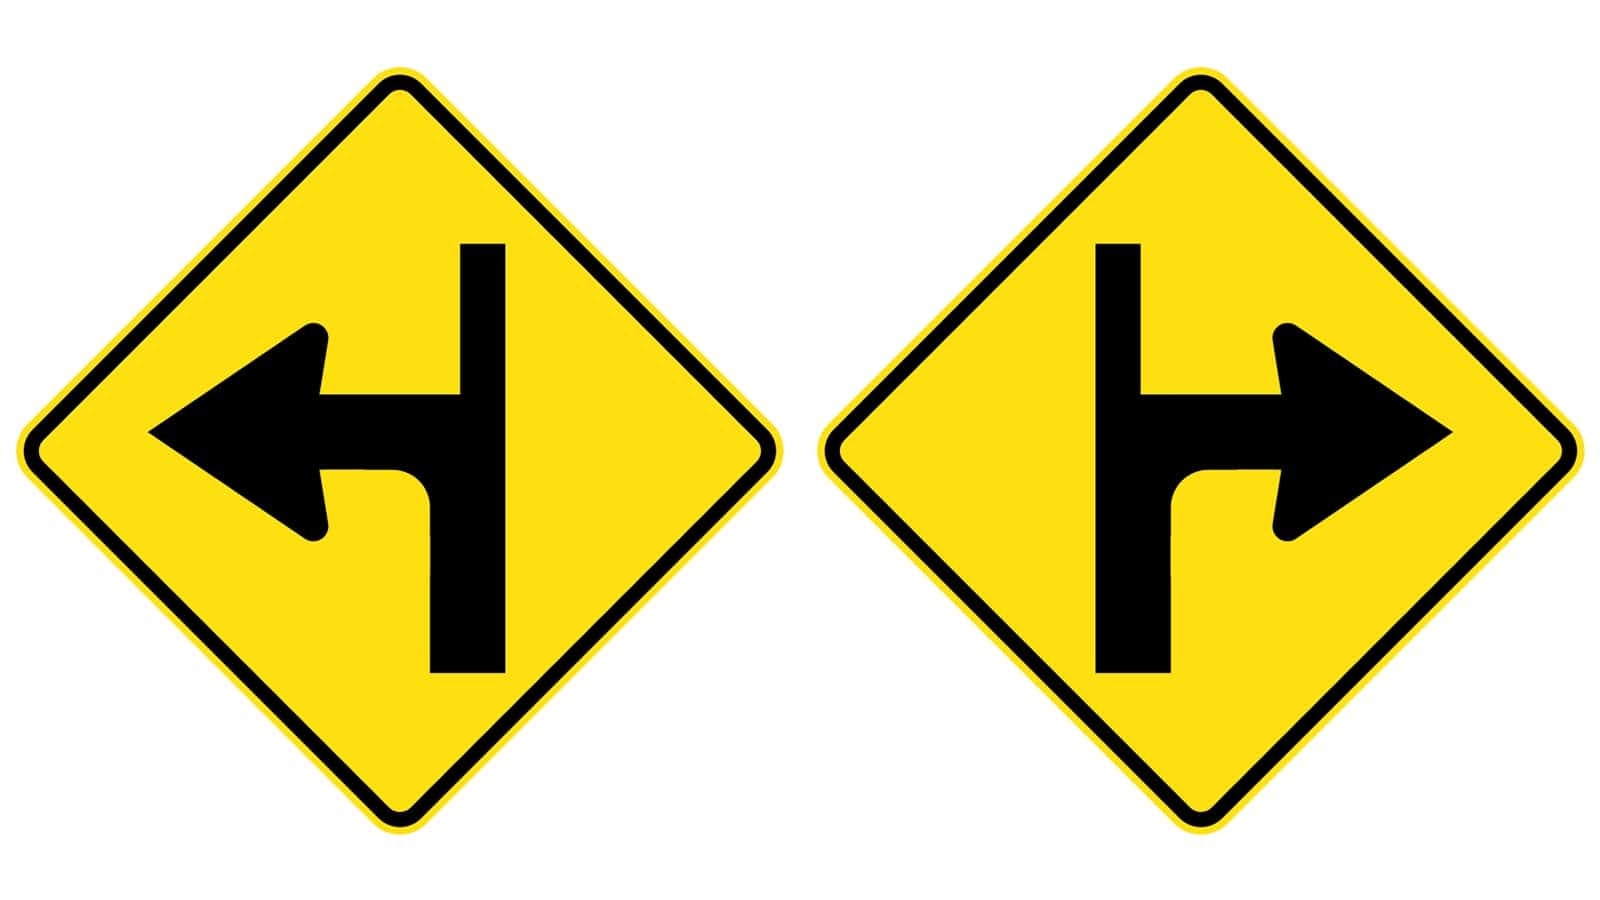
Priority Side Road Intersection from Left or Right
The “Priority Side Road Intersection from Left or Right” road signs indicate that drivers on the main road have priority over vehicles entering from the side road.
Where It Is Commonly Seen
• On major roads with frequent side road intersections, the priority side road intersection sign is popular.
• Near busy intersections where main road traffic flow is prioritised, these safety signs are compulsory.
• In suburban areas with significant traffic from side streets, a common sight is the priority side road intersection sign.
Driving Tips
1. Maintain Speed: Continue driving at a steady speed, as you have the right-of-way.
2. Stay Alert: Watch for vehicles that may not yield from the side road once you see this priority side road intersection sign.
3. Use Mirrors: Regularly check your mirrors for vehicles entering from side roads.
4. Signal Clearly: Indicate well in advance if you plan to turn onto the side road.
Priority Crossroad Intersection from Left or Right
The “Priority Crossroad Intersection from Left or Right” road signs inform drivers that the crossroad they are approaching has priority over their current road.
Where It Is Commonly Seen
• On major roads intersecting with other major roads, a crossroad intersection sign is a must.
• In urban areas with heavy traffic flow
• Near commercial and residential zones, these safety signs are mandatory.
Driving Tips
1. Yield to Cross Traffic: Be prepared to yield to vehicles on the crossroad with the appearance of the crossroad intersection sign.
2. Slow Down: Observe the speed limit as you approach the crossroad intersection.
3. Stay Alert: Watch for vehicles crossing or entering from the crossroad intersection.
4. Use Indicators: Signal clearly if you intend to turn at the crossroad intersection.
5. Check Both Directions: Look both ways before proceeding to ensure it’s safe to cross or turn from the crossroad intersection.
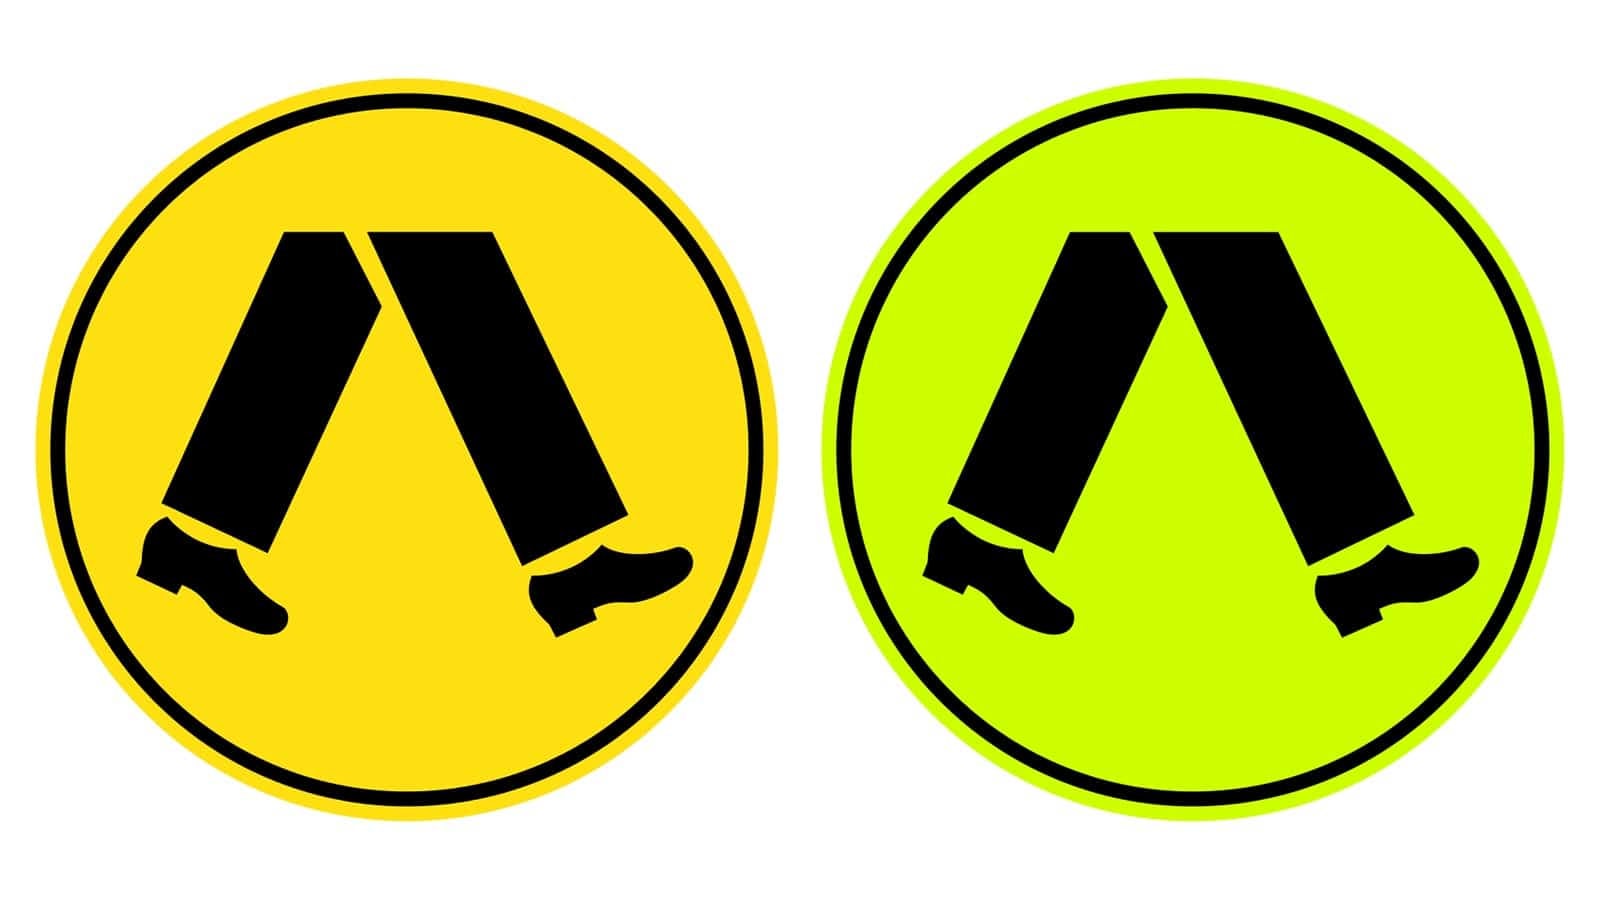
Pedestrian Crossing
The “Pedestrian Crossing” warning signs alert drivers to the presence of a crossing area where pedestrians have the right of way.
Where It Is Commonly Seen
• Near schools
• In residential areas
• At busy crossroad intersections
• In shopping districts
Driving Tips
1. Slow Down: Observe the speed limit as you approach the crossing.
2. Yield to Pedestrians: Be prepared to stop and give way to people crossing the road.
3. Stay Alert: Watch for pedestrians stepping out from the kerb when you notice these safety signs.
4. Use Indicators: Signal clearly if you intend to turn near the crossing.
5. Check for Children: Be especially cautious near schools where children may be crossing.
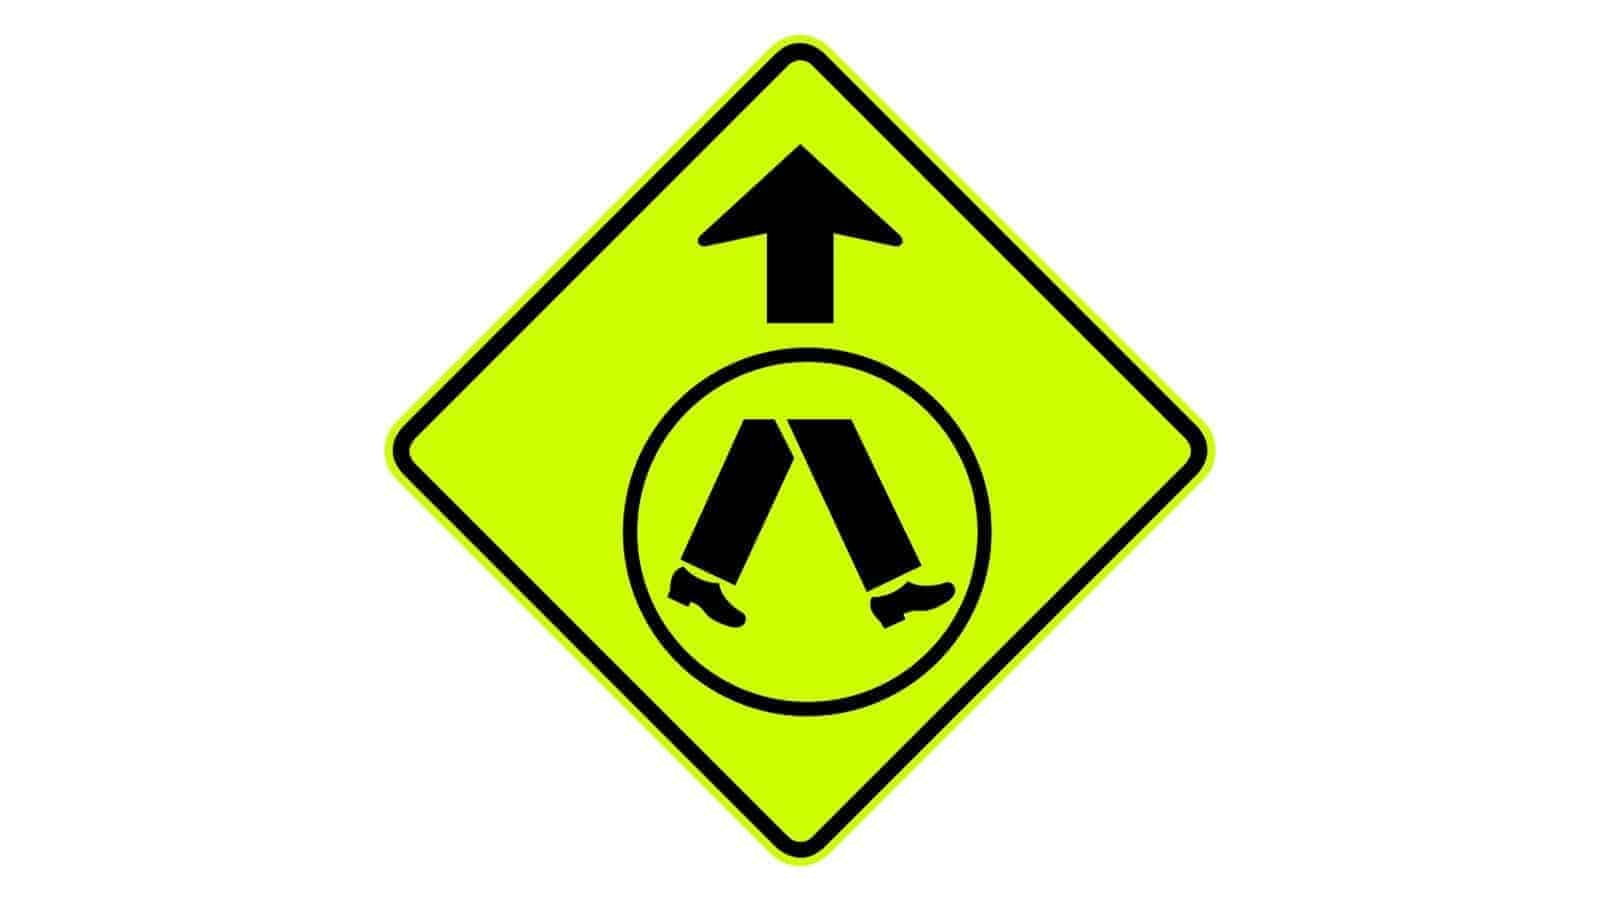
Pedestrian Crossing Ahead Sign
The “Pedestrian Crossing Ahead” road signs alert drivers that they are approaching a designated pedestrian crossing area and should be prepared to stop.
Where It Is Commonly Seen
• Near schools
• In residential areas
• At busy intersections
• In shopping districts
Driving Tips
1. Reduce Speed: Observe the speed limit as you approach the crossing and see these safety signs.
2. Yield to Pedestrians: Be prepared to stop and give way to people crossing the road.
3. Stay Alert: Watch for pedestrians stepping out from the kerb.
4. Use Indicators: Signal clearly if you intend to turn near the crossing.
5. Check for Children: Be especially cautious near schools where children may be crossing.
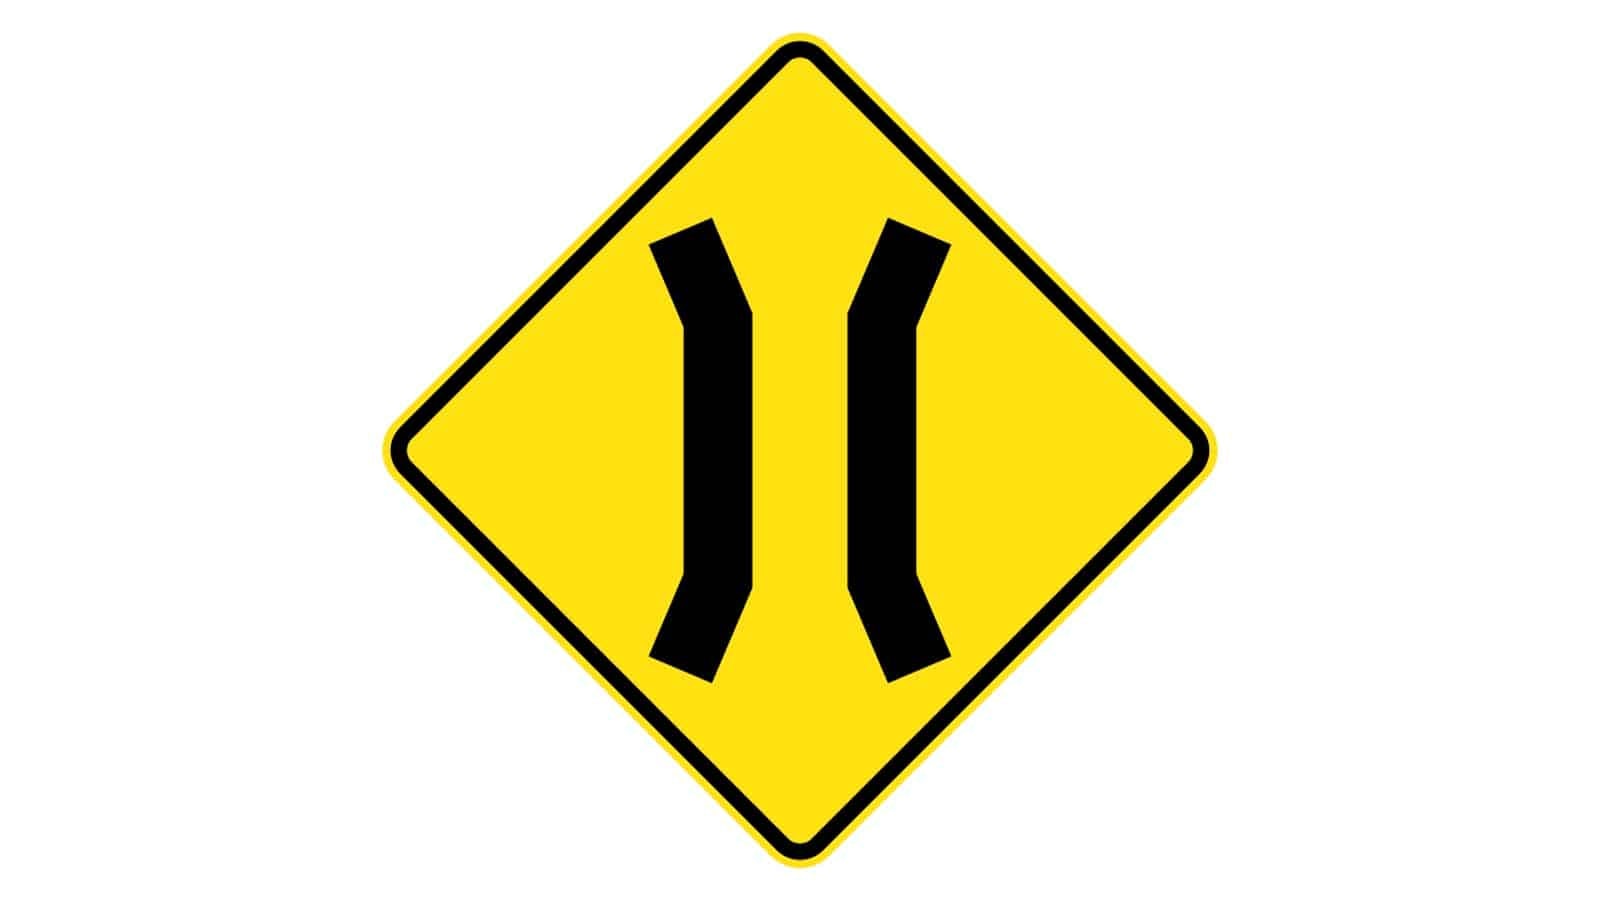
Narrow Bridge Sign
The “Narrow Bridge” warning signs alert drivers that they are approaching a bridge with a width restriction and should be prepared for a narrower road.
Where It Is Commonly Seen
• On rural roads
• Near older bridges
• In areas with historic or scenic routes
Driving Tips
1. Reduce Speed: Observe the speed limit as you approach the bridge to ensure safe passage.
2. Stay Centred: Position your vehicle in the centre of your lane.
3. Check for Oncoming Traffic: Be prepared to yield to vehicles already on the bridge if it is too narrow for two-way traffic.
4. Use Caution: Watch for pedestrians or cyclists who might also be using the bridge.
5. Follow Local Rules: Adhere to any posted safety signs or signals indicating how to cross the bridge.
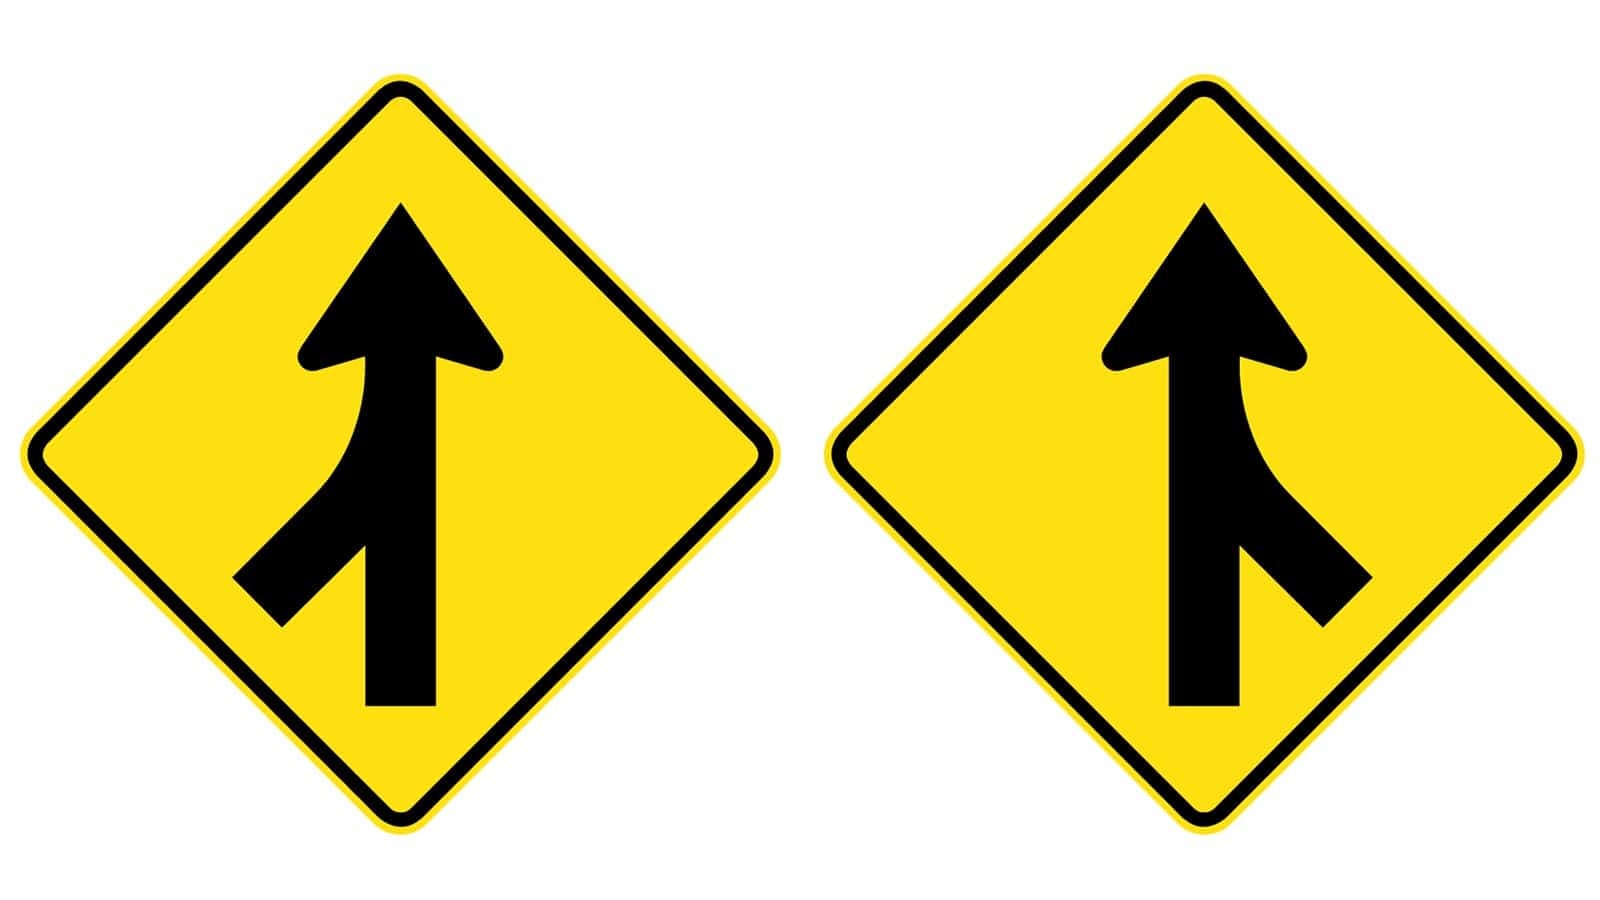
Merging Traffic from Left or Right Sign
The “Merging Traffic from Left or Right” road signs alert drivers that vehicles will be entering the main road from a side road on either the left or right side.
Where It Is Commonly Seen
• On highways
• At freeway on-ramps
• Near major intersections
Driving Tips
1. Stay Alert: Watch for vehicles entering from the side.
2. Adjust Speed: Check the speed limit and accordingly, speed up to allow merging vehicles to enter smoothly.
3. Use Mirrors: Check your side mirrors frequently to be aware of merging traffic.
4. Signal Clearly: Use your indicators to communicate your intentions to other drivers.
5. Yield Right-of-Way: Be prepared to allow merging vehicles to join the main road safely.
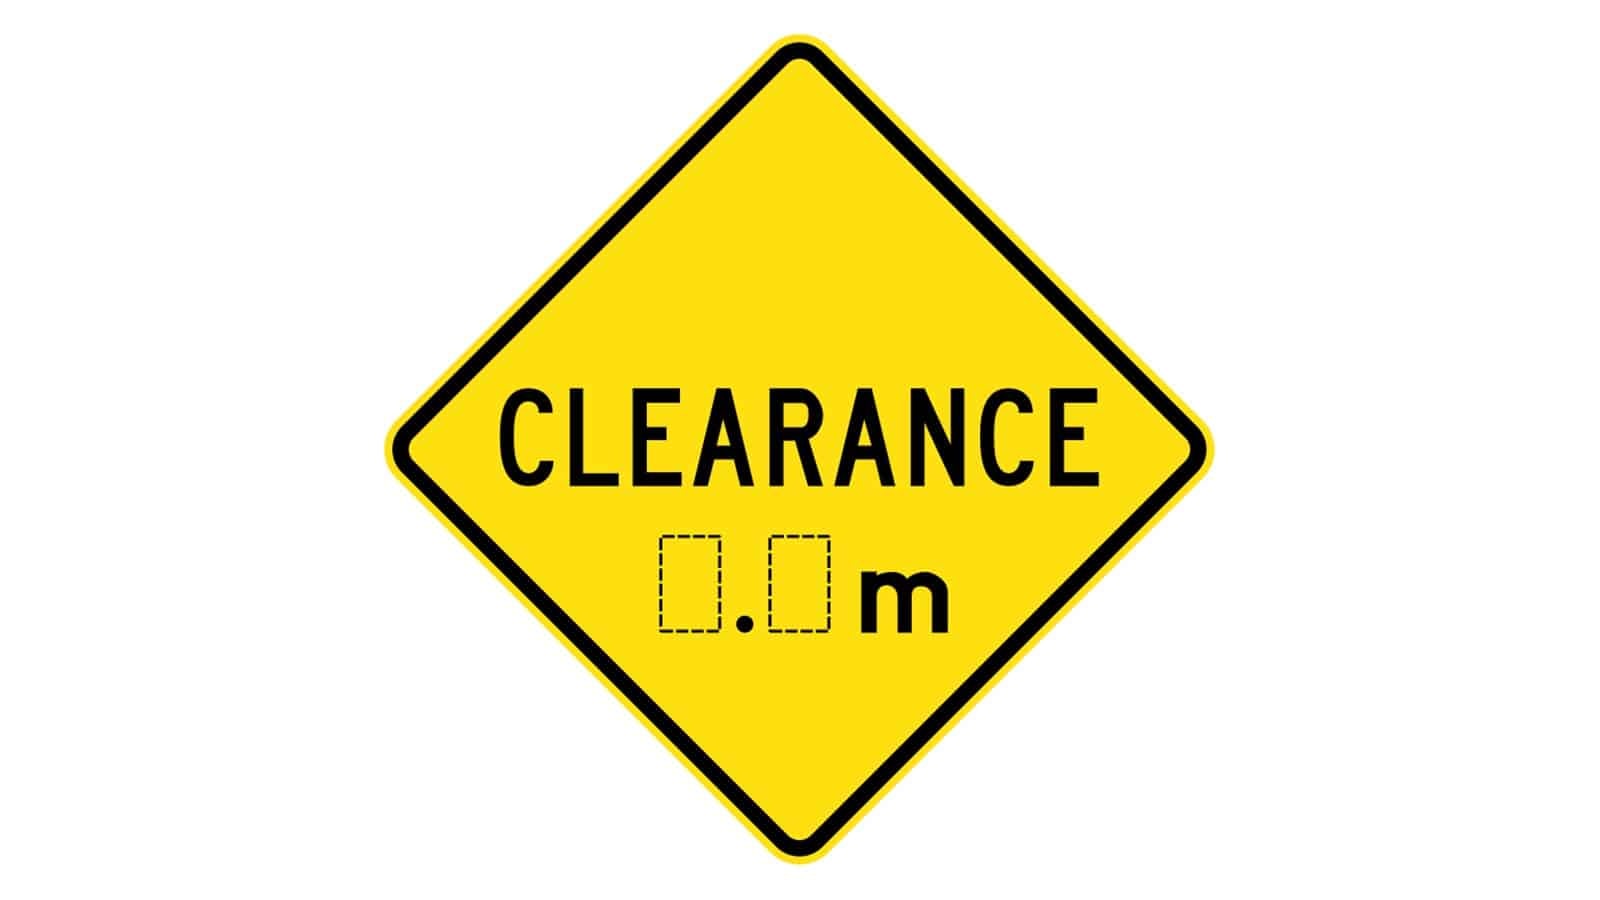
Low Clearance Ahead Sign
The “Low Clearance Ahead” warning signs alert drivers that there is a height restriction ahead and vehicles taller than the indicated clearance height should not proceed.
Where It Is Commonly Seen
• Under bridges and overpasses
• At tunnels
• In parking garages
• Near construction zones with temporary height restrictions
Driving Tips
1. Check Vehicle Height: Know the height of your vehicle and ensure it is lower than the clearance indicated.
2. Plan Route: Avoid routes with low clearance if your vehicle exceeds the height limit.
3. Reduce Speed: Observe the speed limit as you approach the low clearance area to avoid accidents.
4. Use Alternate Routes: If your vehicle is too tall, use an alternate route to avoid the restricted area.
5. Stay Alert: Pay attention to any additional signage indicating low clearance ahead.
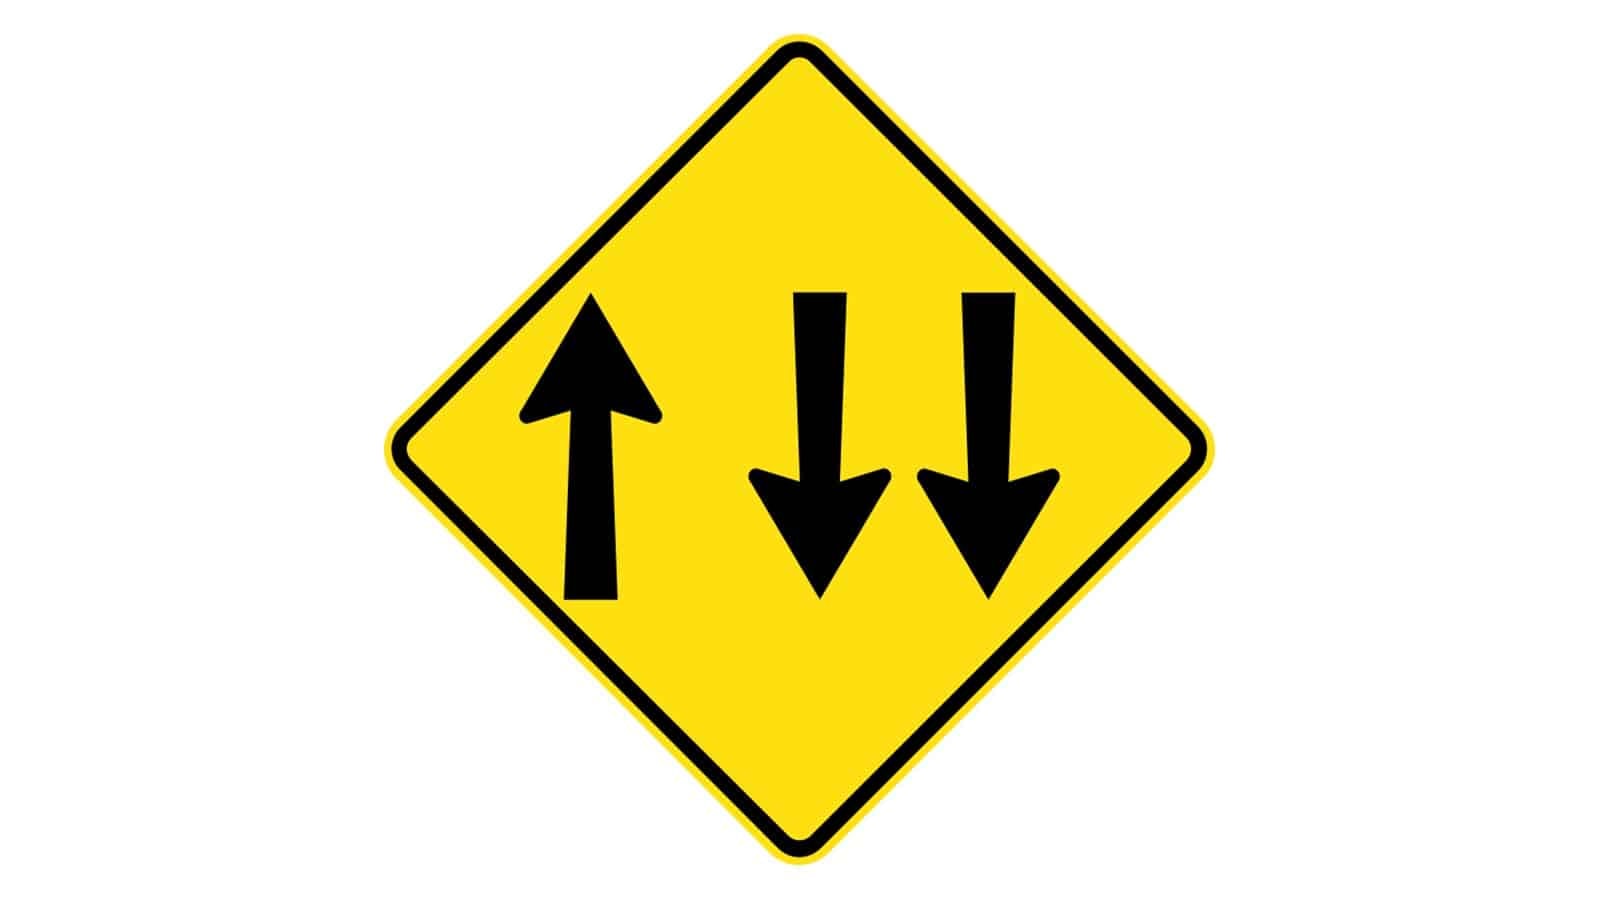
Lane Allocation Ahead Sign (Three-Way Traffic)
The “Lane Allocation Ahead” or three-way traffic warning signs inform drivers about the allocation of lanes ahead, indicating the specific lanes designated for different traffic directions.
Where It Is Commonly Seen
• At the approaches to intersections, these safety signs are a must.
• Near highway exits
• In areas with designated lanes for different directions or types of vehicles
Driving Tips
1. Choose Lane Early: Select the appropriate lane based on your intended direction of travel when you see this three-way traffic sign.
2. Stay in Lane: Follow the lane markings and stay in your designated lane.
3. Reduce Speed: Observe the speed limit and be prepared for potential lane changes by other drivers as indicated by the three-way traffic sign.
4. Signal Clearly: Use your indicators well in advance if you need to change lanes.
5. Stay Alert: Be aware of other vehicles that may be merging or diverging in the designated lanes.
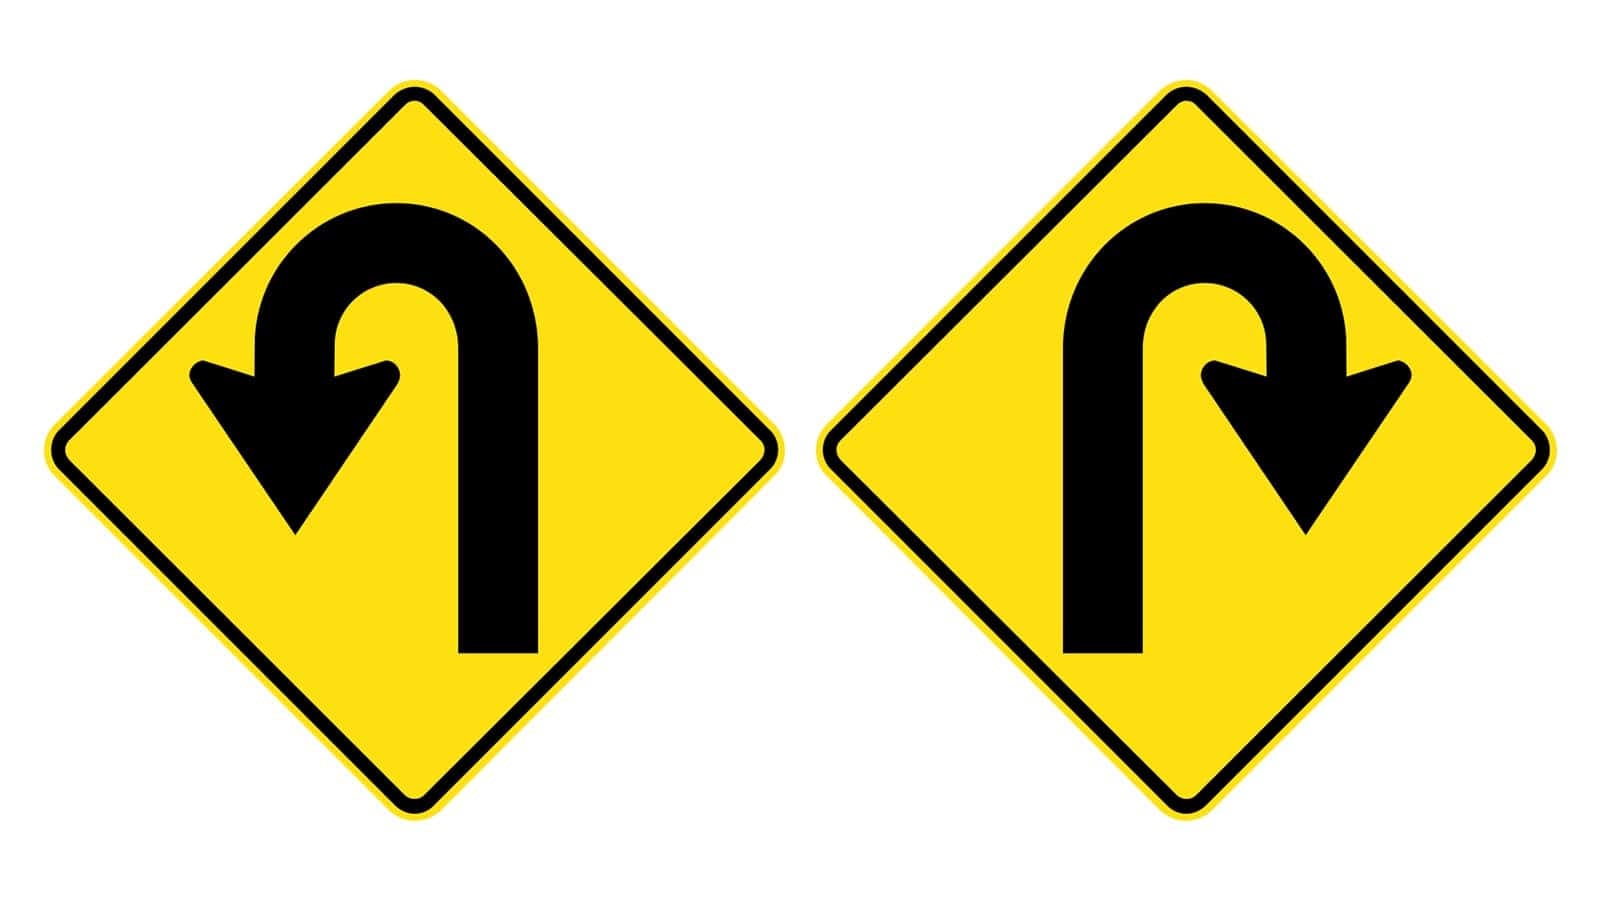
Hairpin Bend to Left/Right Sign
The “Hairpin Bend” warning signs warn drivers of a sharp turn ahead, resembling a hairpin shape, indicating a sharp curve either to the left or the right.
Where It Is Commonly Seen
• On mountainous roads
• Near steep inclines or declines
• In areas with tight curves
Driving Tips
1. Reduce Speed: Check the speed limit significantly as you approach the bend to maintain control.
2. Stay in Lane: Follow the lane markings and stay within your lane to avoid oncoming traffic.
3. Use Low Gear: Shift to a lower gear to help control your speed and maintain traction.
4. Signal Clearly: Use your indicators to alert other drivers of your intentions.
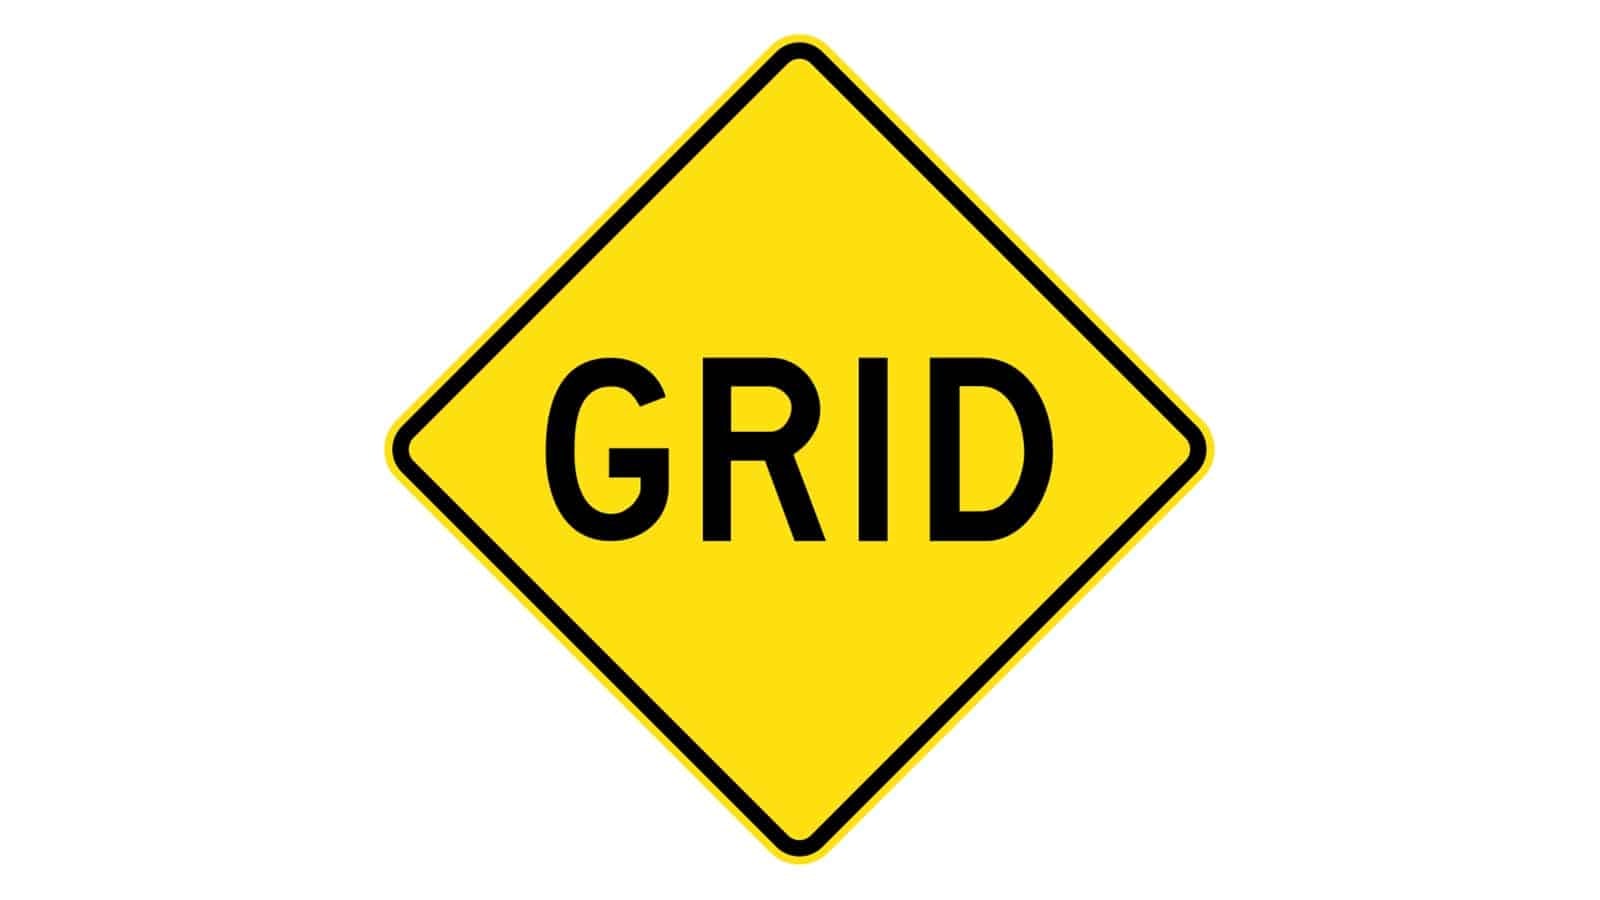
Grid Sign
The “Grid” warning signs alert drivers that they are approaching a cattle grid, which is a device used to prevent livestock from crossing.
Where It Is Commonly Seen
• On rural roads
• Near farms and ranches
• In areas with livestock
Driving Tips
1. Reduce Speed: Observe the speed limit to navigate the grid safely.
2. Stay in Lane: Follow the lane markings and stay within your lane while crossing the grid.
3. Check Vehicle: Ensure your vehicle is in good condition to handle the grid, especially if you have a low clearance vehicle.
4. Be Cautious: Watch for livestock near the grid area.
5. Avoid Sudden Movements: Drive steadily and avoid sudden acceleration or braking while crossing the grid.
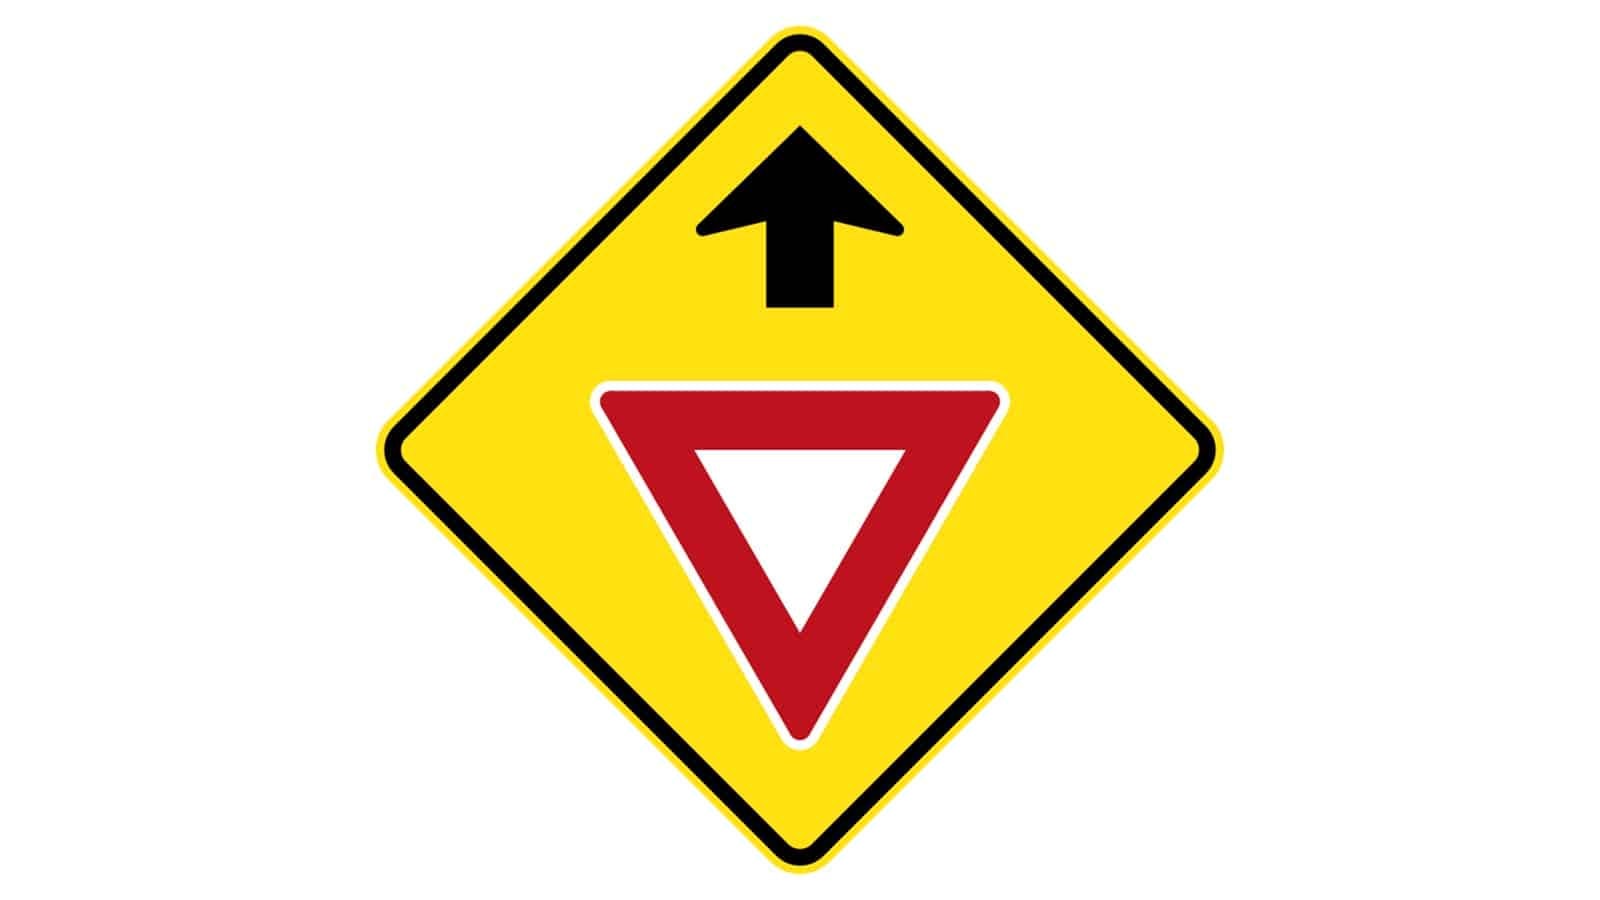
Give Way Sign Ahead
The “Give Way Sign Ahead” warning signs alert drivers that they are approaching an intersection where they must yield the right-of-way to other vehicles.
Where It Is Commonly Seen
• At intersections without traffic lights, a give way sign is very common.
• At roundabouts
• On roads merging with a main road
• Near pedestrian crossings, a give way sign is unmistakable.
Driving Tips
1. Reduce Speed: Observe the speed limit as you approach the give way sign ahead.
2. Stay Alert: Look for other vehicles and pedestrians that may have the right-of-way.
3. Yield Right-of-Way: Be prepared to stop if necessary and give way to other vehicles or pedestrians.
4. Check Mirrors: Be aware of traffic behind you.
5. Proceed with Caution: Only continue when it is safe to do so.
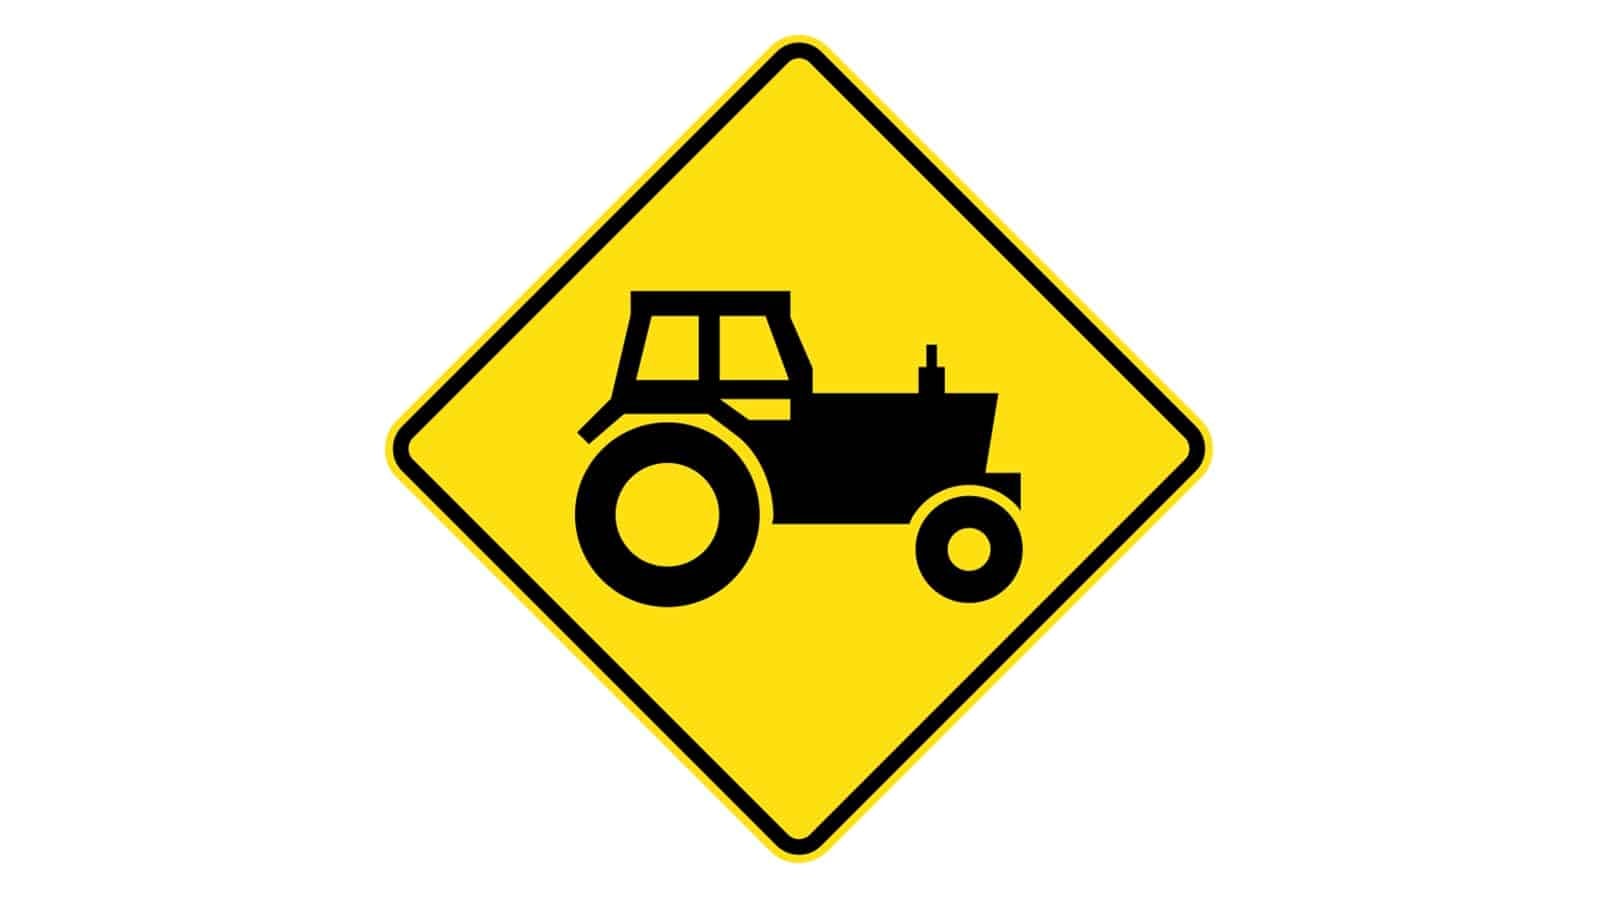
Farm Machinery Sign
The “Farm Machinery Sign” warning signs alerts drivers that they are entering an area where farm machinery, such as tractors, may be crossing or driving on the road.
Where It Is Commonly Seen
• On rural roads
• Near farmland
• In agricultural areas
• On roads with frequent farm vehicle crossings
Driving Tips
1. Reduce Speed: Slow down as you approach the area.
2. Stay Alert: Be on the lookout for slow-moving farm machinery.
3. Maintain Distance: Keep a safe distance from farm vehicles.
4. Be Patient: Allow extra time for farm machinery to move or turn.
5. Pass with Caution: Only pass farm vehicles when it is safe to do so and ensure you have clear visibility.
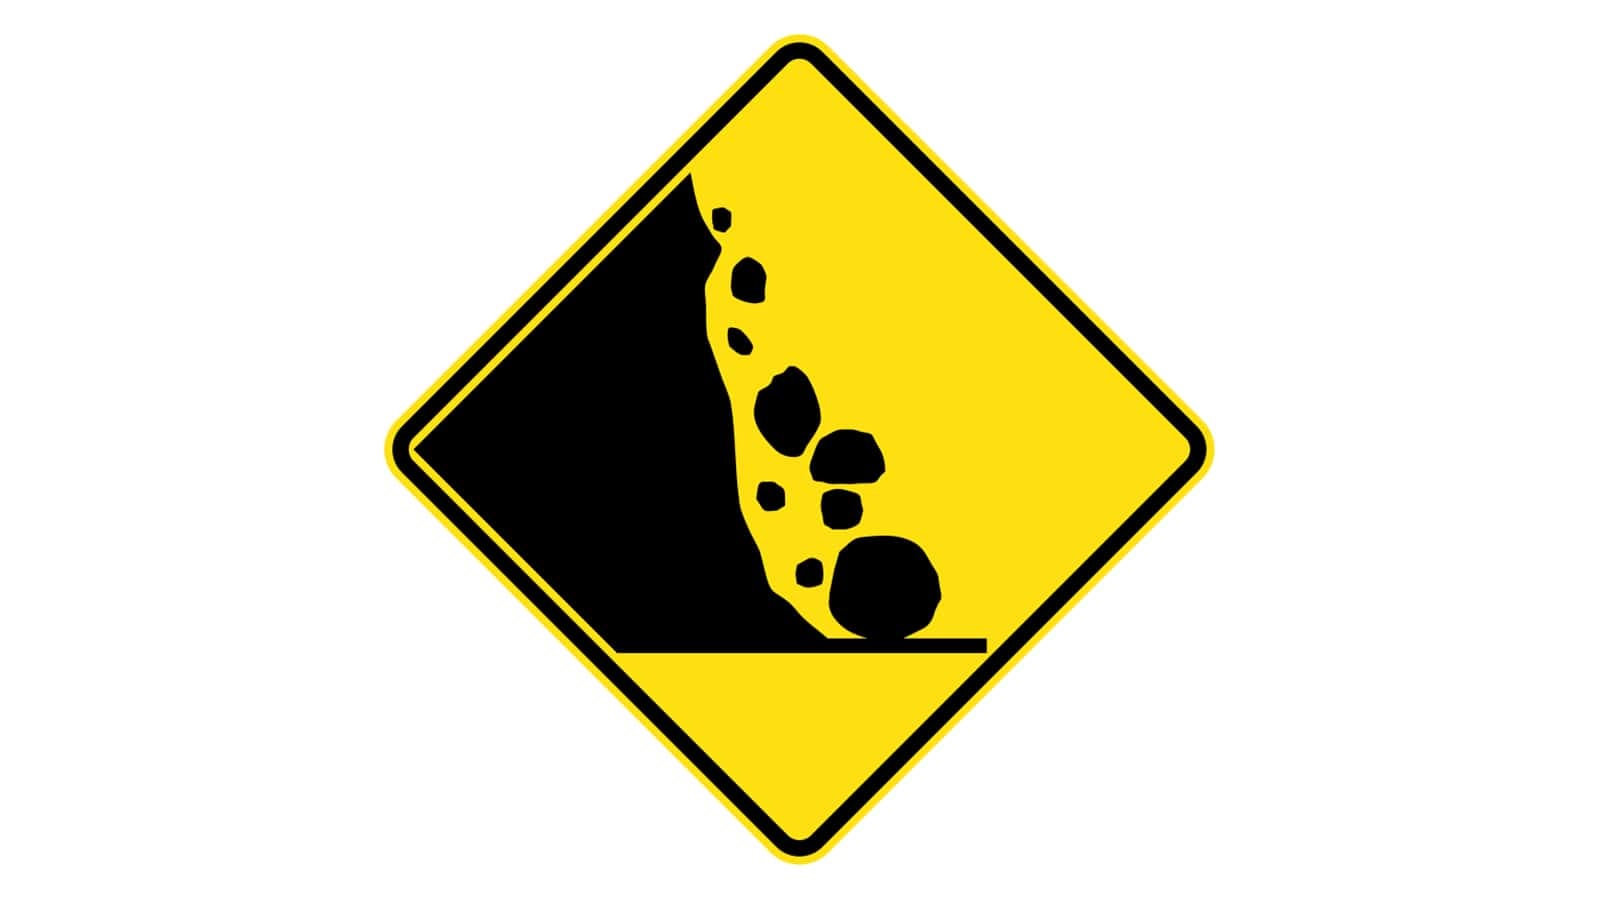
Falling Rocks Sign
The “Falling Rocks” sign warns drivers that they are entering an area where rocks may fall onto the road from a cliff or steep slope.
Where It Is Commonly Seen
• In mountainous areas
• Along roads with steep cliffs or slopes
• In areas prone to landslides or rockfalls
Driving Tips
1. Stay Alert: Be vigilant and watch for falling rocks.
2. Reduce Speed: Check the speed limit to give yourself more time to react.
3. Maintain Distance: Keep a safe distance from the cliff or slope.
4. Avoid Stopping: Do not stop in areas marked by this sign unless absolutely necessary.
5. Report Hazards: If you see fallen rocks on the road, report them to the appropriate authorities.
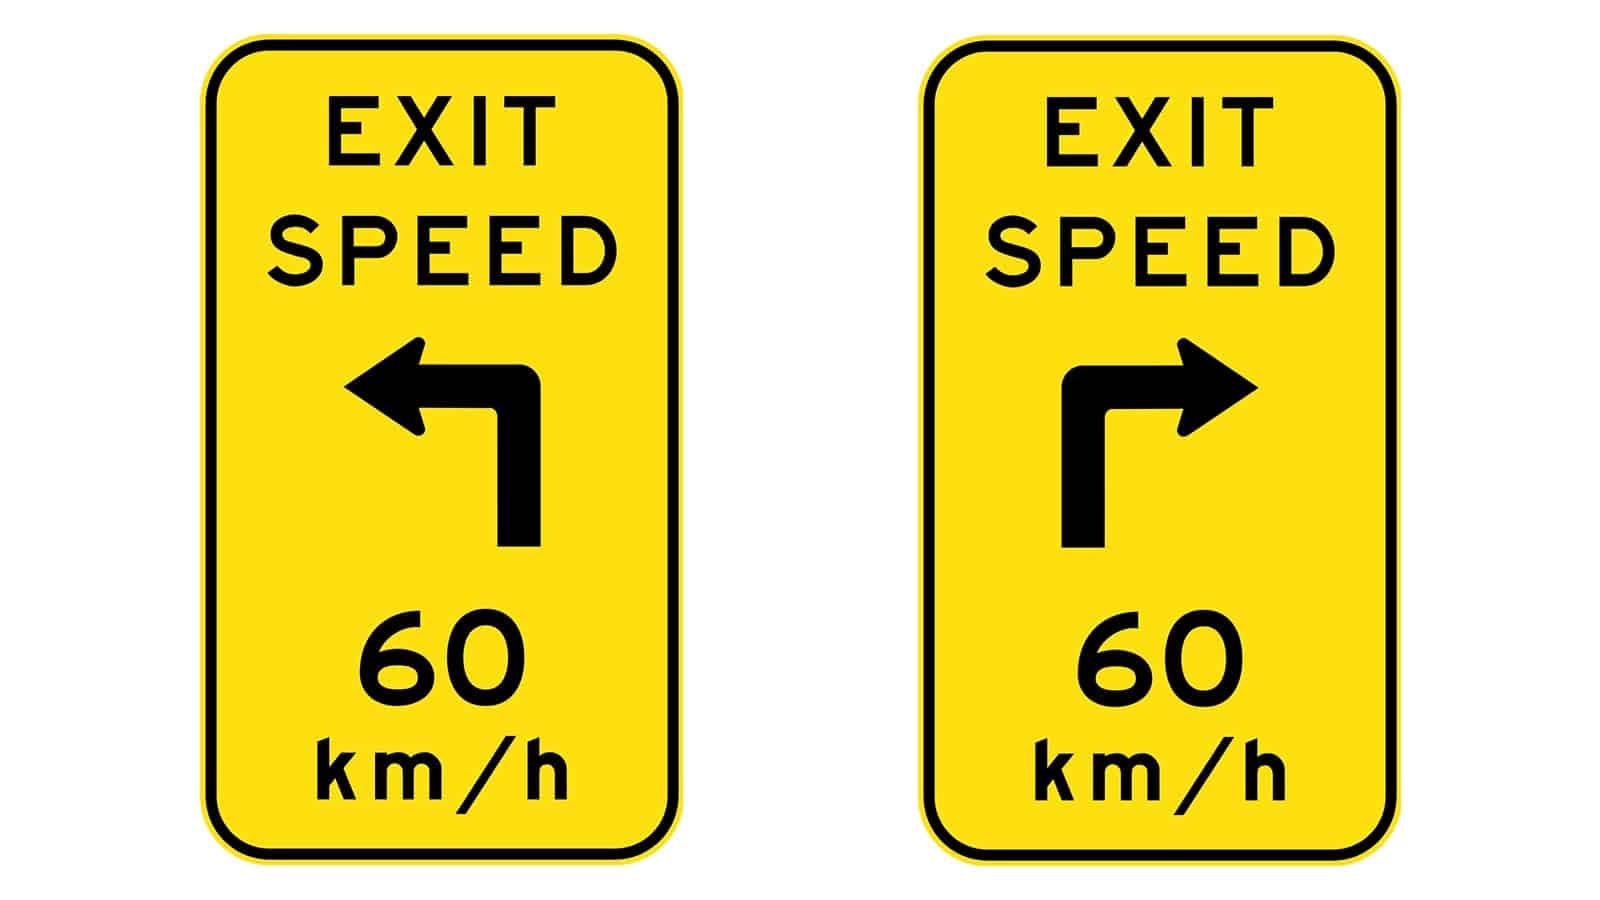
Exit Advisory Speed Sign
The “Exit Advisory Speed” sign informs drivers of the recommended speed to safely navigate an exit ramp or turn.
Where It Is Commonly Seen
• On motorway or highway exit ramps
• At major intersections with sharp turns
• Near off-ramps in urban and rural areas
Driving Tips
1. Follow Speed Limit: Adhere to the indicated speed limit for a safe exit.
2. Signal Early: Use your indicators well in advance of the exit or turn.
3. Slow Down Gradually: Reduce your speed smoothly as you approach the exit.
4. Stay in Lane: Follow lane markings and remain in your designated lane.
5. Be Aware of Traffic: Watch for vehicles ahead and behind you, and be prepared for sudden stops or slowdowns.
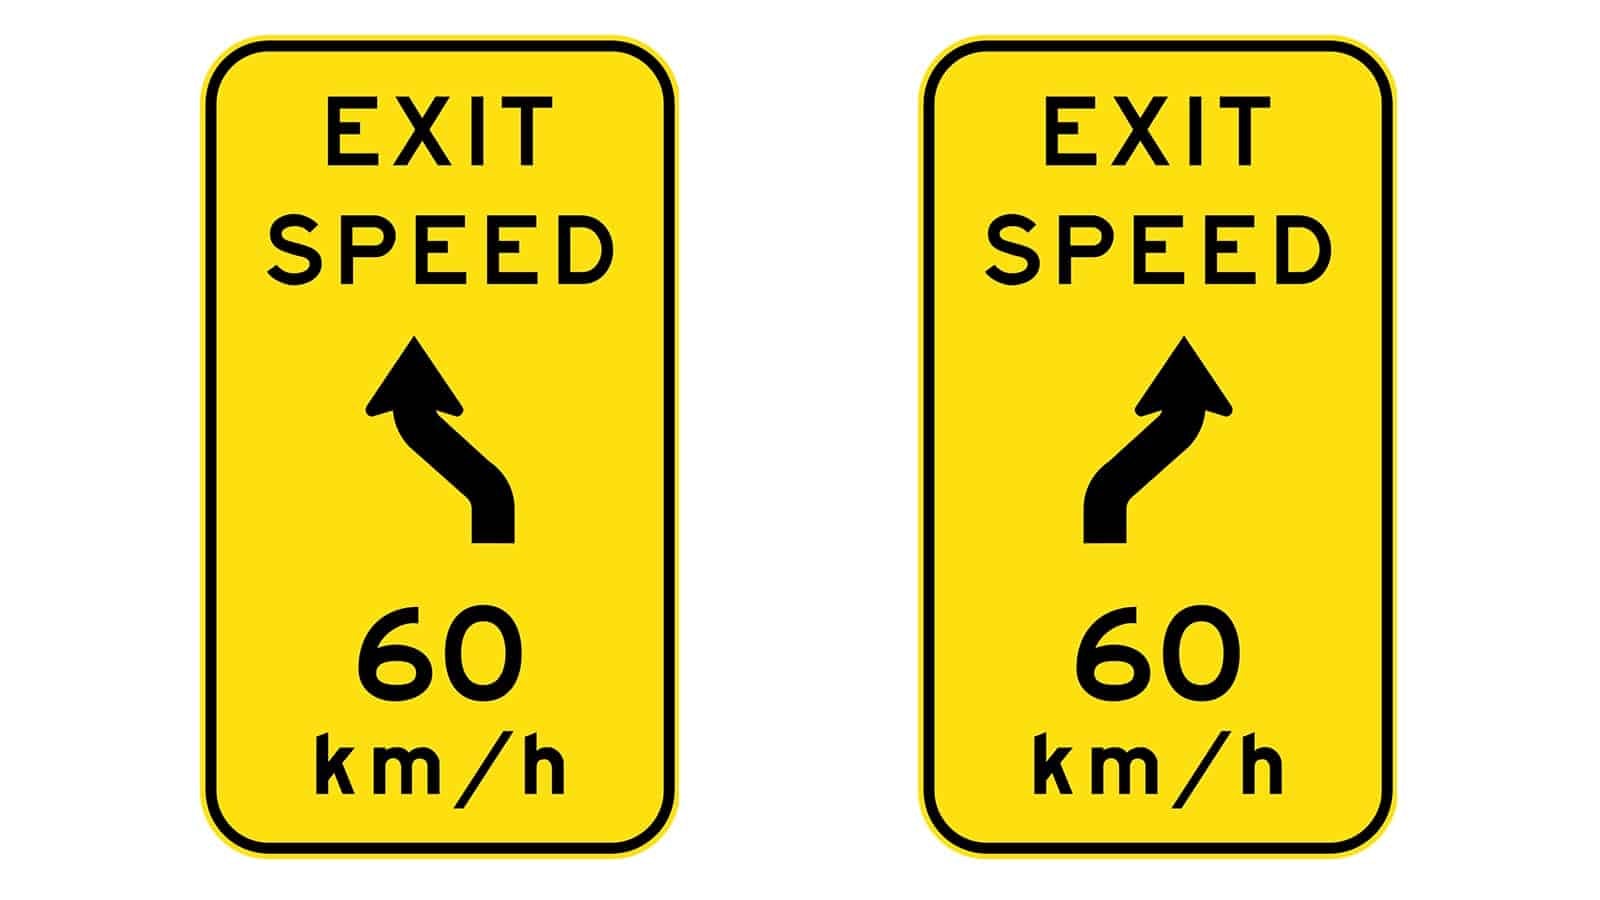
Exit Advisory Speed with Reverse Curve Sign
The “Exit Advisory Speed with Reverse Curve” sign indicates the recommended speed for navigating an exit ramp or turn that involves a reverse curve, starting to the left or right.
Where It Is Commonly Seen
• On motorway or highway exit ramps with reverse curves
• At major intersections with complex turns
• Near off-ramps in urban and rural areas
Driving Tips
1. Follow Speed Limit: Adhere to the indicated speed limit to safely navigate the reverse curve.
2. Signal Early: Use your indicators well in advance of the exit or turn.
3. Slow Down Gradually: Reduce your speed smoothly as you approach the exit.
4. Stay in Lane: Follow lane markings and remain in your designated lane.
5. Be Aware of Traffic: Watch for vehicles ahead and behind you, and be prepared for sudden stops or slowdowns.
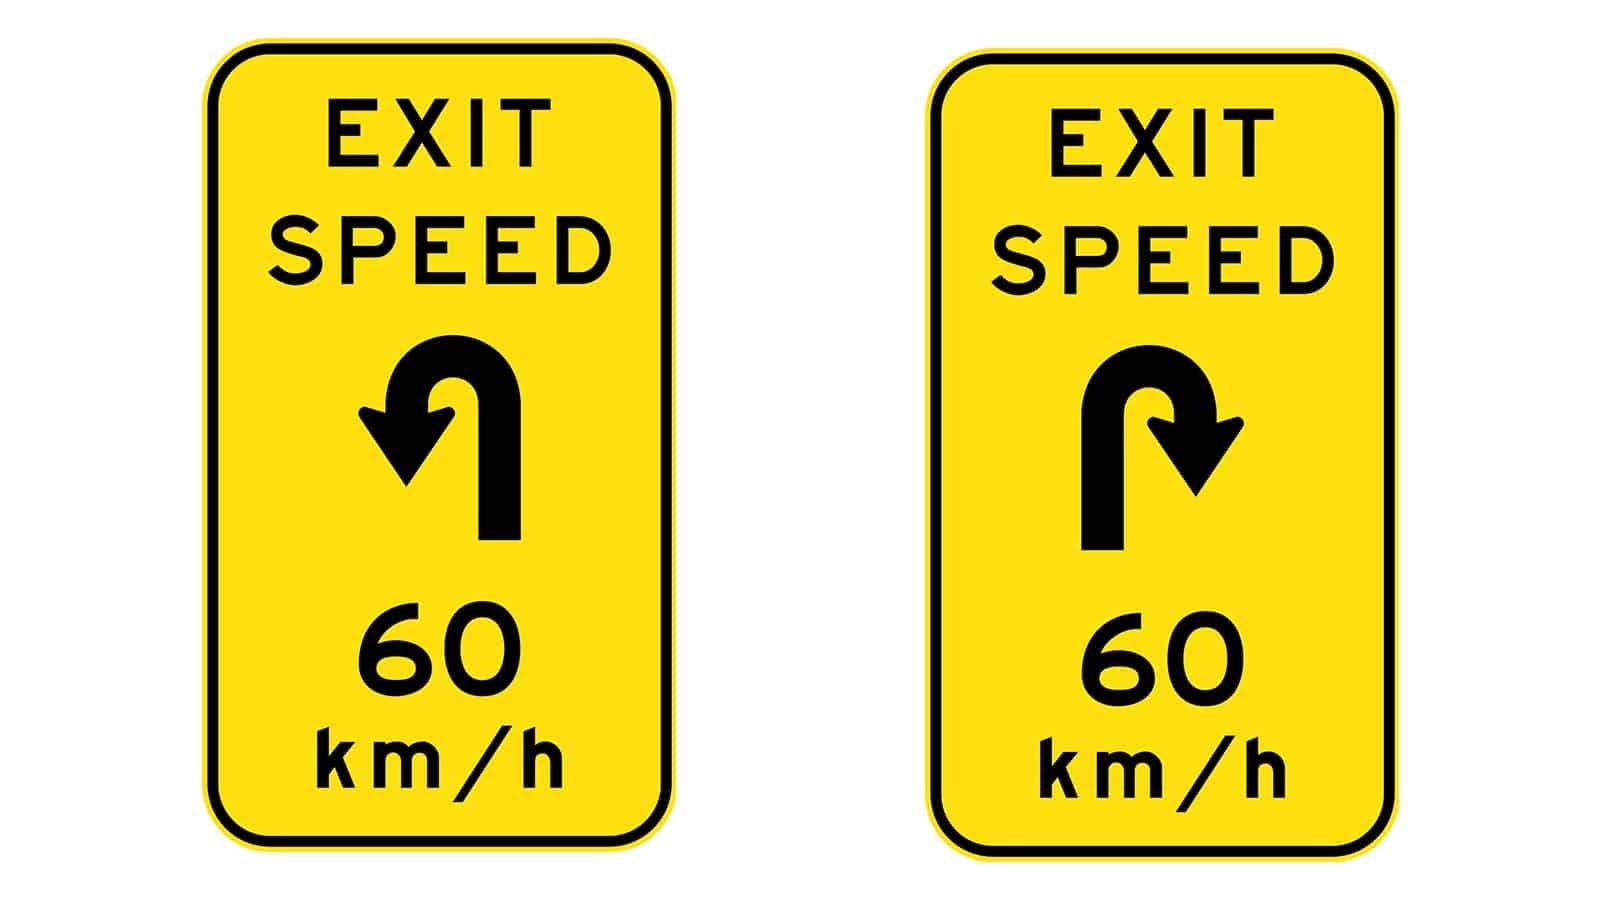
Exit Advisory Speed with Hairpin Bend Sign
The “Exit Advisory Speed with Hairpin Bend” sign indicates the recommended speed for navigating an exit ramp or turn that involves a hairpin bend, starting to the left or right.
Where It Is Commonly Seen
• On motorway or highway exit ramps with hairpin bends
• At mountainous or hilly roads with sharp turns
• Near off-ramps in urban and rural areas
Driving Tips
1. Follow Speed Limit: Adhere to the indicated speed limit to safely navigate the hairpin bend.
2. Signal Early: Use your indicators well in advance of the exit or turn.
3. Slow Down Gradually: Reduce your speed smoothly as you approach the exit.
4. Stay in Lane: Follow lane markings and remain in your designated lane.
5. Be Aware of Traffic: Watch for vehicles ahead and behind you, and be prepared for sudden stops or slowdowns.⬤
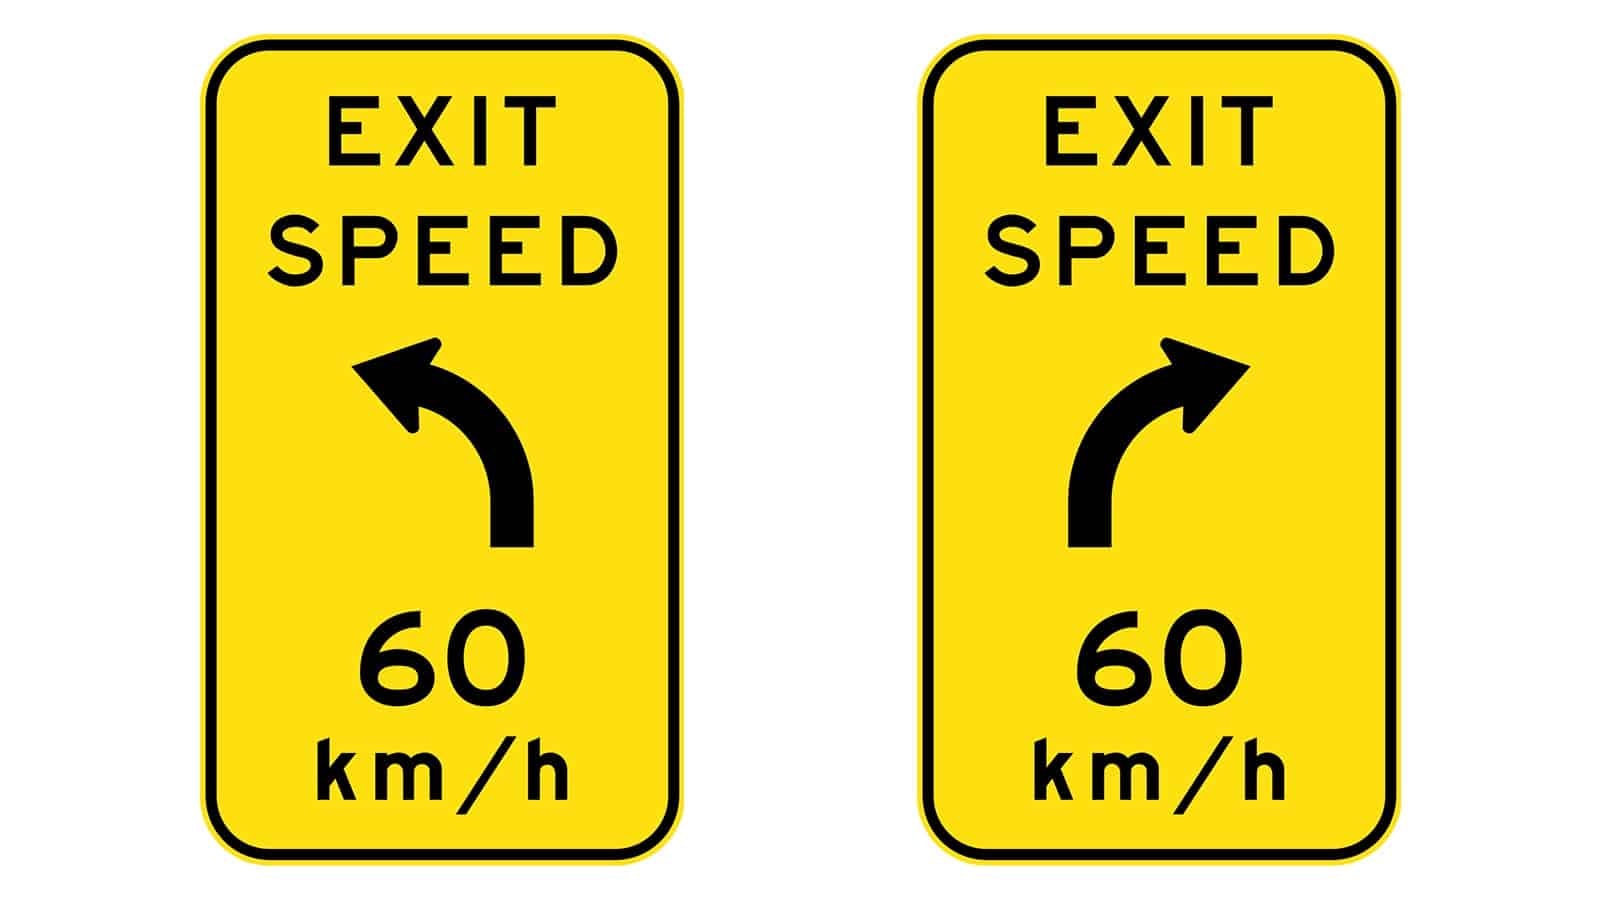
Exit Advisory Speed with Curve Sign
The “Exit Advisory Speed with Curve” sign indicates the recommended speed for navigating an exit ramp or turn that involves a curve, starting to the left or right.
Where It Is Commonly Seen
• On motorway or highway exit ramps with curves
• At urban and suburban areas with curved exit ramps
• Near off-ramps in both rural and city locations
Driving Tips
1. Adhere to Speed Limit: Follow the indicated speed limit to navigate the curve safely.
2. Signal Early: Use your indicators well in advance of the exit or turn.
3. Reduce Speed Smoothly: Slow down gradually as you approach the exit.
4. Stay in Lane: Follow lane markings and remain in your designated lane.
5. Be Vigilant of Traffic: Watch for vehicles ahead and behind you, and be prepared for sudden stops or slowdowns.
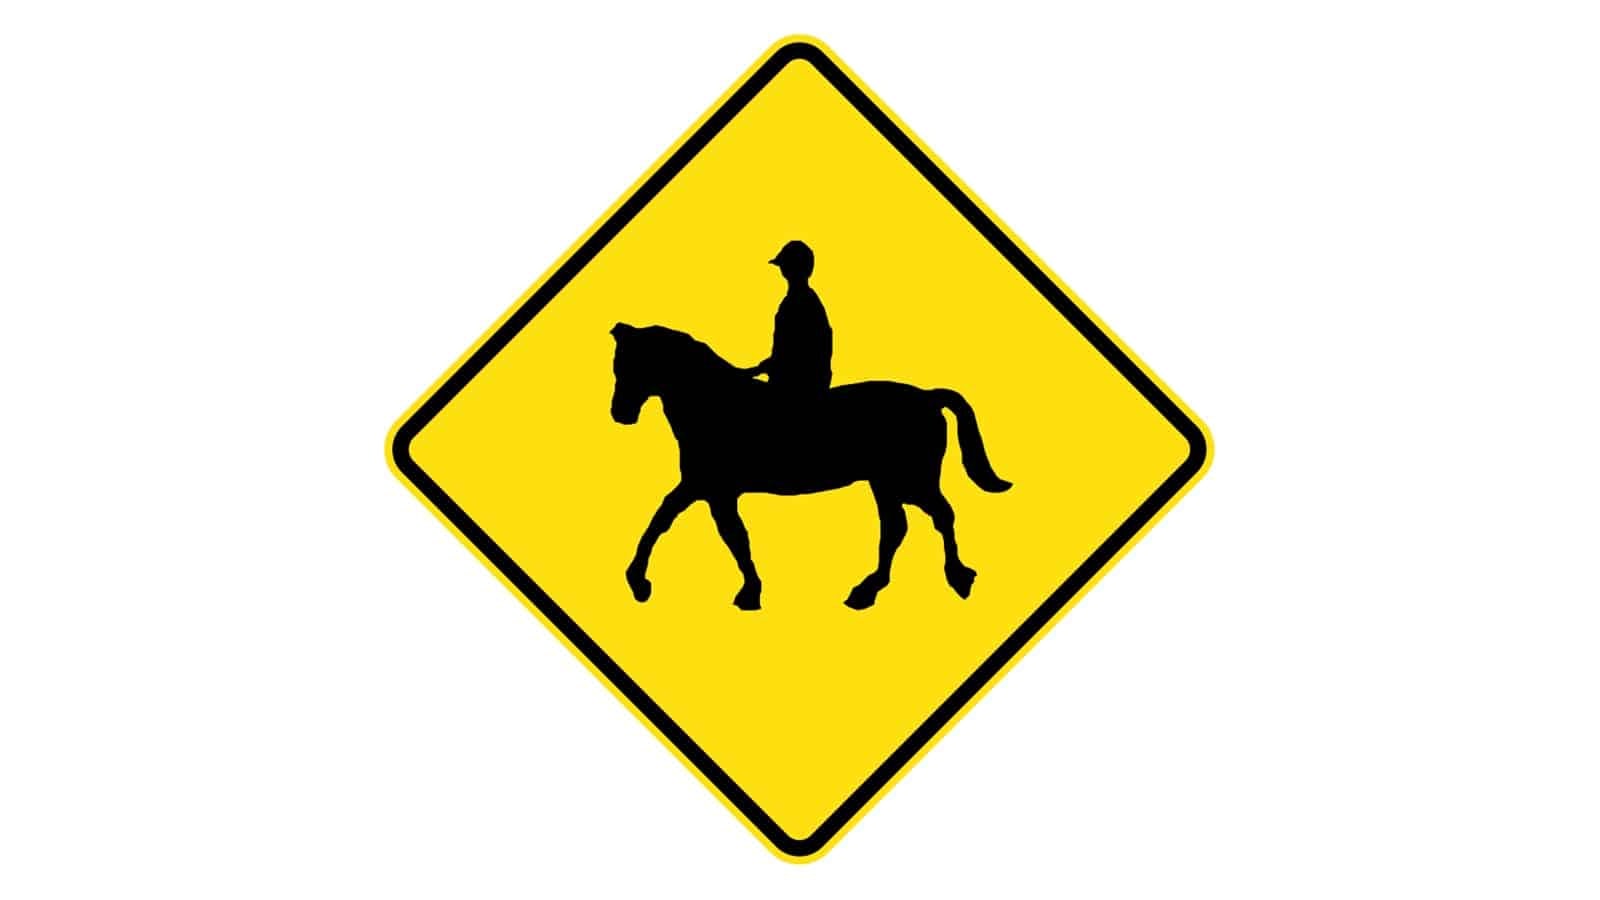
Equestrians Ahead Sign
The “Equestrians Ahead” sign alerts drivers to the presence of horseback riders on or near the road.
Where It Is Commonly Seen
• Near equestrian centres and stables
• On rural roads
• In areas with designated horse-riding trails crossing the road
Driving Tips
1. Reduce Speed: Check the speed limit to avoid startling the horses.
2. Give Space: Leave plenty of room when passing riders.
3. Avoid Sudden Movements: Do not honk or make abrupt moves that could frighten the horses.
4. Be Patient: Wait for a safe opportunity to pass.
5. Follow Rider’s Signals: Watch for and adhere to signals given by horseback riders.
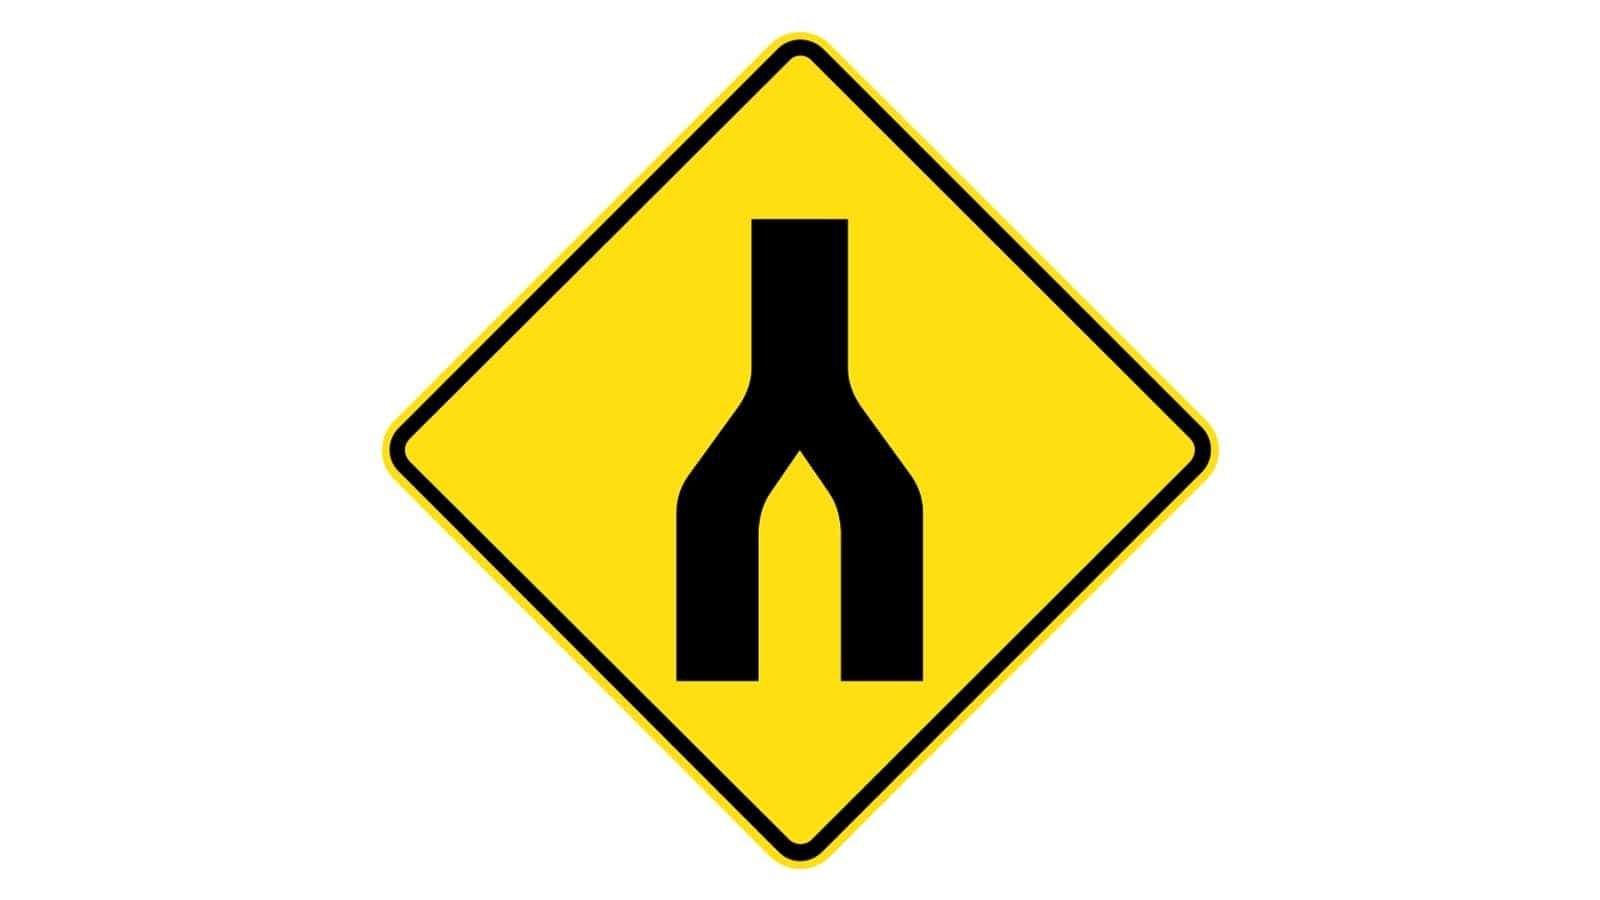
End Divided Road Sign
The “End Divided Road” sign informs drivers that the divided road they are on will soon end, and they will transition to an undivided road.
Where It Is Commonly Seen
• At the end of highways or motorways
• On roads transitioning from dual carriageways to single carriageways
• Near the end of road construction zones where a temporary divide was in place
Driving Tips
1. Reduce Speed: Observe the speed limit as you approach the end of the divided road.
2. Stay in Lane: Follow lane markings to merge safely into a single lane.
3. Check Mirrors: Be aware of other vehicles merging into your lane.
4. Signal Clearly: Use your indicators to communicate your intentions to other drivers.
5. Stay Alert: Watch for changes in road conditions and adjust your driving accordingly.
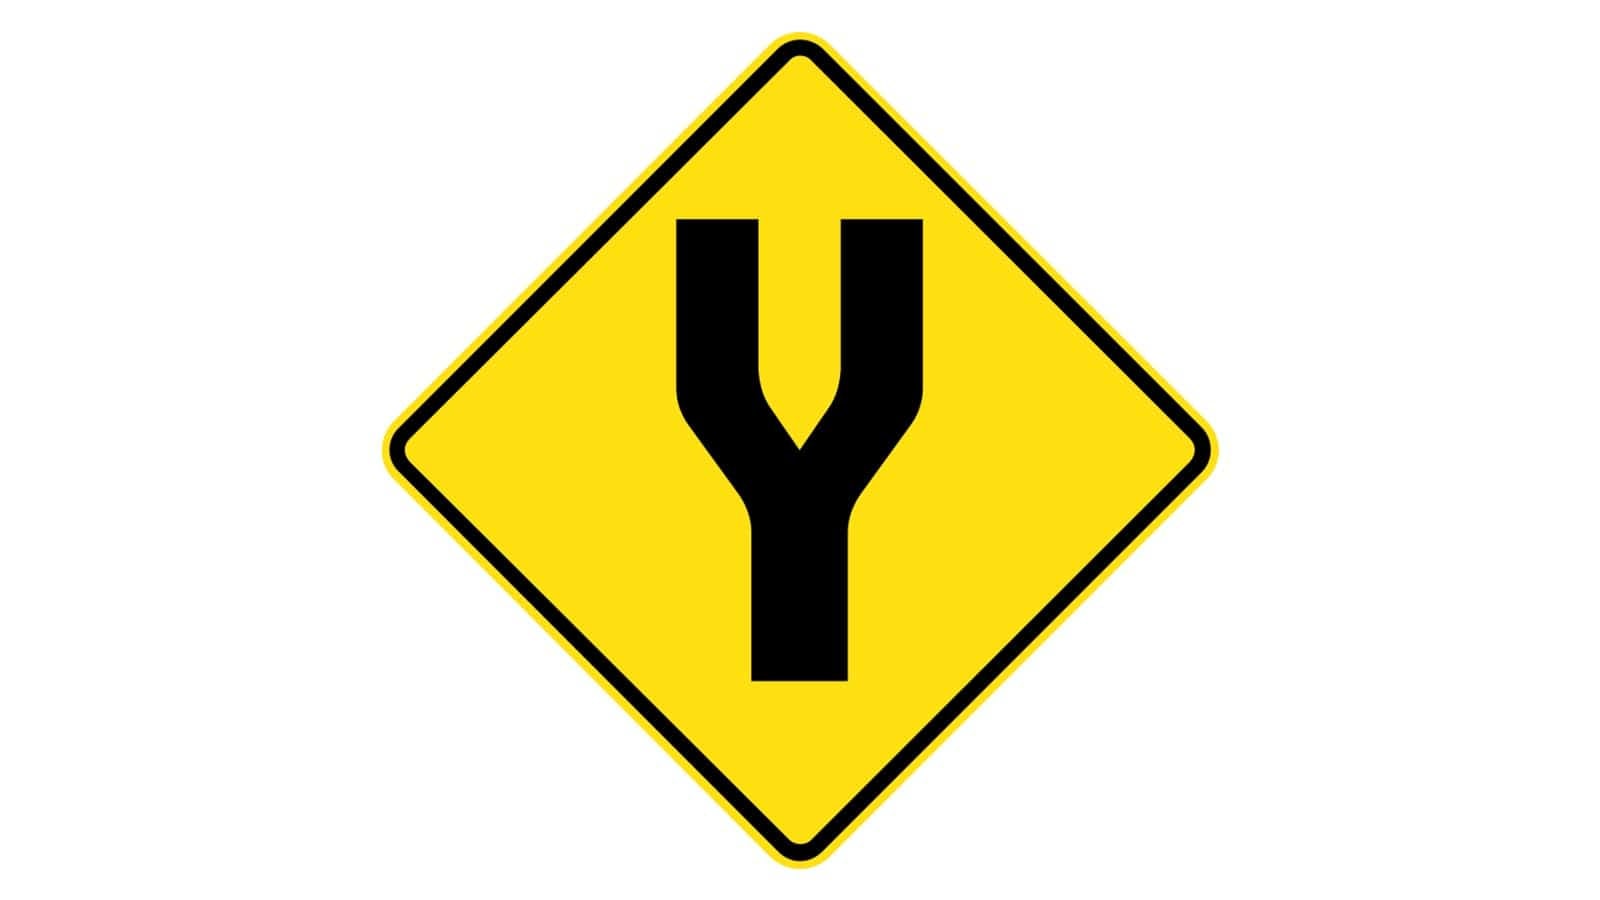
Divided Road Sign
The “Divided Road” sign indicates to drivers that the road ahead will split into a divided road, typically with a central median.
Where It Is Commonly Seen
• At the beginning of highways or motorways
• On roads transitioning from single carriageways to dual carriageways
• Near construction zones where a temporary divide is set up
Driving Tips
1. Stay in Lane: Follow lane markings to merge smoothly into your designated lane.
2. Check Mirrors: Be aware of other vehicles that may be merging into your lane.
3. Reduce Speed: Check the speed limit if necessary to safely navigate the transition.
4. Signal Clearly: Use your indicators to communicate your intentions to other drivers.
5. Stay Alert: Watch for changes in road conditions and adjust your driving accordingly.
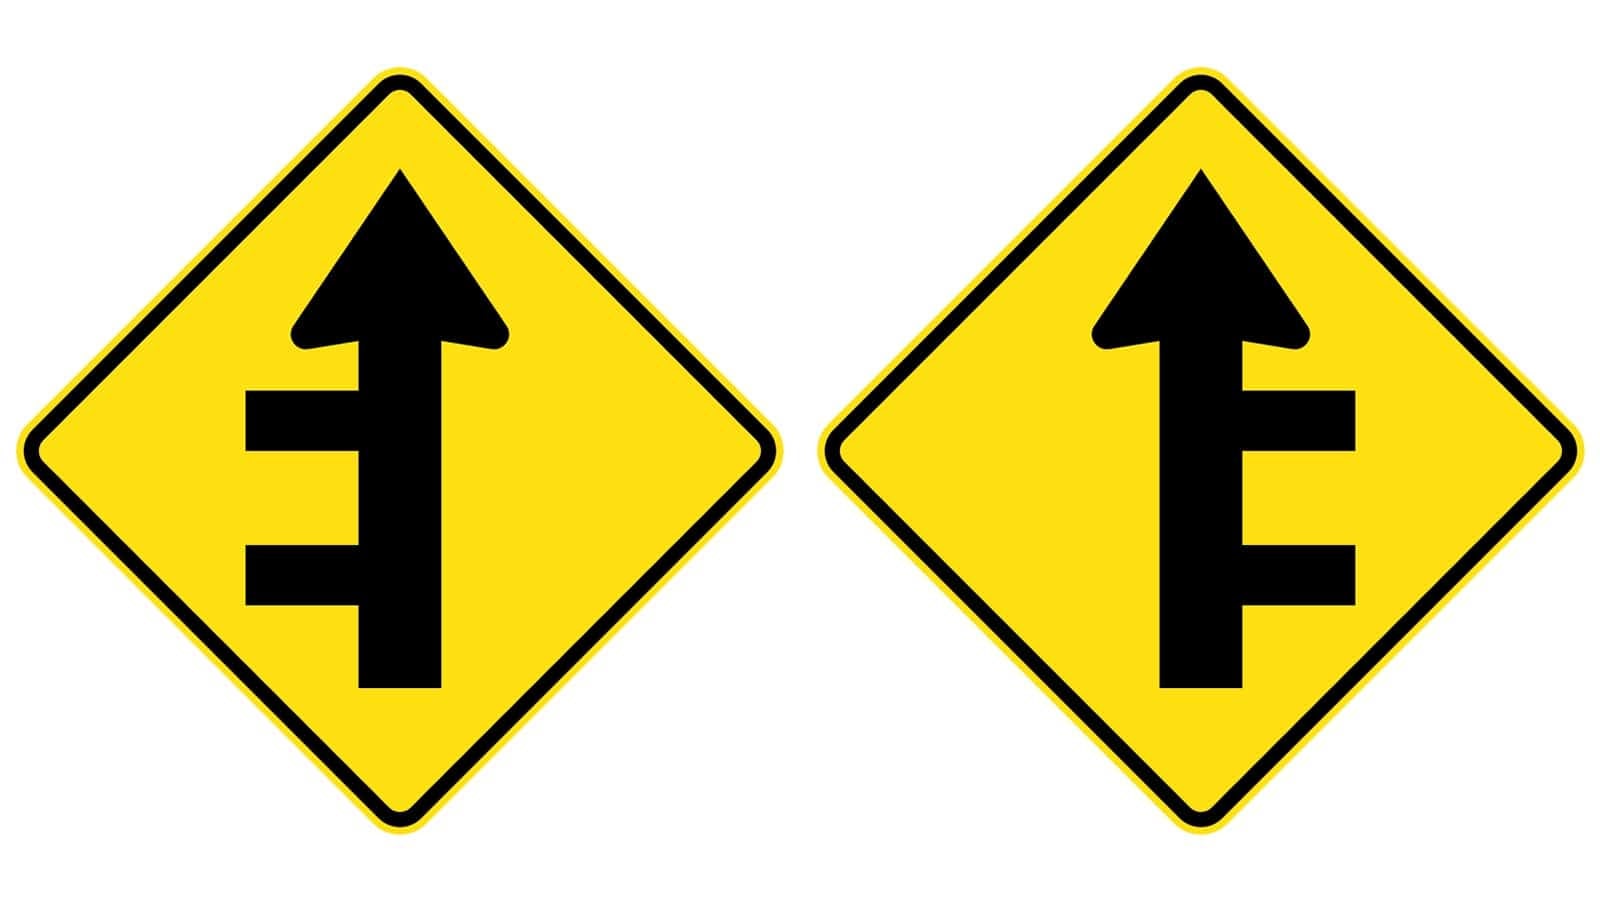
Double Side Road Intersection Sign
The “Double Side Road Intersection” sign warns drivers of two side roads intersecting with the main road, one after the other, from either the left or the right.
Where It Is Commonly Seen
• On rural roads
• Near residential areas with multiple side streets
• In areas where two consecutive side roads meet the main road at right angles
Driving Tips
1. Stay Alert: Watch for vehicles entering or exiting from the side roads.
2. Reduce Speed: Check the speed limit to navigate the intersections safely.
3. Check Mirrors: Be aware of other vehicles that may be turning or merging from the side roads.
4. Signal Clearly: Use your indicators well in advance as you control the speed limit if you plan to turn onto any of the side roads.
5. Yield Right-of-Way: Follow right-of-way rules and be prepared to stop if necessary.
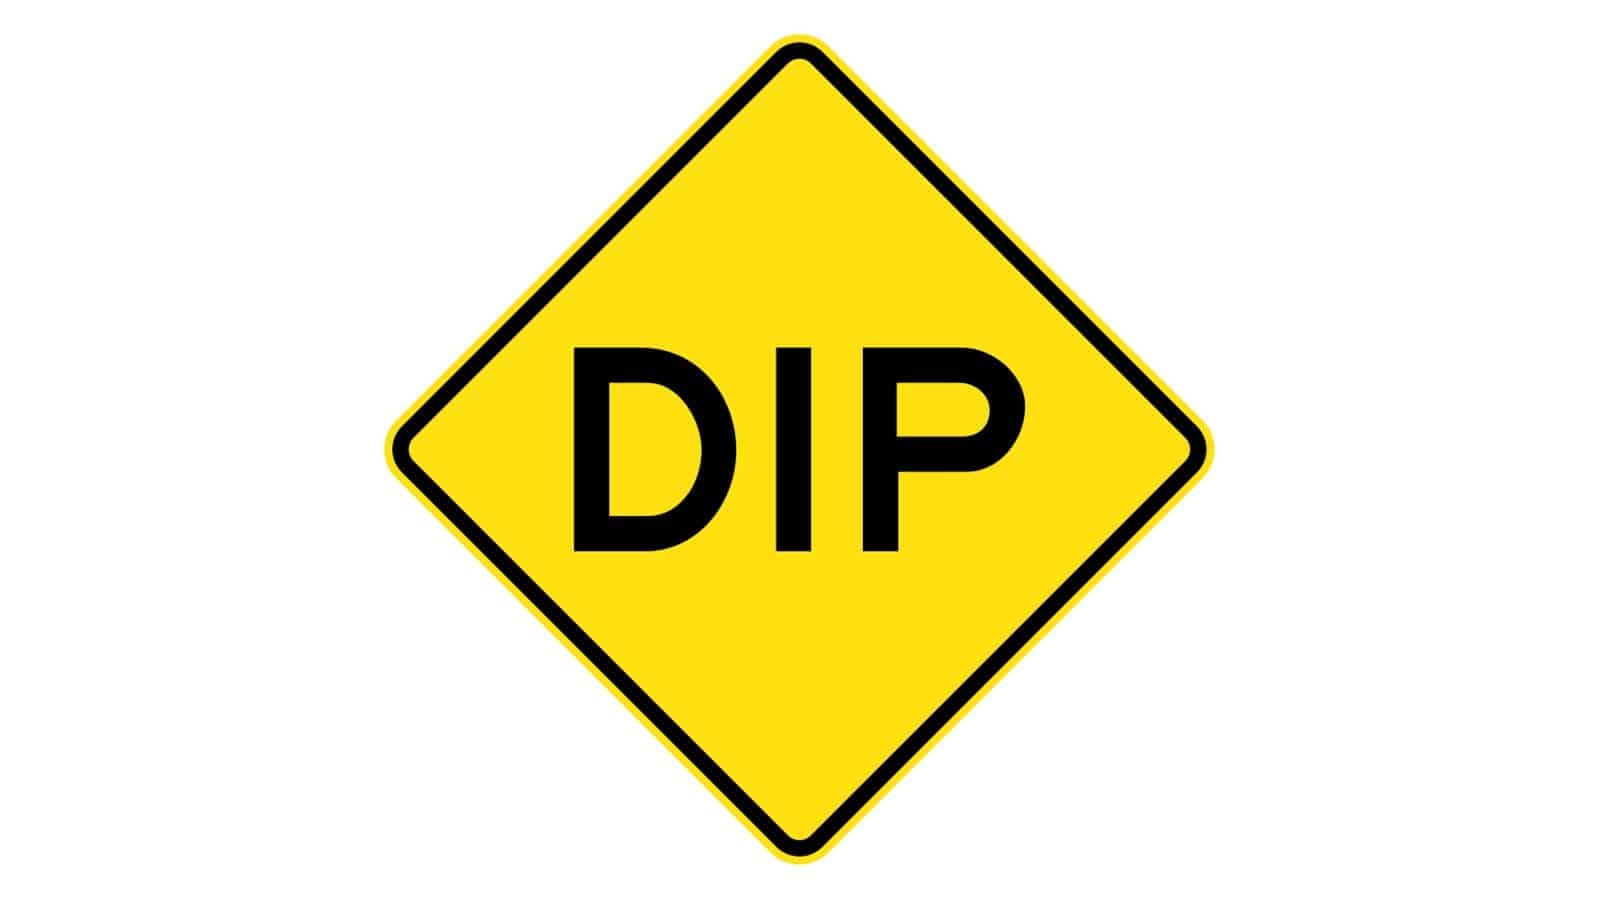
Dip Sign
The “Dip” sign alerts drivers to a dip in the road ahead, which may cause vehicles to bounce or jolt if not navigated carefully.
Where It Is Commonly Seen
• On roads with natural dips or low areas
• Near drainage ditches or flood-prone areas
• On rural or less maintained roads
Driving Tips
1. Reduce Speed: Monitor the speed limit to safely navigate the dip and avoid damage to your vehicle.
2. Stay Alert: Watch for any water accumulation or debris in the dip.
3. Maintain Control: Keep a firm grip on the steering wheel to maintain control as you pass through the dip.
4. Be Prepared: Be ready for a sudden change in road surface that may affect vehicle stability.
5. Use Caution at Night: Dips can be less visible in low light, so exercise extra caution when driving at night.
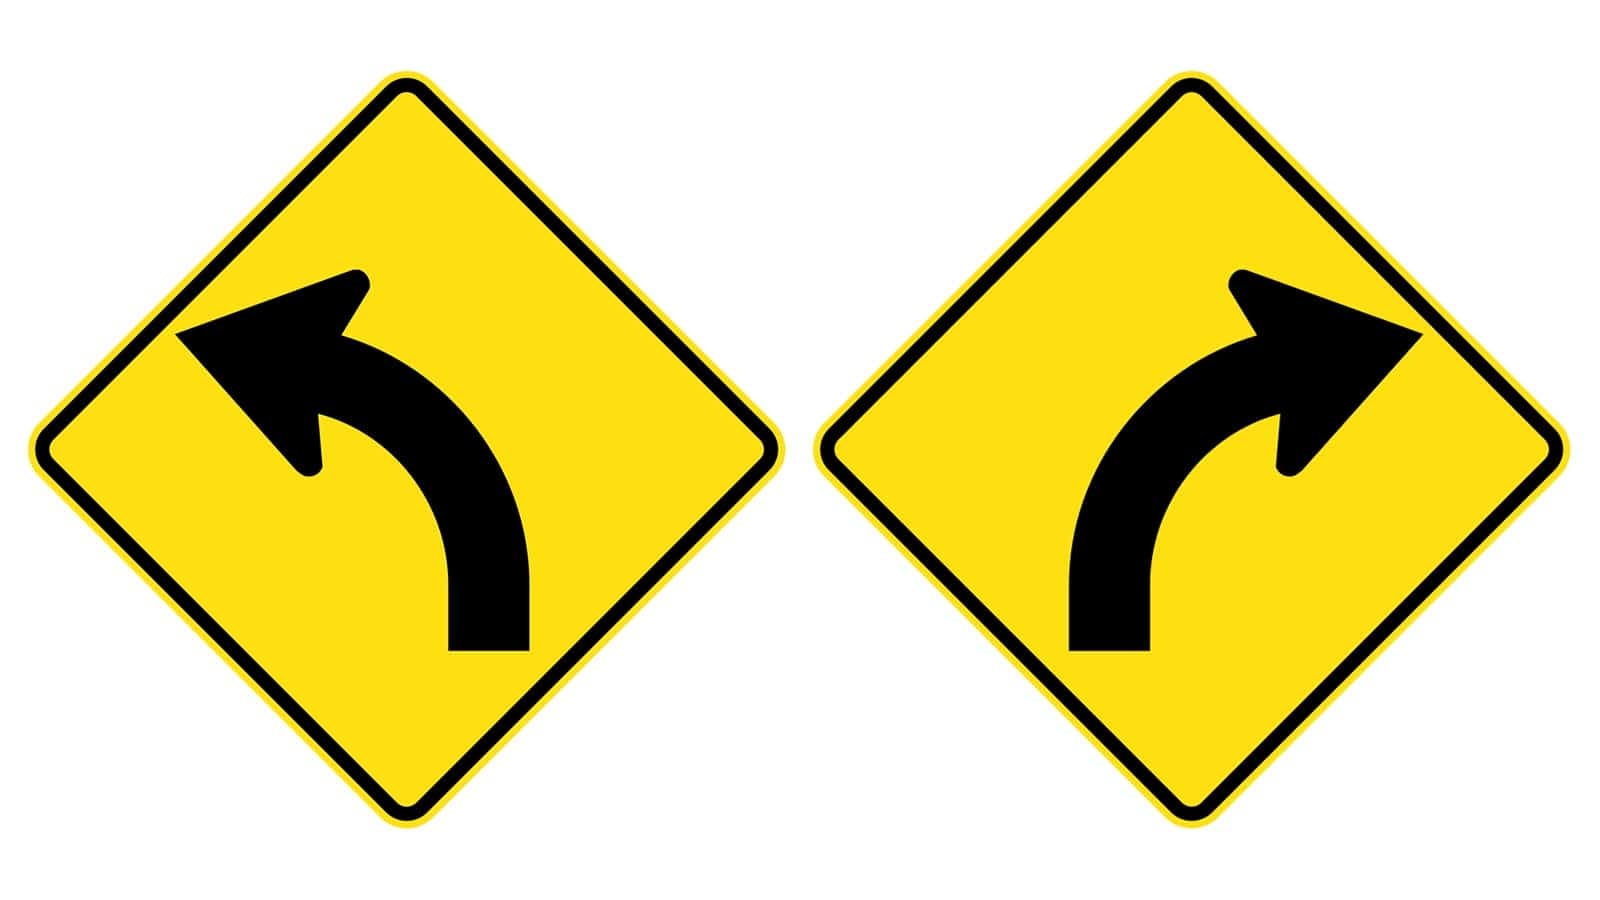
Curve to Left or Right Sign
These signs indicate a curve in the road ahead, directing drivers to slow down and be prepared to turn in the indicated direction.
Where It Is Commonly Seen
• On roads with sharp or significant curves
• Before winding or mountainous roads
• In areas where maintaining lane discipline is crucial
Driving Tips
1. Reduce Speed: Observe the speed limit before entering the curve to maintain control.
2. Follow the Curve: Steer smoothly and follow the path of the curve without sudden movements.
3. Stay in Your Lane: Ensure you stay within your lane, especially on narrow or winding roads.
4. Use Caution in Bad Weather: Wet or icy conditions can make curves more hazardous.
5. Observe the Road Ahead: Look ahead to anticipate the curve and adjust your driving accordingly.
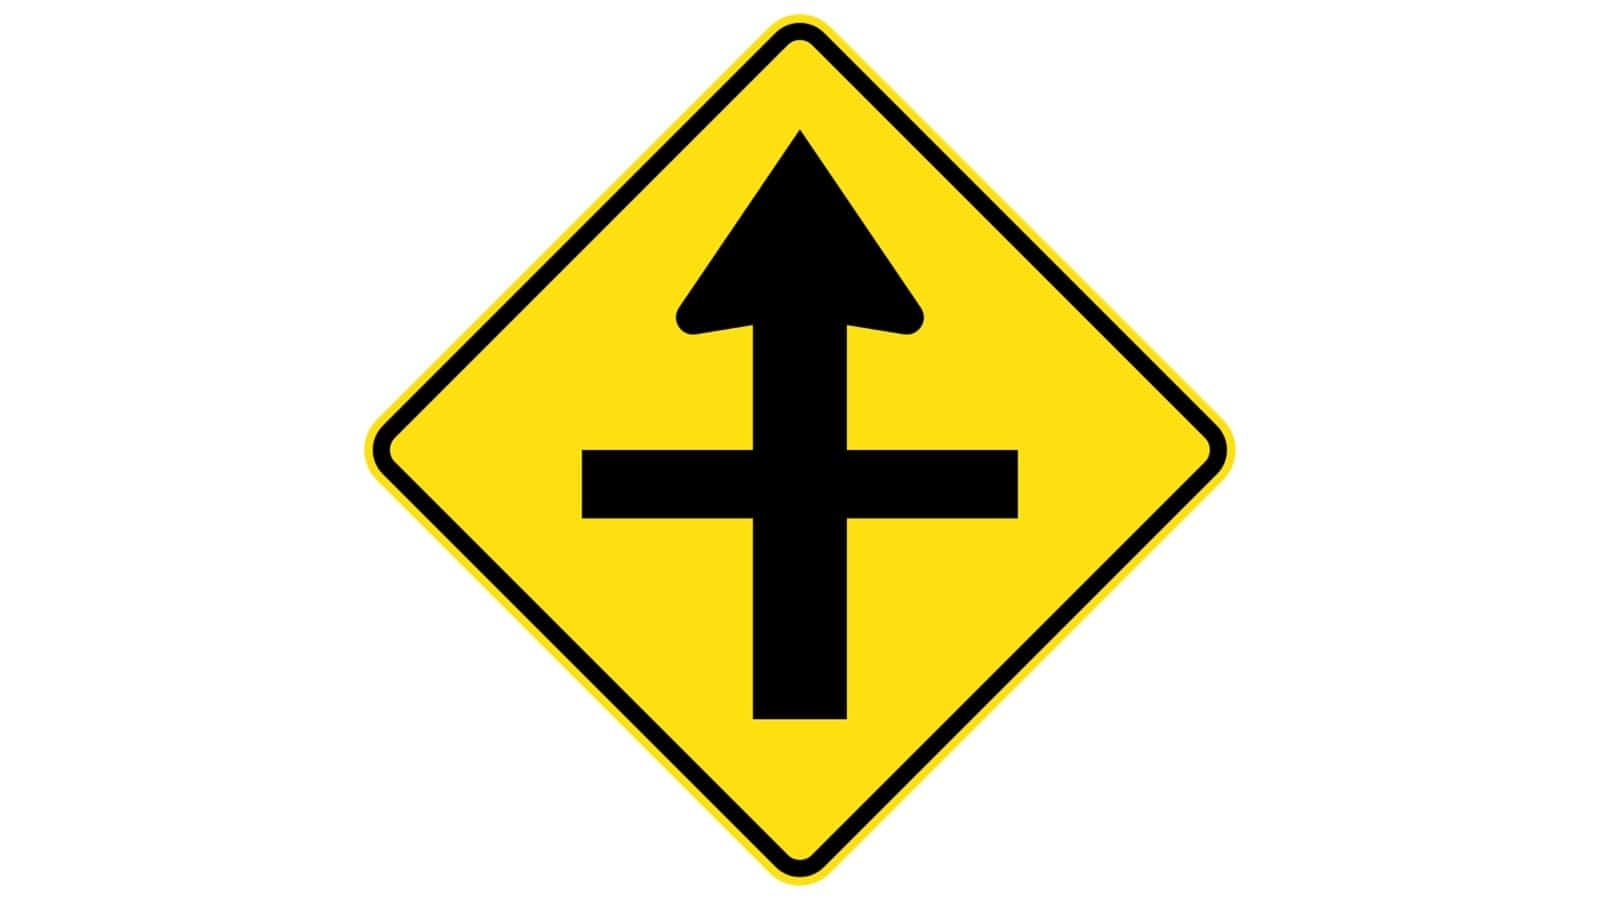
Crossroad Intersection Sign
This sign indicates that a crossroad intersection is ahead, where traffic can cross the main road from either direction.
Where It Is Commonly Seen
• At the approach to intersections where two roads cross at or near right angles.
• In rural or urban areas with intersecting roads.
Driving Tips
1. Reduce Speed: Approach the intersection with caution and observe your speed limit.
2. Observe Traffic: Look for other vehicles and pedestrians entering or crossing the intersection.
3. Yield Right of Way: Follow the rules of the road and yield to traffic as necessary.
4. Be Prepared to Stop: Be ready to stop if the intersection is controlled by stop signs or traffic lights.
5. Check All Directions: Ensure it is safe to proceed by checking left, right, and ahead for oncoming traffic.
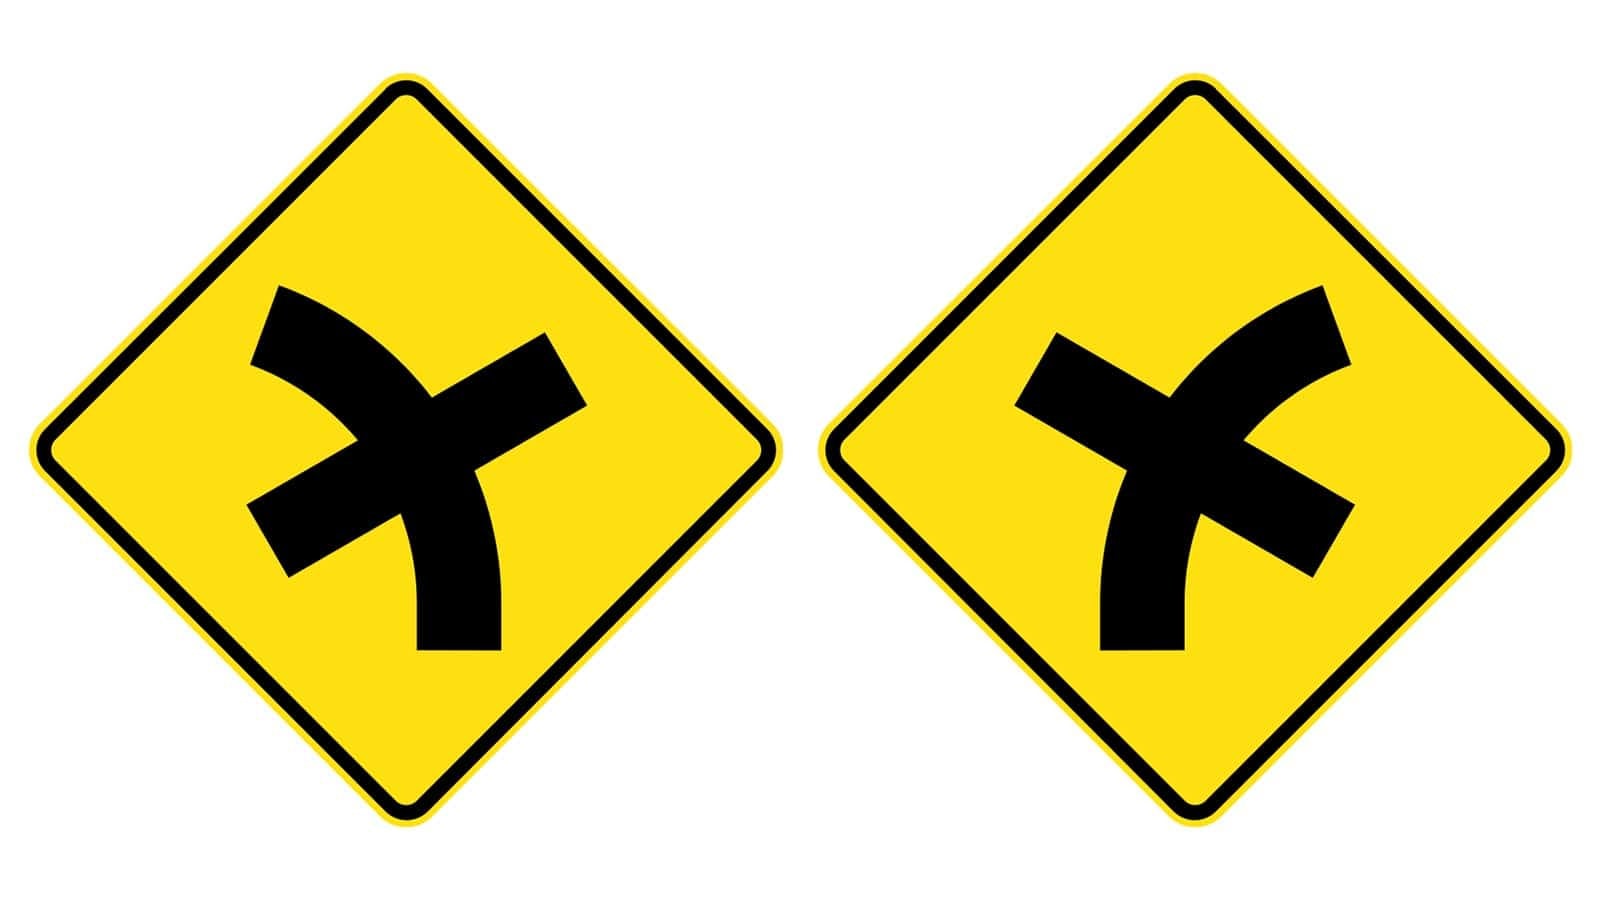
Crossroad Intersection on a Curve Sign
This sign indicates that a crossroad intersection is ahead on a curve, which could be either to the left or the right depending on the direction of the curve.
Where It Is Commonly Seen
• On roads where an intersection occurs along a curve, making visibility of the intersection potentially limited.
• In areas with winding roads or mountainous terrain.
Driving Tips
1. Reduce Speed: Approach the curve cautiously, observe the speed limit and reduce your speed to ensure you can safely navigate the curve and the intersection.
2. Observe Traffic: Be extra vigilant for vehicles entering or crossing the intersection, as they may be harder to see due to the curve.
3. Use Headlights: In low visibility conditions, such as fog or at night, use your headlights to increase visibility.
4. Yield Right of Way: Follow the standard rules of the road, yielding to oncoming traffic or vehicles already in the intersection.
5. Check for Signs: Look for additional signage or signals that may control the intersection, such as stop signs or traffic lights.
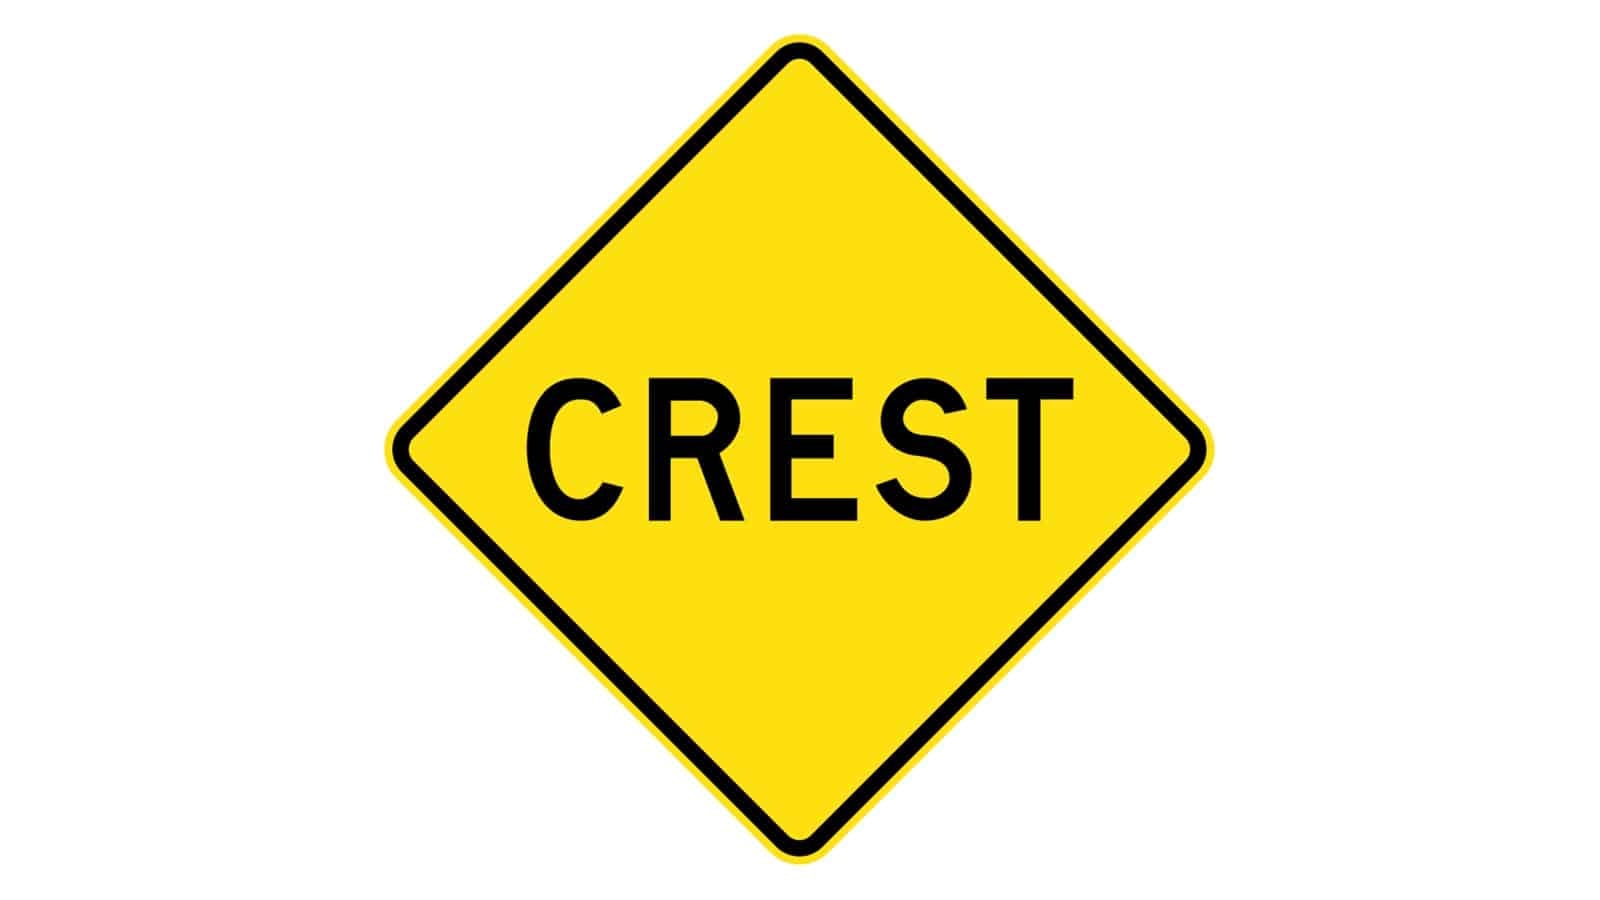
Crest Sign
This sign indicates the presence of a crest in the road ahead, warning drivers to be cautious as their view of the road beyond may be obstructed.
Where It Is Commonly Seen
• On hilly or mountainous roads
• Approaching steep hills or sudden inclines
• In rural or remote areas with undulating terrain
Driving Tips
1. Reduce Speed: Observe the speed limit as you approach the crest to maintain control.
2. Be Prepared to Stop: There may be hidden hazards or slow-moving vehicles just beyond the crest.
3. Stay in Your Lane: Maintain your lane position to avoid potential head-on collisions.
4. Use Headlights: If visibility is poor, turn on your headlights to ensure you are seen by other drivers.
5. Observe the Road Ahead: Anticipate the crest and adjust your driving accordingly.
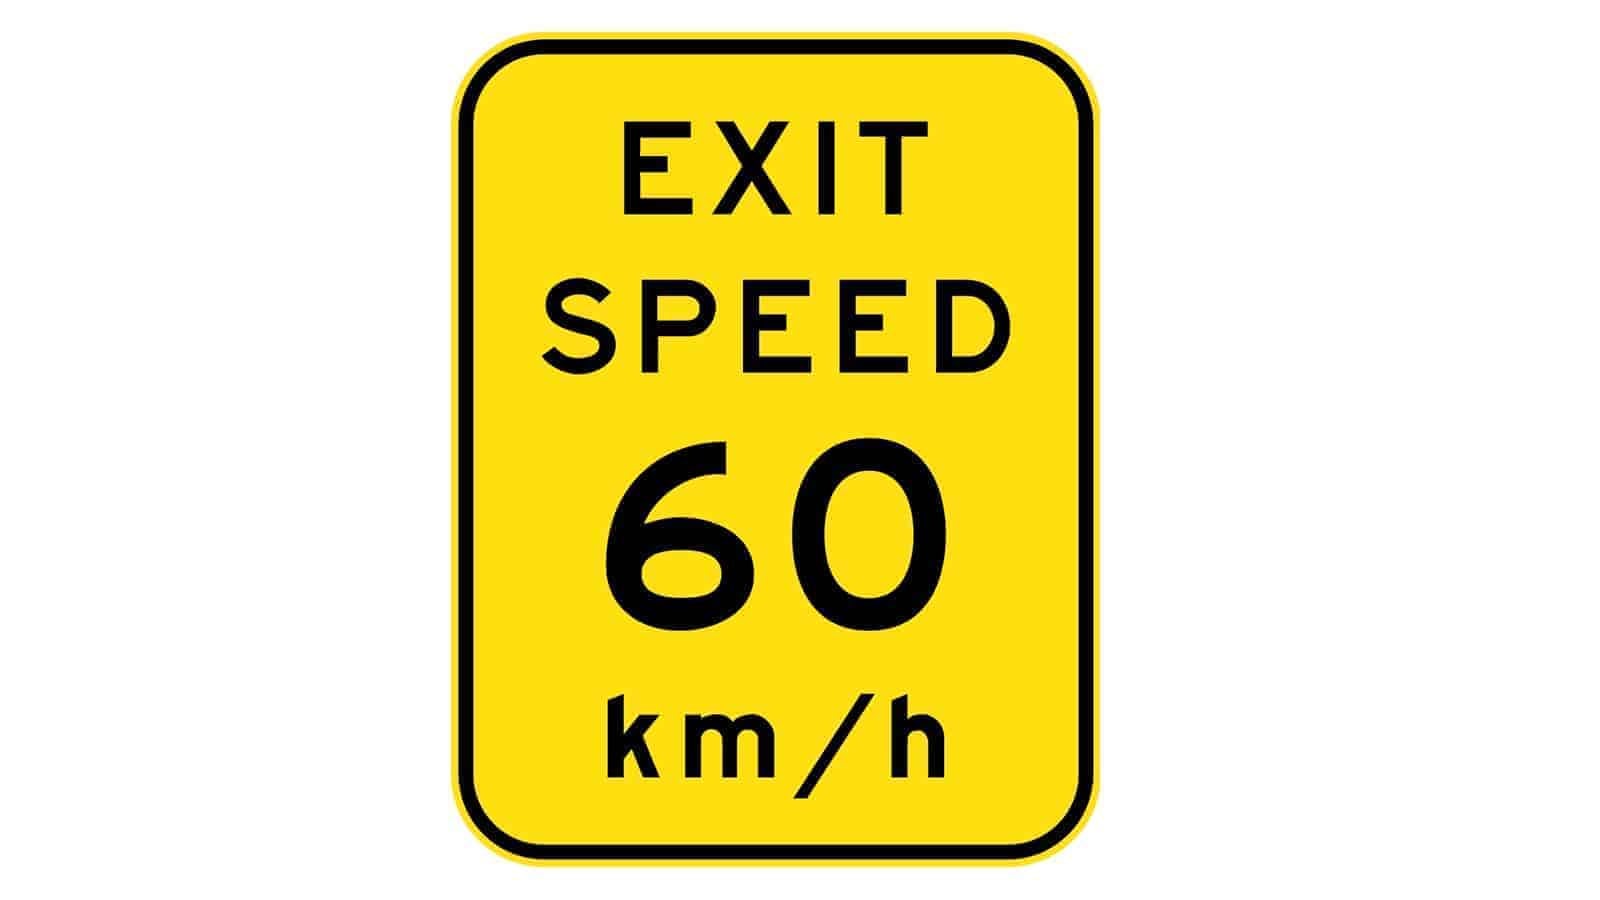
Advisory Exit Speed Sign
This sign indicates the recommended maximum speed at which drivers should exit a motorway or main road to ensure safety.
Where It Is Commonly Seen
• At motorway exit ramps
• At exits from major roads or highways
• Approaching roundabouts or sharp turns off main roads
Driving Tips
1. Follow the Speed Limit: Adhere to the indicated exit speed limit to safely navigate the exit ramp.
2. Prepare in Advance: Start reducing your speed well before the exit to avoid sudden braking.
3. Be Aware of Traffic: Check for traffic around you and signal your intent to exit.
4. Stay in Your Lane: Maintain lane discipline and avoid abrupt lane changes.
5. Adjust for Conditions: In adverse weather or poor visibility, consider reducing speed further for added safety.
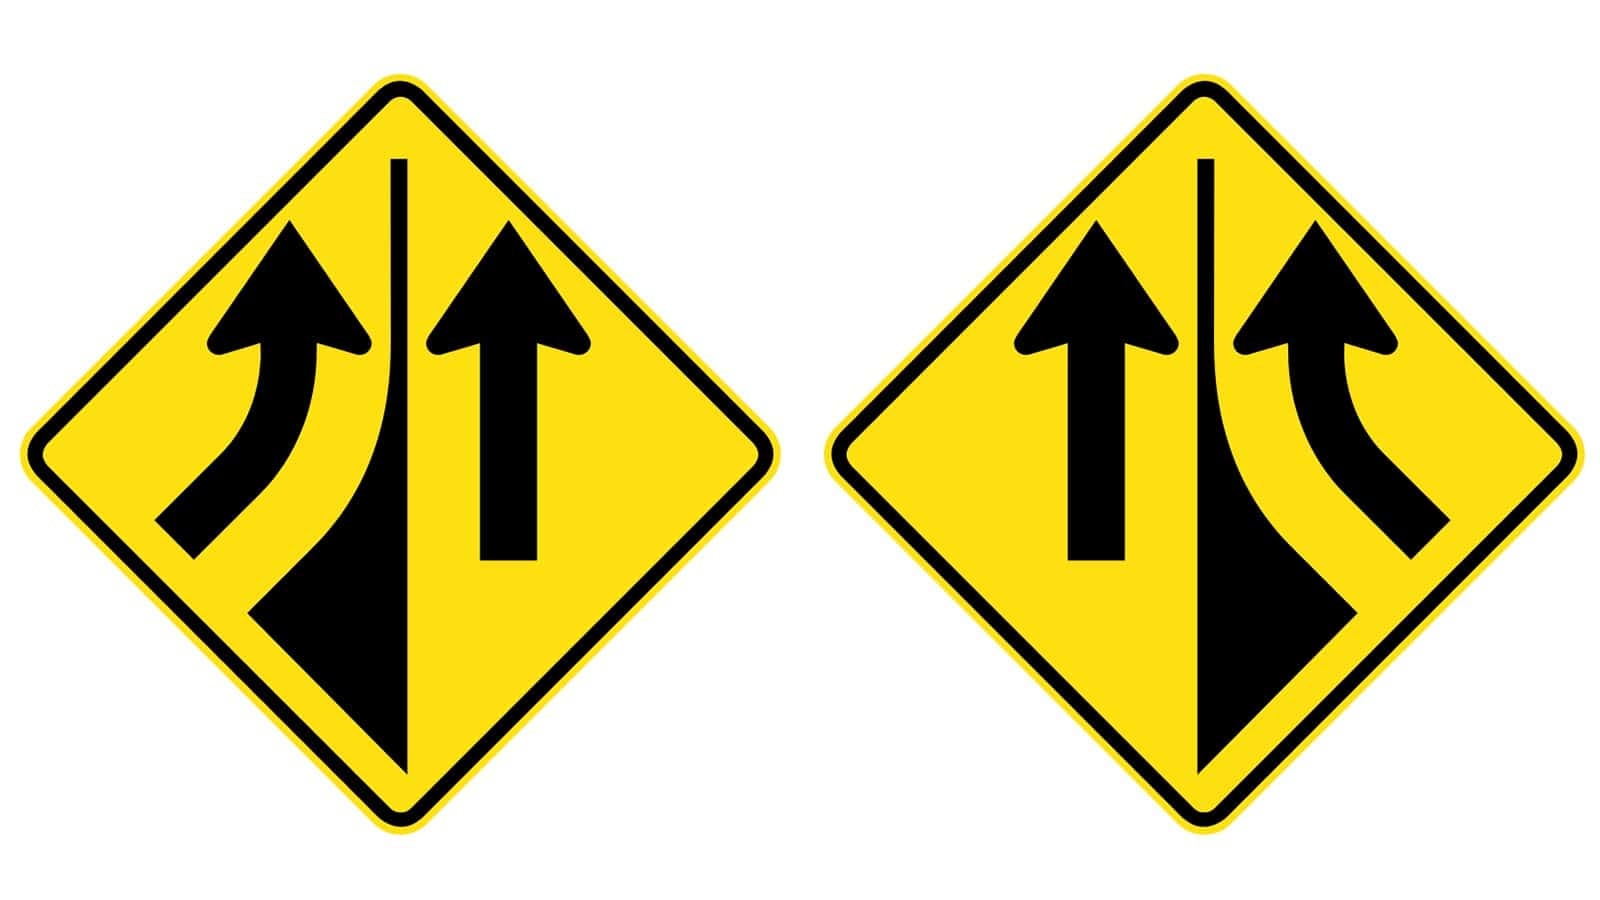
Added Lane Sign
These signs indicate the addition of a new lane on the road, allowing for smoother merging and traffic flow.
Where It Is Commonly Seen
• On highways where a new lane is added
• Approaching motorway interchanges where an added lane sign is a must.
• Near road construction zones where temporary lanes are created
Driving Tips
1. Observe the Lane Addition: Be aware of the new lane and adjust your position on the road accordingly.
2. Merge Smoothly: If merging into the new lane, use your indicators and check your blind spots especially when you see this added lane sign.
3. Stay in Your Lane: If continuing straight, maintain your lane position and be cautious of vehicles merging.
4. Adjust Speed: Match your speed limit with the traffic flow to ensure a smooth transition.
5. Stay Alert: Watch for any changes in traffic patterns and be prepared for potential merging vehicles.
Route Markers
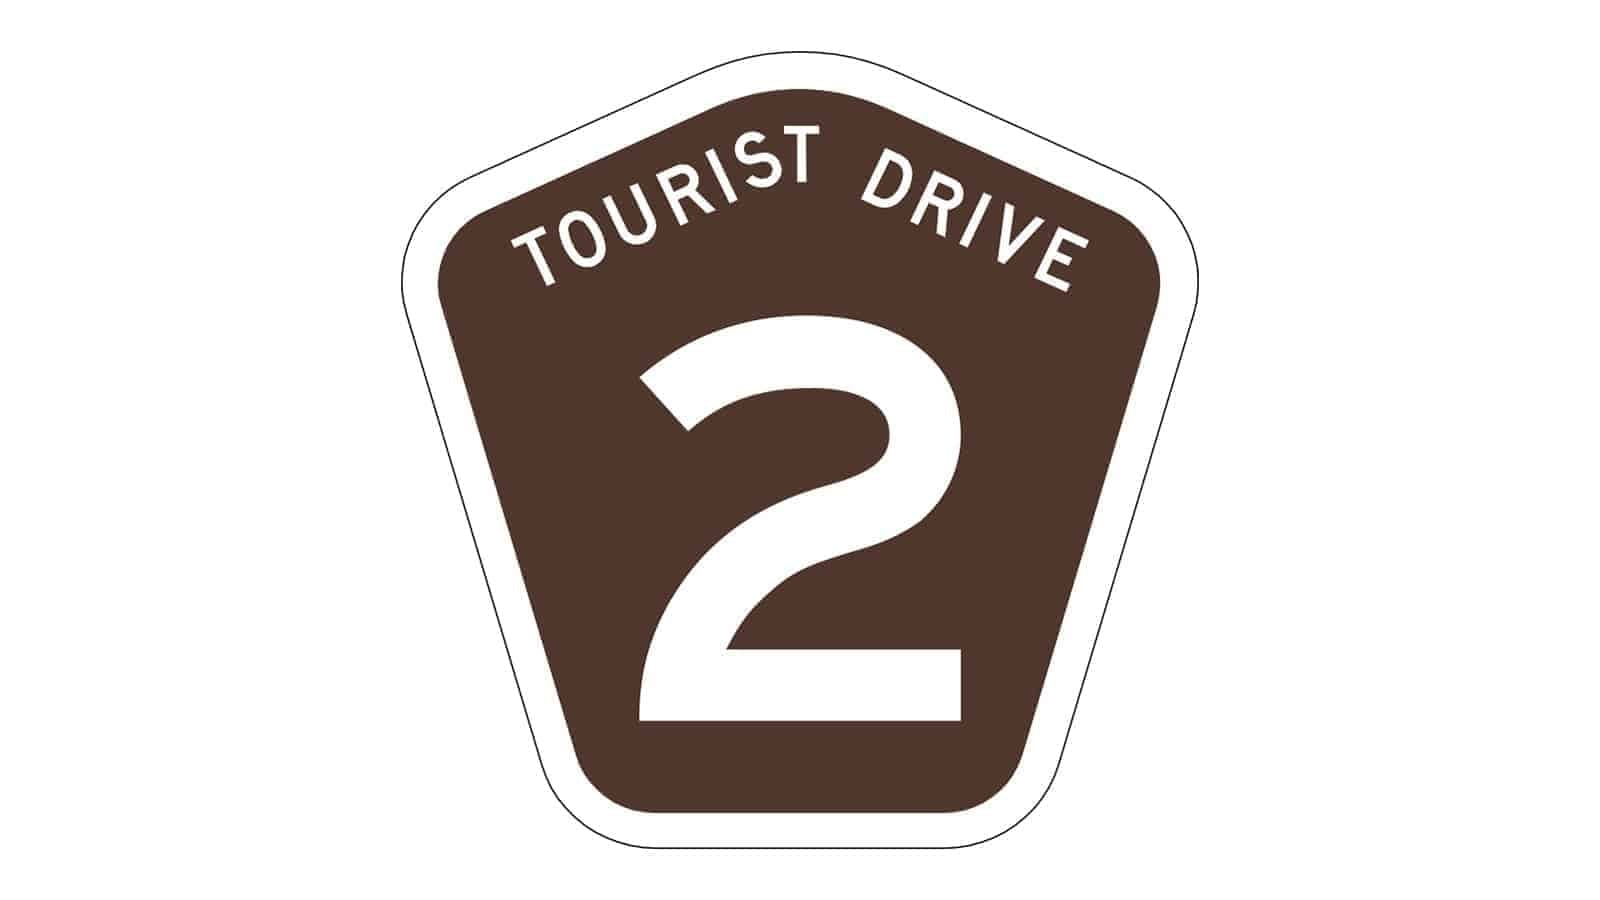
Tourist Drive Marker
This sign indicates a designated tourist drive, guiding travellers through scenic or historically significant areas.
Where It Is Commonly Seen
• Along routes with notable landmarks or natural beauty
• In regions promoting tourism
• Near heritage sites and cultural attractions
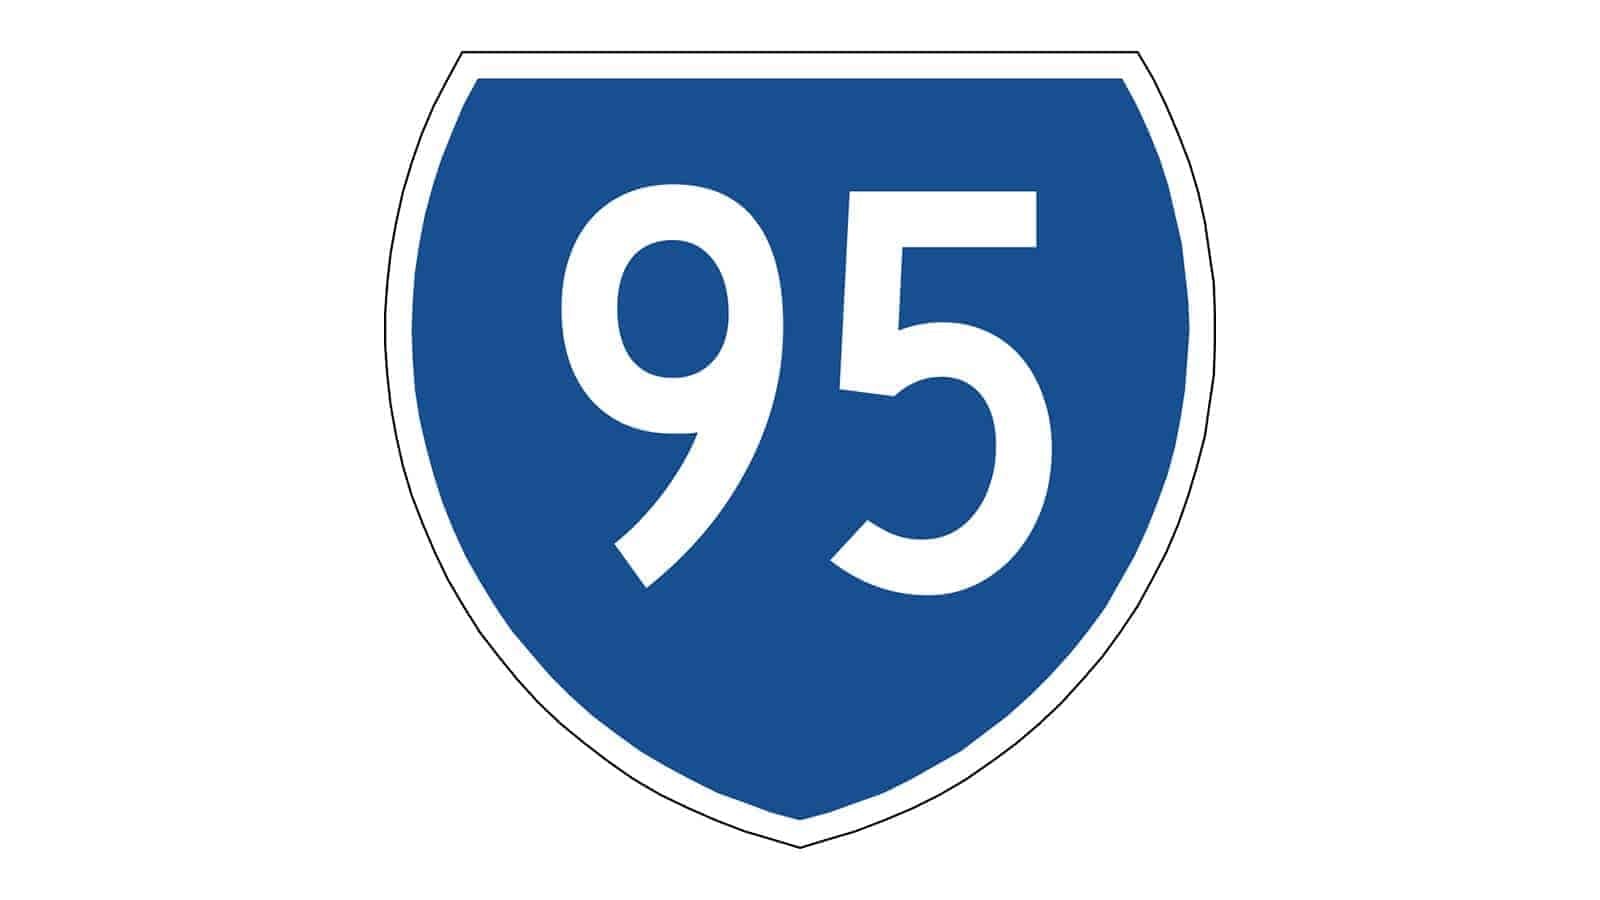
State Route Marker
This sign indicates a state route, a significant road that is part of the state highway system.
Where It Is Commonly Seen
• On major roads that are part of the state highway network
• At intersections and along routes within the state
• Near state borders to indicate the continuation of the route
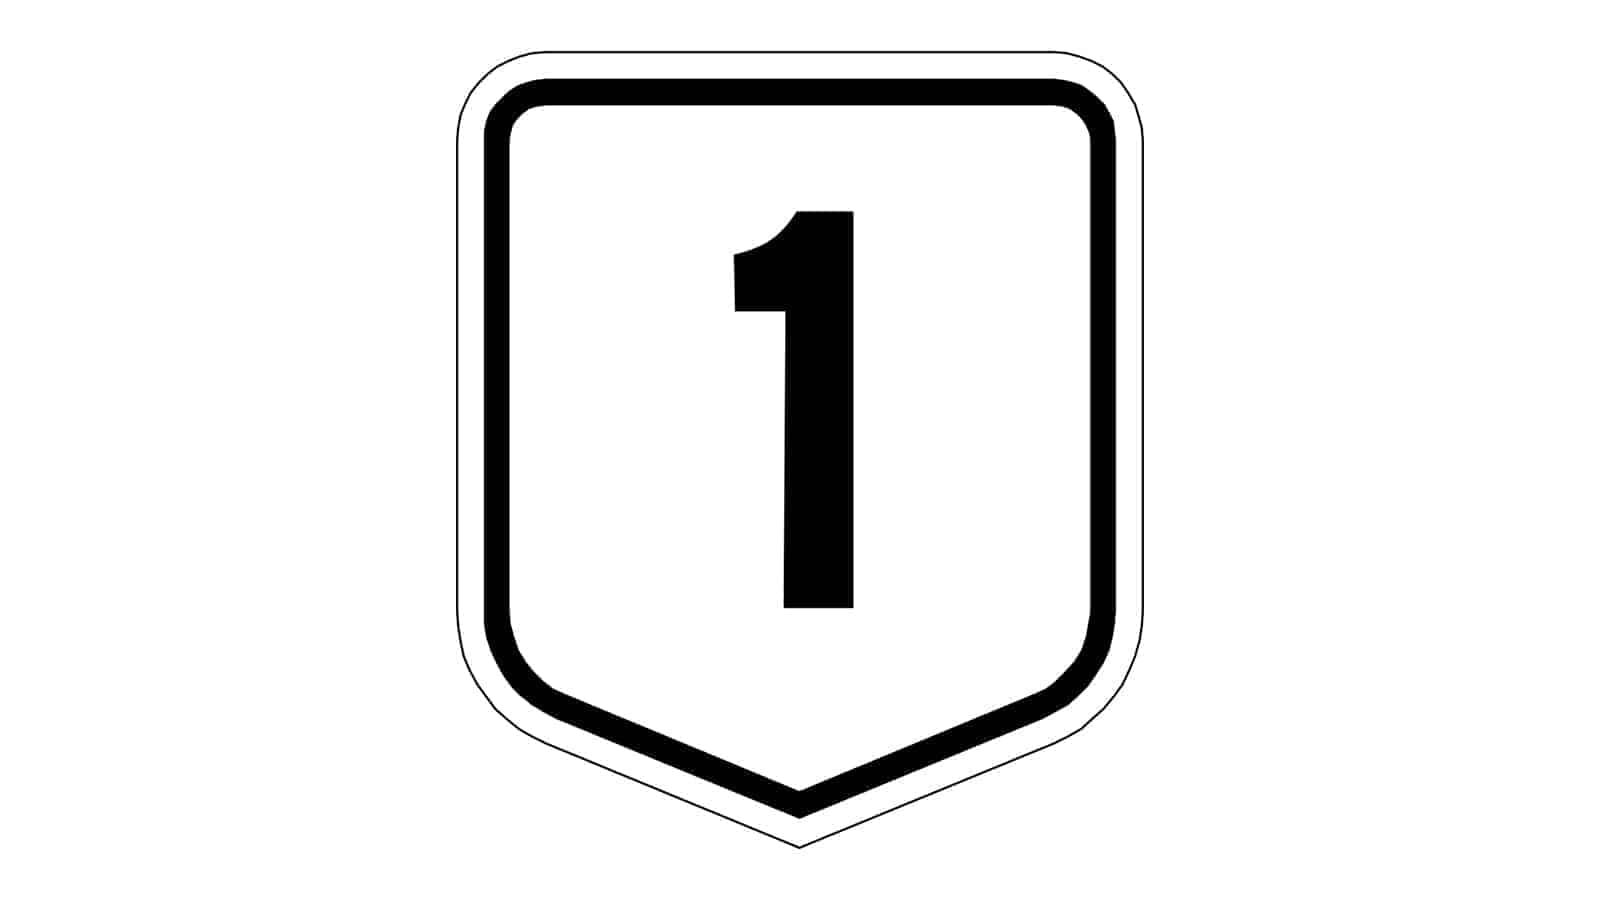
National Route Marker
This sign indicates a national route, which is a major road forming part of the country’s national highway system.
Where It Is Commonly Seen
• On major highways and interstates that are part of the national network
• At intersections and along routes that cross state or regional borders
• In areas where long-distance travel is common
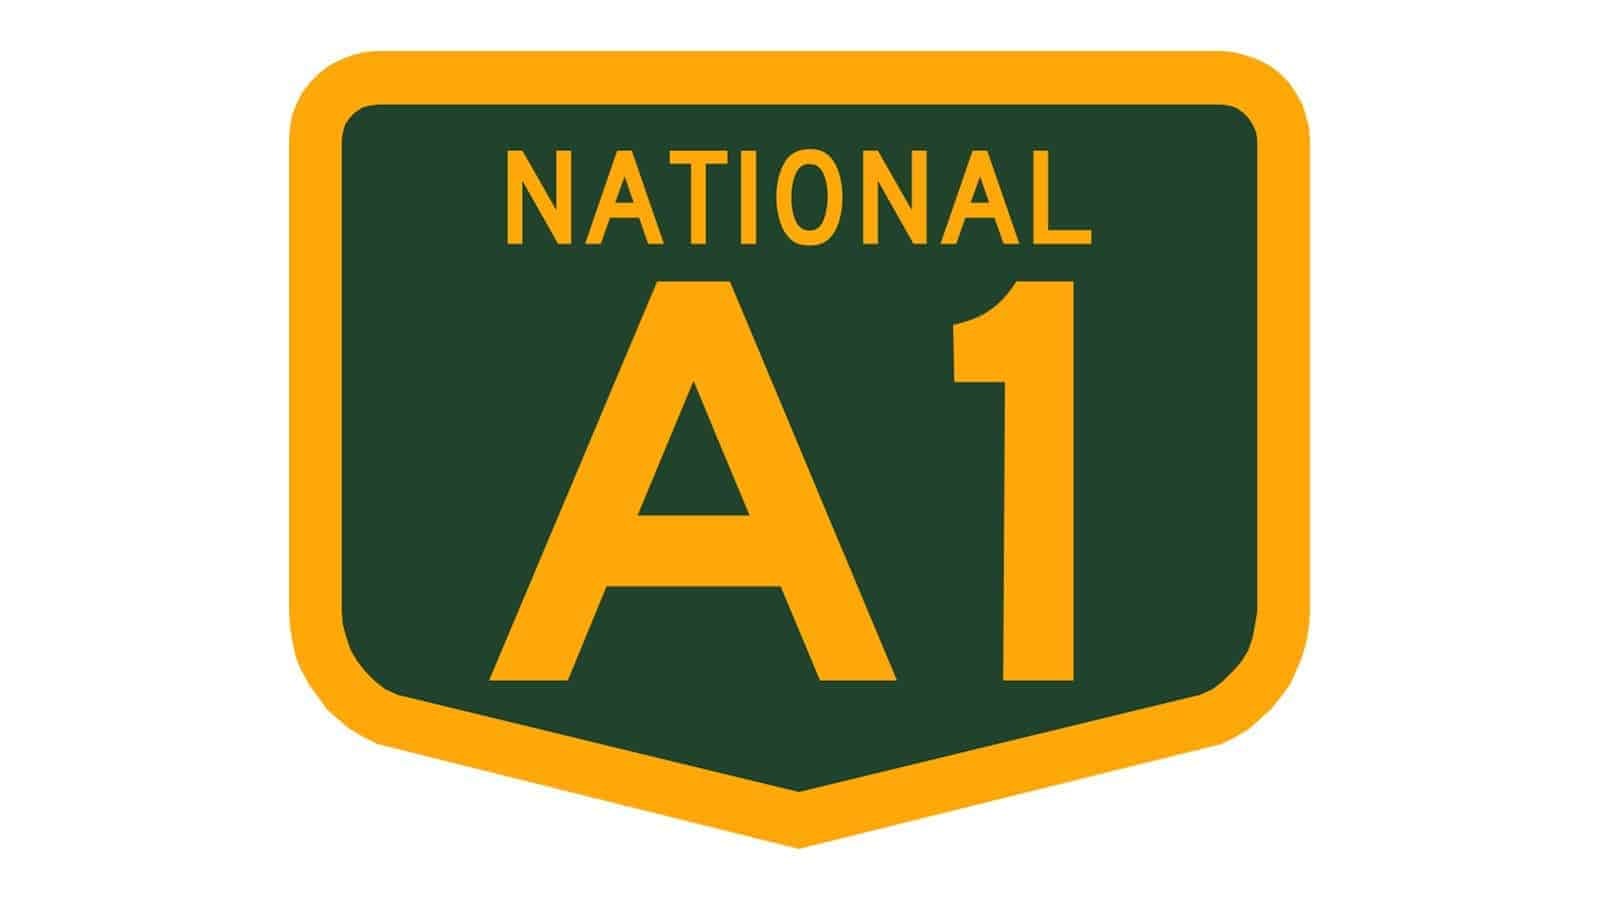
National Highway Marker
This sign indicates a national highway, which is a major road forming part of the country’s primary highway network.
Where It Is Commonly Seen
• On major highways and interstates that are part of the national network
• At intersections and along routes that facilitate long-distance travel
• In areas connecting major cities and regions
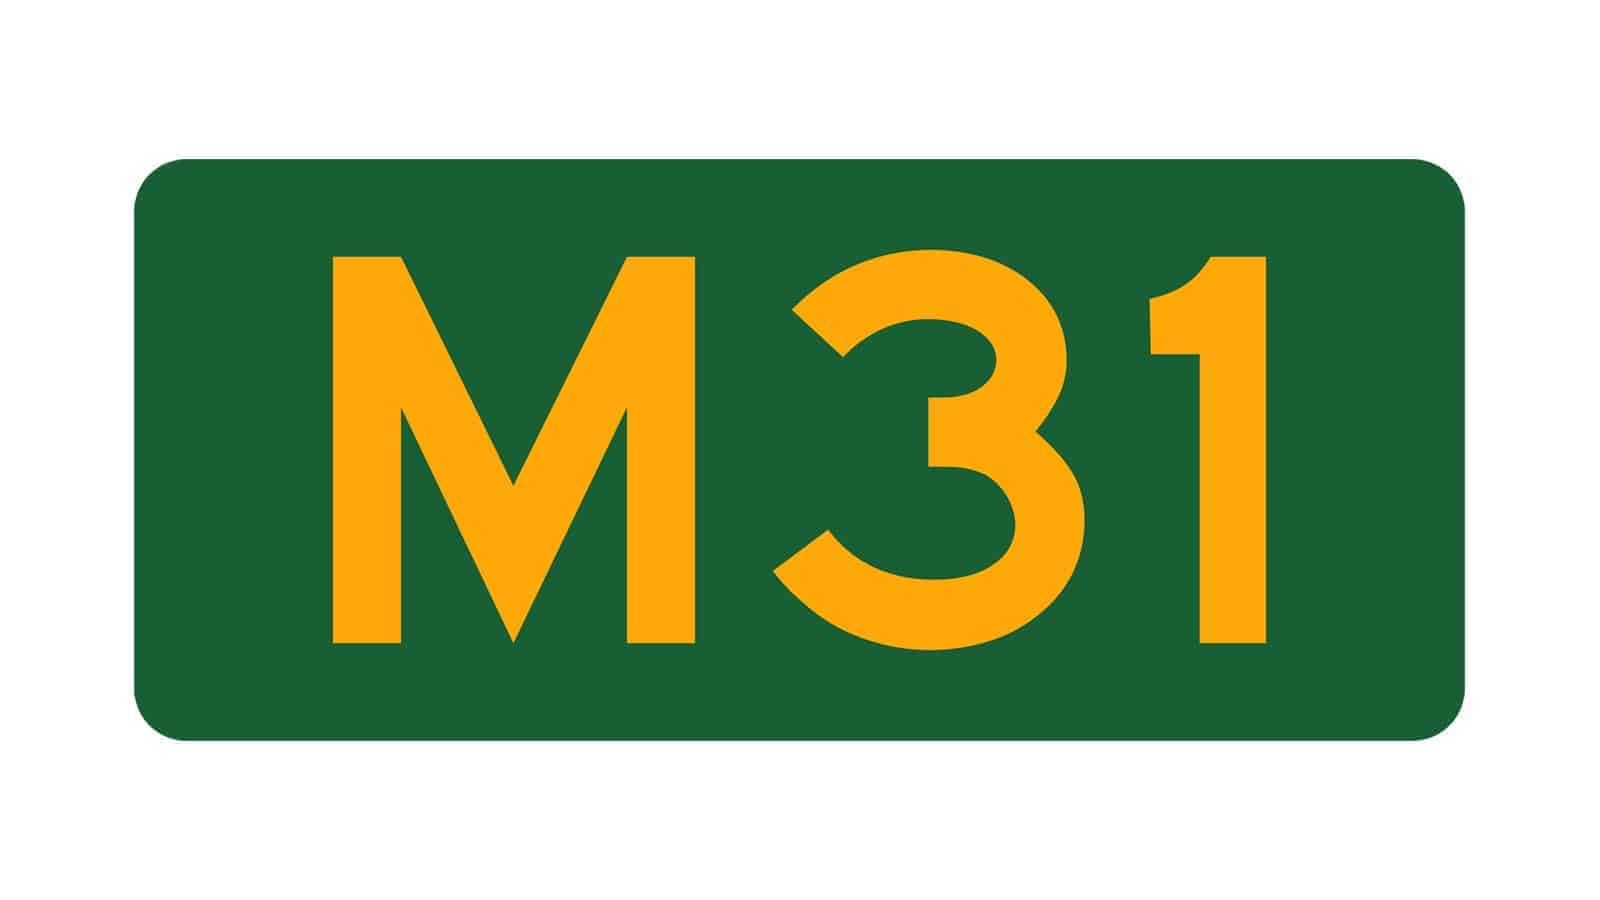
Alphanumeric Route Marker
This sign indicates an alphanumeric route, combining letters and numbers to designate a specific road or highway within a network.
Where It Is Commonly Seen
• On highways and main roads that are part of a larger, organized road system
• At intersections and along routes to help with navigation
• In areas with extensive road networks requiring detailed signage
Guide Signs
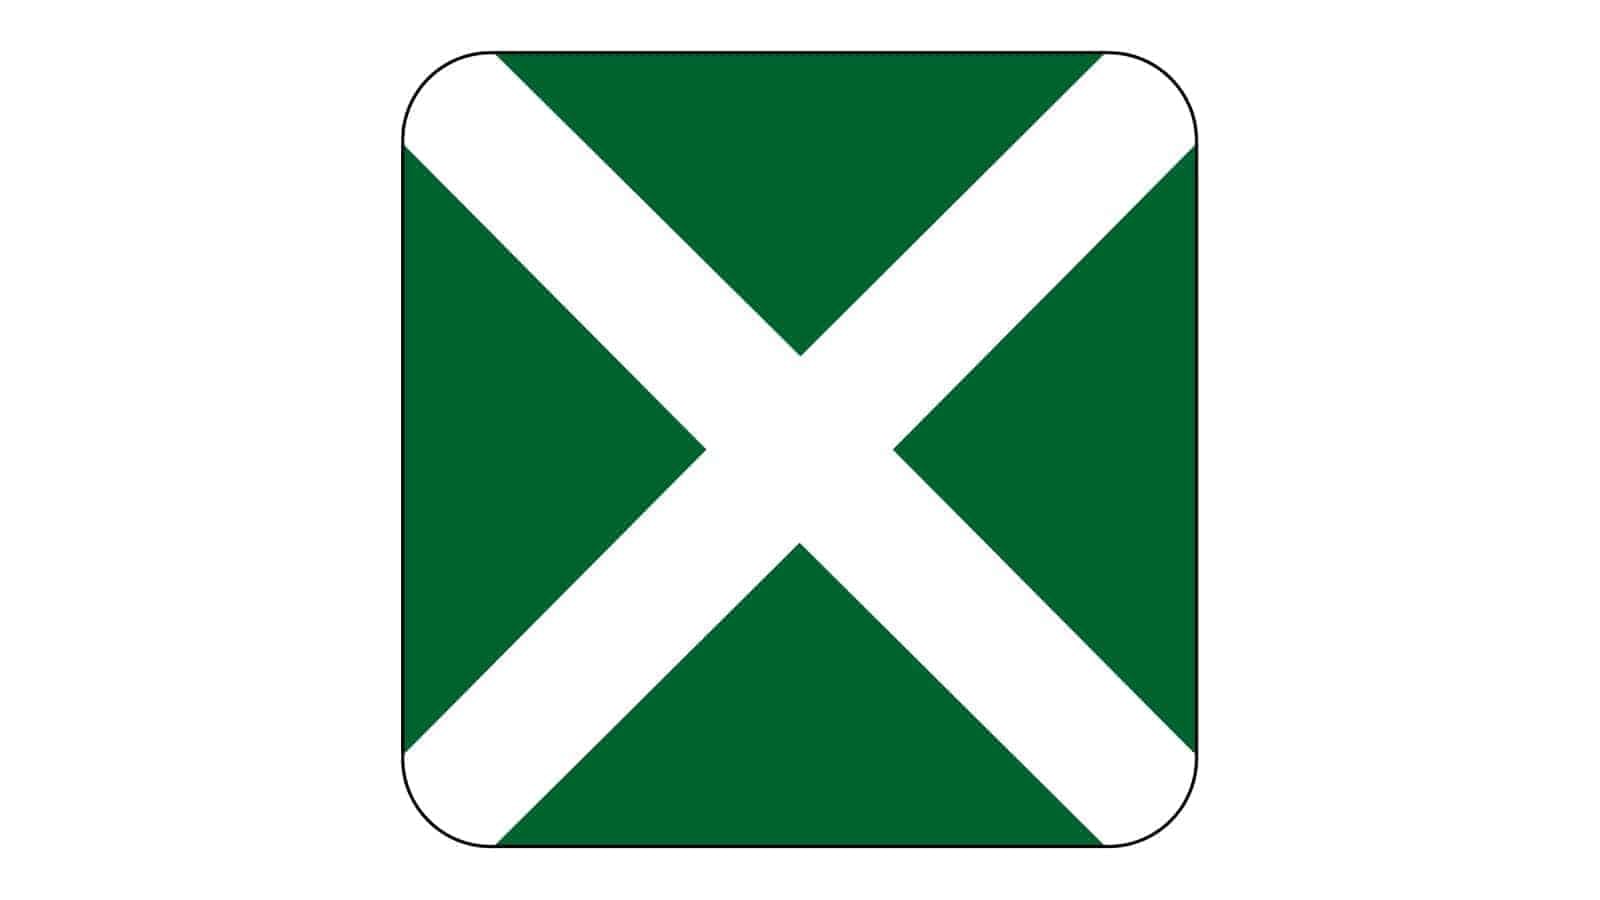
Emergency Median Crossing Sign
This sign indicates a designated area where emergency vehicles can cross the median on a divided highway.
Where It Is Commonly Seen
• On divided highways and motorways
• Near emergency services access points
• At intervals along major roads to facilitate quick response times
Driving Tips
1. Do Not Use: This crossing is strictly for emergency vehicles only. Do not use it under any circumstances.
2. Yield to Emergency Vehicles: If you see an emergency vehicle approaching, yield and allow them to use the crossing.
3. Stay Alert: Be aware of your surroundings and watch for emergency vehicles that may be using the crossing.
4. Maintain Lane Discipline: Stay in your lane and do not attempt to use the median crossing.
5. Report Misuse: If you witness a non-emergency vehicle using the crossing, report it to the authorities.
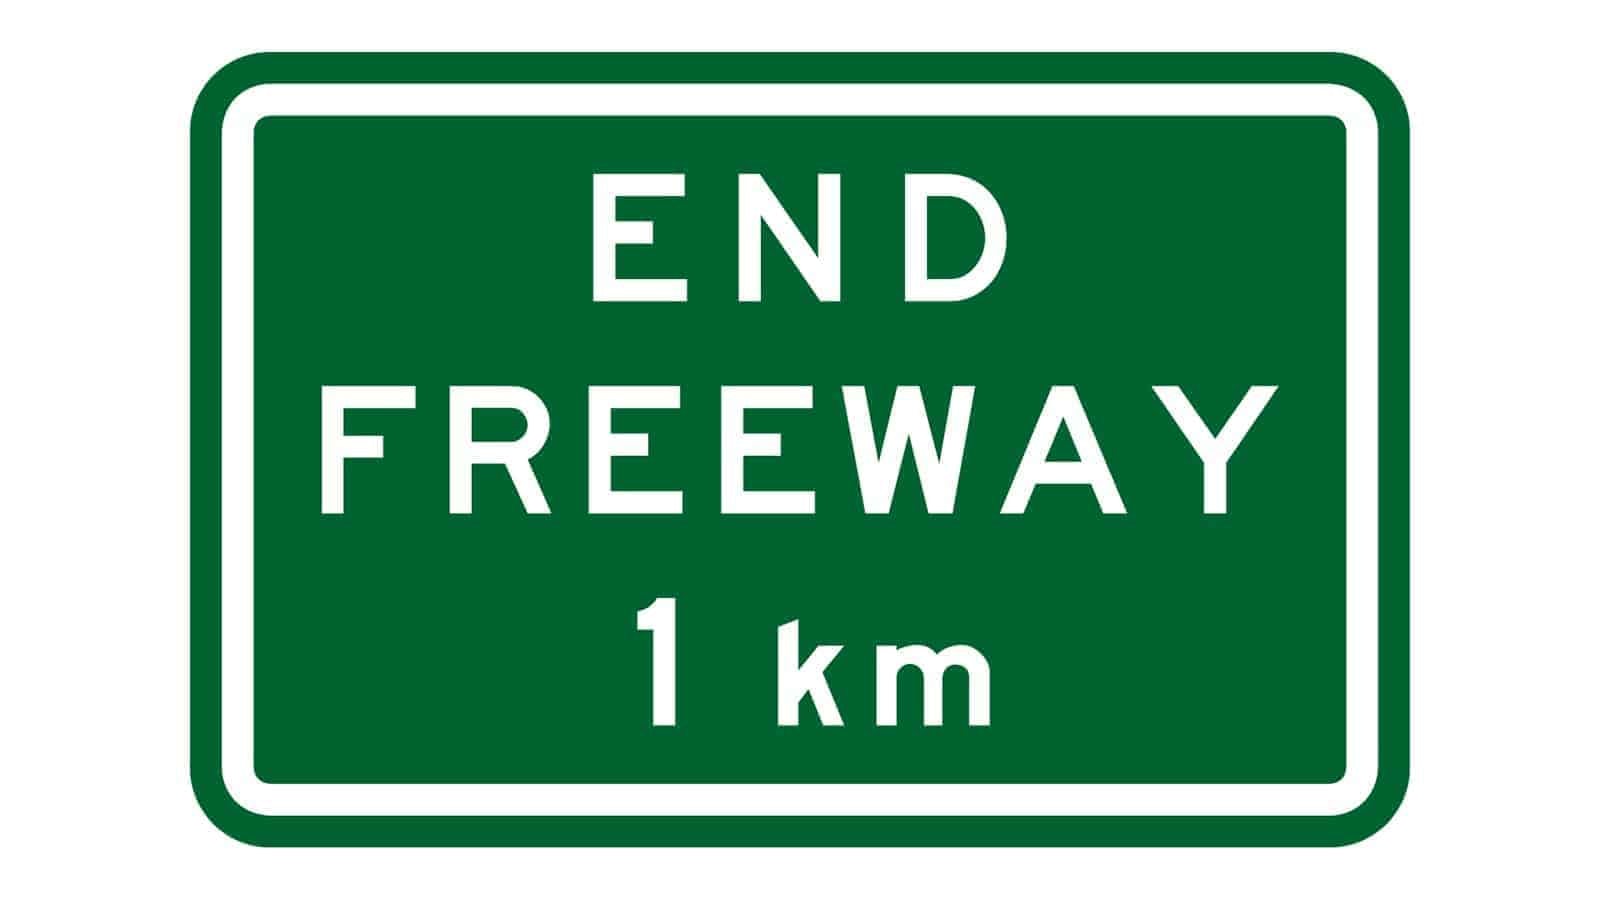
End Freeway Sign
This sign indicates that the freeway is ending in 1 kilometre, and drivers will soon transition to regular road conditions.
Where It Is Commonly Seen
• On motorways and freeways
• Before the end of high-speed road sections
• At transitions from controlled-access highways to surface streets
Driving Tips
1. Prepare to Slow Down: Begin to reduce your speed as you approach the end of the freeway.
2. Be Alert for Changes: Watch for changes in traffic patterns, signals, and intersections ahead.
3. Follow Local Traffic Laws: Adhere to the speed limits and rules of the road for the upcoming area.
4. Stay in Your Lane: Maintain lane discipline and be prepared for possible lane merges or exits.
5. Observe Road Signs: Pay attention to additional signage that may provide further instructions or warnings.
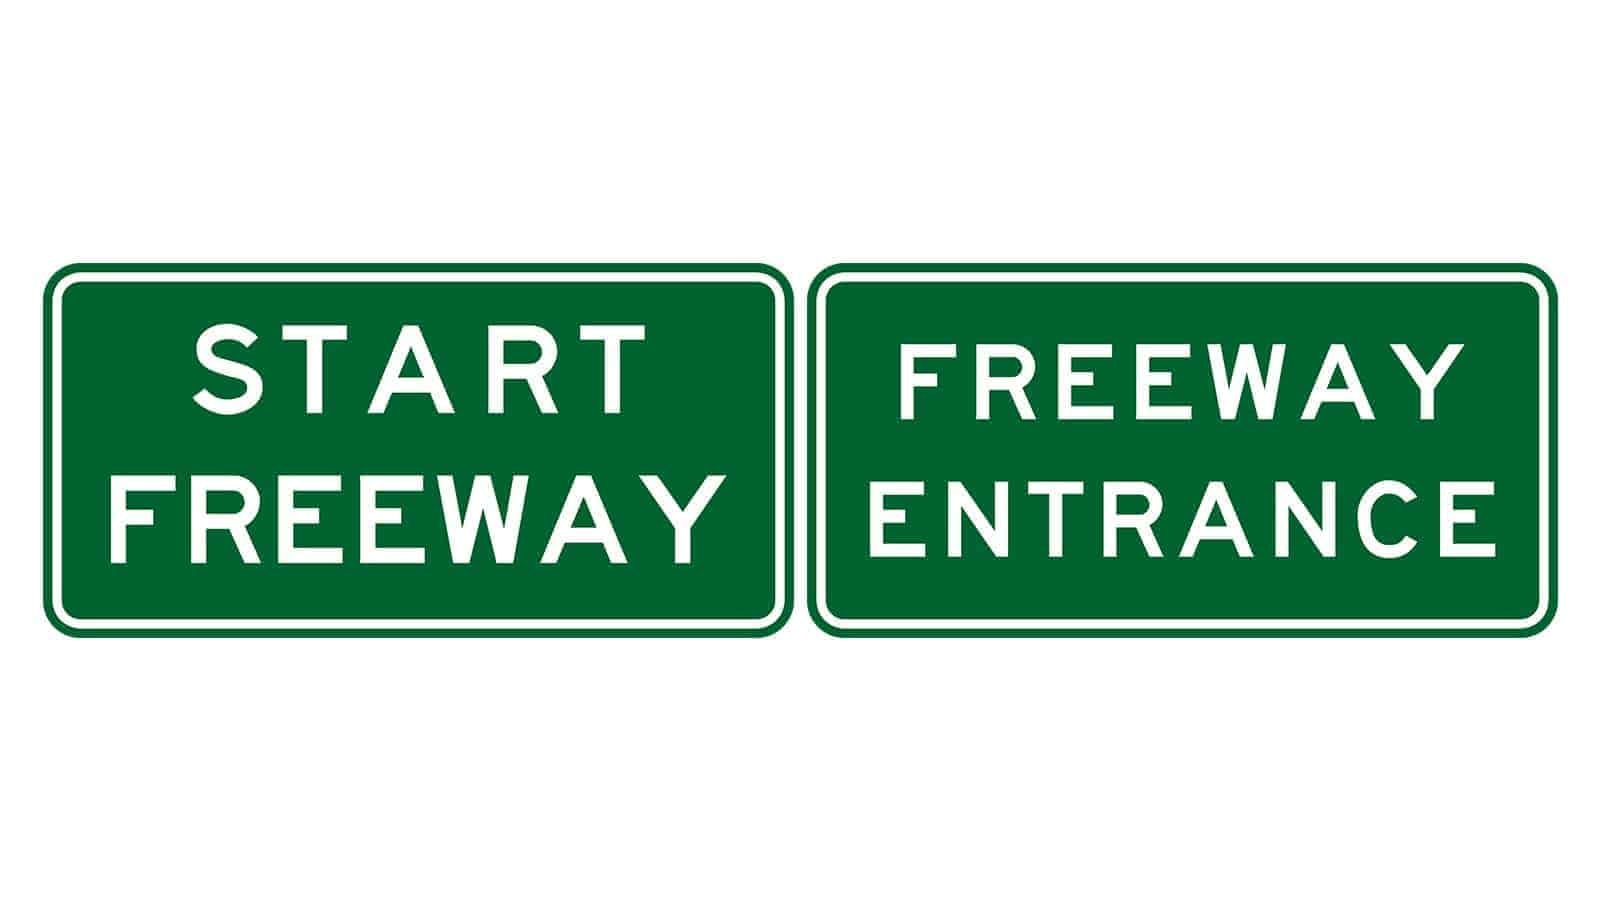
Start Freeway / Freeway Entrance Sign
These signs indicate the beginning of a freeway or an entrance to a freeway, signalling drivers to adjust their driving to freeway conditions.
Where It Is Commonly Seen
• At the on-ramp entrances to freeways
• At the beginning of controlled-access highways
• Before entering high-speed road sections
Driving Tips
1. Increase Speed: Accelerate to match the speed of the traffic already on the freeway.
2. Merge Safely: Use your mirrors and signal to merge into the freeway lanes without disrupting traffic flow.
3. Stay Alert: Be aware of the traffic around you and anticipate the movements of other vehicles.
4. Maintain Distance: Keep a safe distance between your vehicle and others to allow for smooth traffic flow.
5. Observe Road Signs: Pay attention to additional signage that may provide further instructions or indicate lane changes.
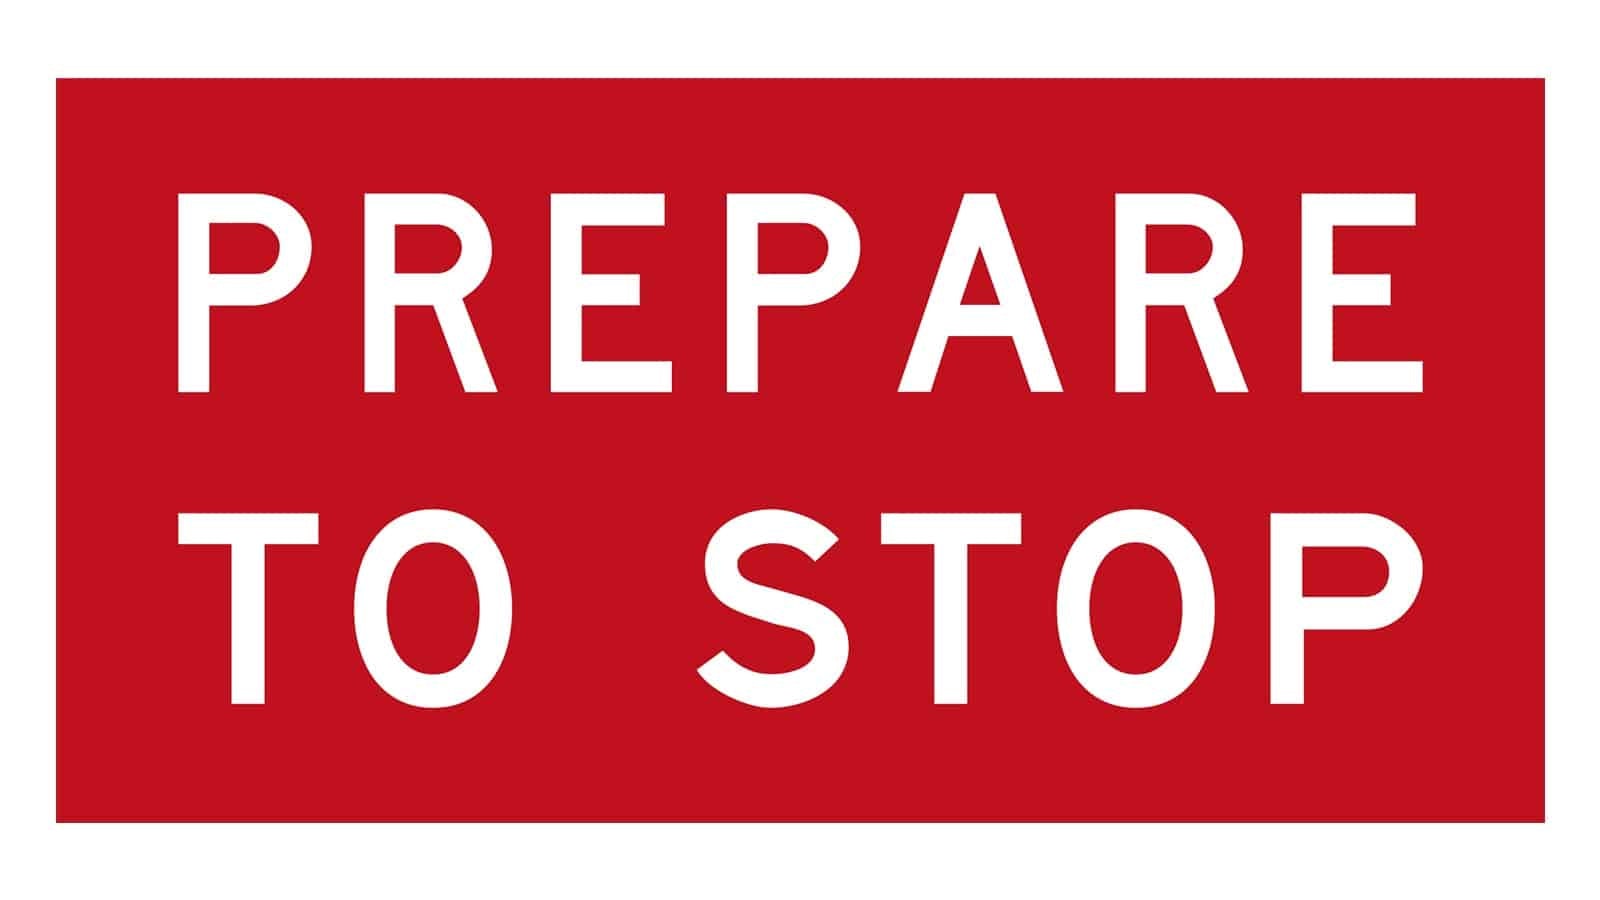
Prepare to Stop Sign
This sign indicates that drivers should be ready to stop due to upcoming traffic control or road conditions.
Where It Is Commonly Seen
• Before intersections with traffic signals
• Approaching construction zones
• Areas with potential traffic congestion
Driving Tips
1. Slow Down: Gradually reduce your speed to ensure you can stop safely if needed.
2. Stay Alert: Keep an eye on the road ahead and be aware of traffic conditions.
3. Observe Surroundings: Watch for changes in traffic flow or signals indicating a need to stop.
4. Maintain Distance: Ensure a safe following distance from the vehicle in front to allow for sudden stops.
5. Prepare to Brake: Have your foot ready to brake in case the traffic ahead comes to a sudden halt.
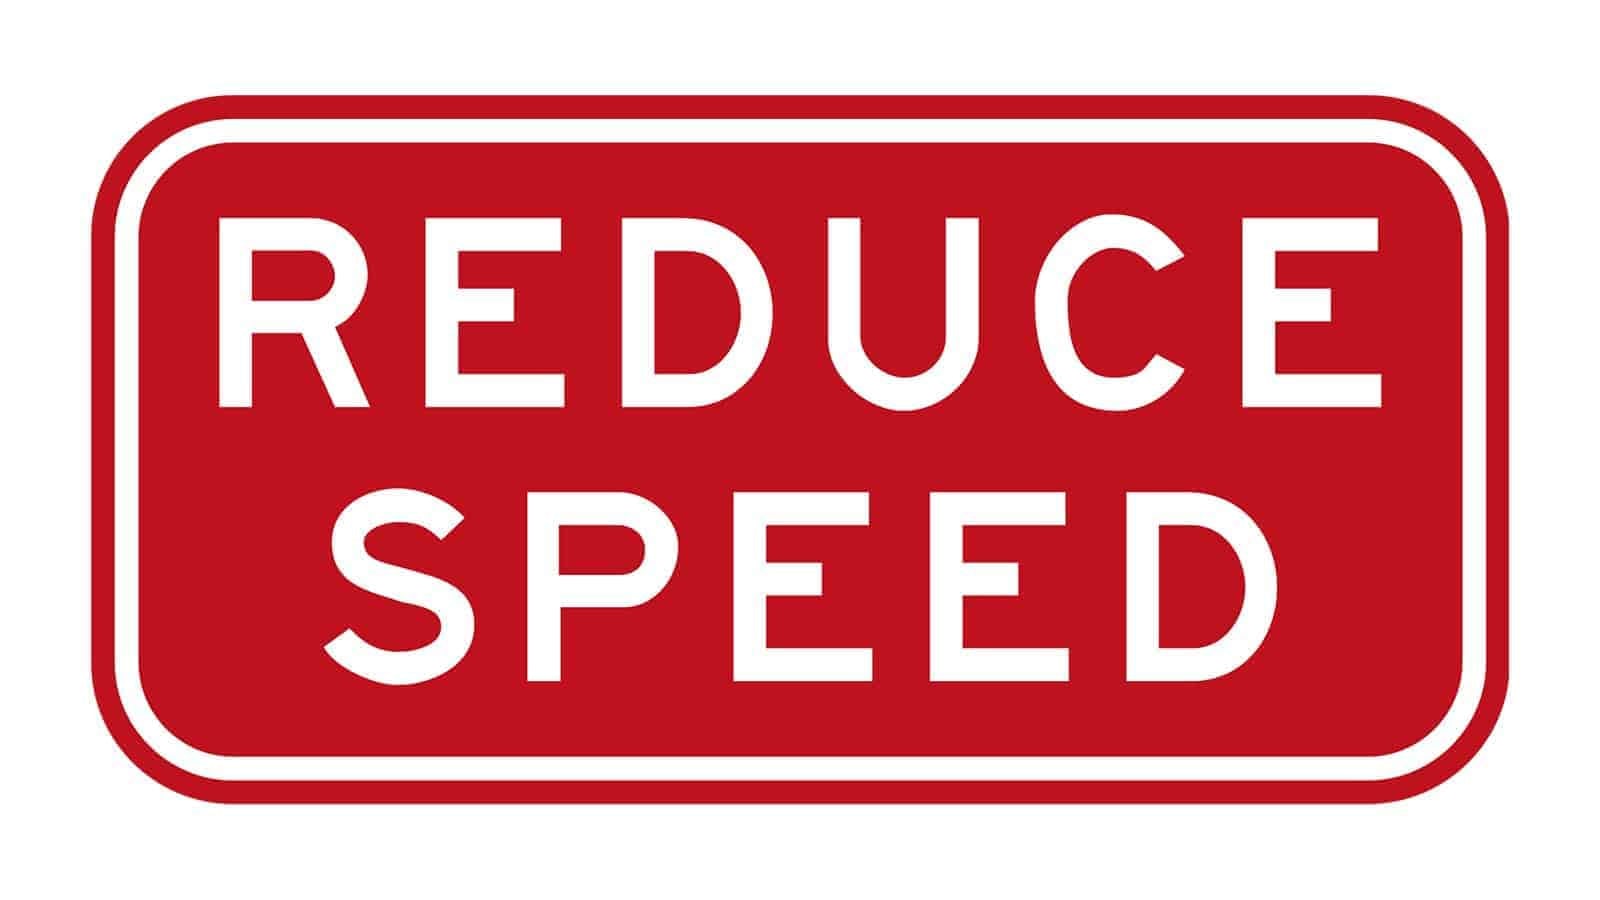
Reduce Speed Sign
This sign instructs drivers to slow down for safety due to changing road conditions or hazards ahead.
Where It Is Commonly Seen
• Near construction zones
• Approaching intersections or pedestrian crossings
• Before sharp curves or bends
• In areas with frequent wildlife crossings
Driving Tips
1. Slow Down Gradually: Begin reducing your speed as soon as you see the sign.
2. Stay Alert: Watch for any potential hazards or changes in road conditions.
3. Maintain Control: Ensure you have full control of the vehicle by avoiding sudden braking.
4. Increase Following Distance: Allow more space between you and the vehicle ahead.
5. Observe Speed Limits: Adhere to posted speed limits and any additional instructions.
Wrong Way – Go Back Sign
This sign alerts drivers that they are travelling in the wrong direction on a road or highway and need to turn around immediately.
Where It Is Commonly Seen
• At the beginning of one-way streets
• On highway off-ramps
• Near the entrances of restricted areas
• At the exit of driveways or private properties
Driving Tips
1. Stop Immediately: As soon as you see the sign, stop your vehicle to avoid going further in the wrong direction.
2. Turn Around Safely: Check for traffic and turn around safely, preferably at a point where you have enough visibility and space.
3. Look for Signs: After turning around, look for signs indicating the correct direction or route.
4. Stay Calm: If you’re unsure of your location, stay calm and use a GPS or map to find your way.
5. Report Issues: If you believe the sign placement is incorrect or confusing, report it to local traffic authorities.

Regulatory Signs
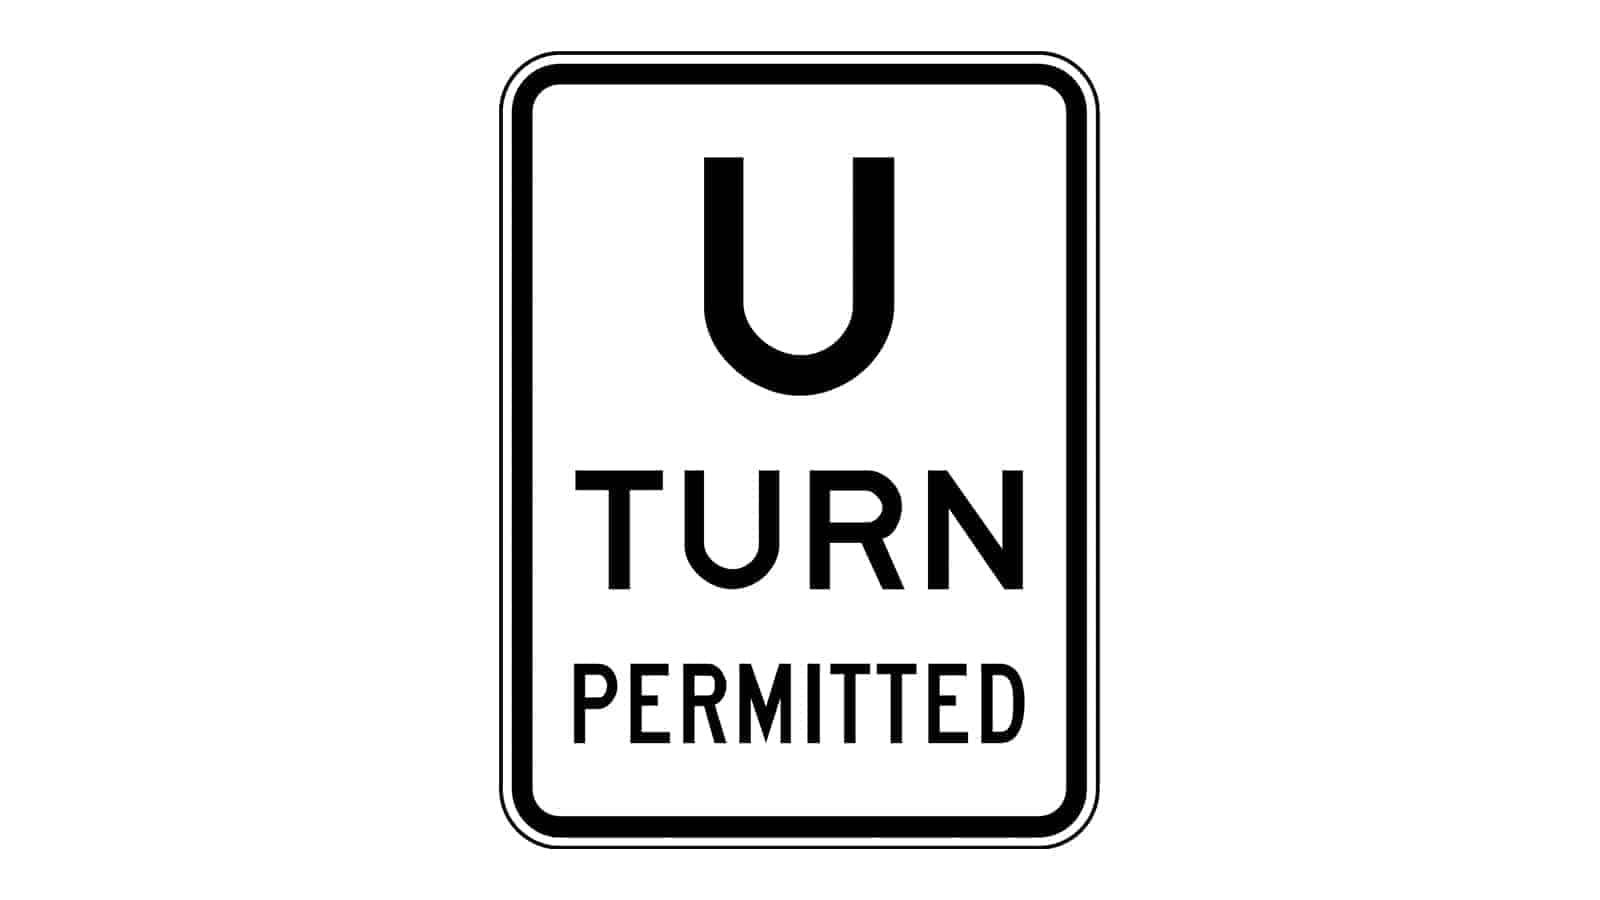
U-Turn Permitted Sign
These regulatory signs indicate that making a U-turn is allowed at the designated location.
Where It Is Commonly Seen
• At intersections where U-turns are safe and legal
• On roads with a central turning lane
• In areas where it is necessary to provide a means for drivers to change direction
Driving Tips
1. Check for Oncoming Traffic: Ensure that the road is clear of oncoming vehicles before making a U-turn.
2. Use Your Indicator: Signal your intention to turn early to alert other drivers when you see these regulatory signs.
3. Turn from the Correct Lane: Only make a U-turn from the designated lane or position as indicated by road markings.
4. Observe Traffic Lights: If at a signalized intersection, follow the traffic lights and wait for the appropriate signal before turning.
5. Turn Carefully: Make the turn slowly and cautiously, ensuring you have enough space to complete the turn safely.
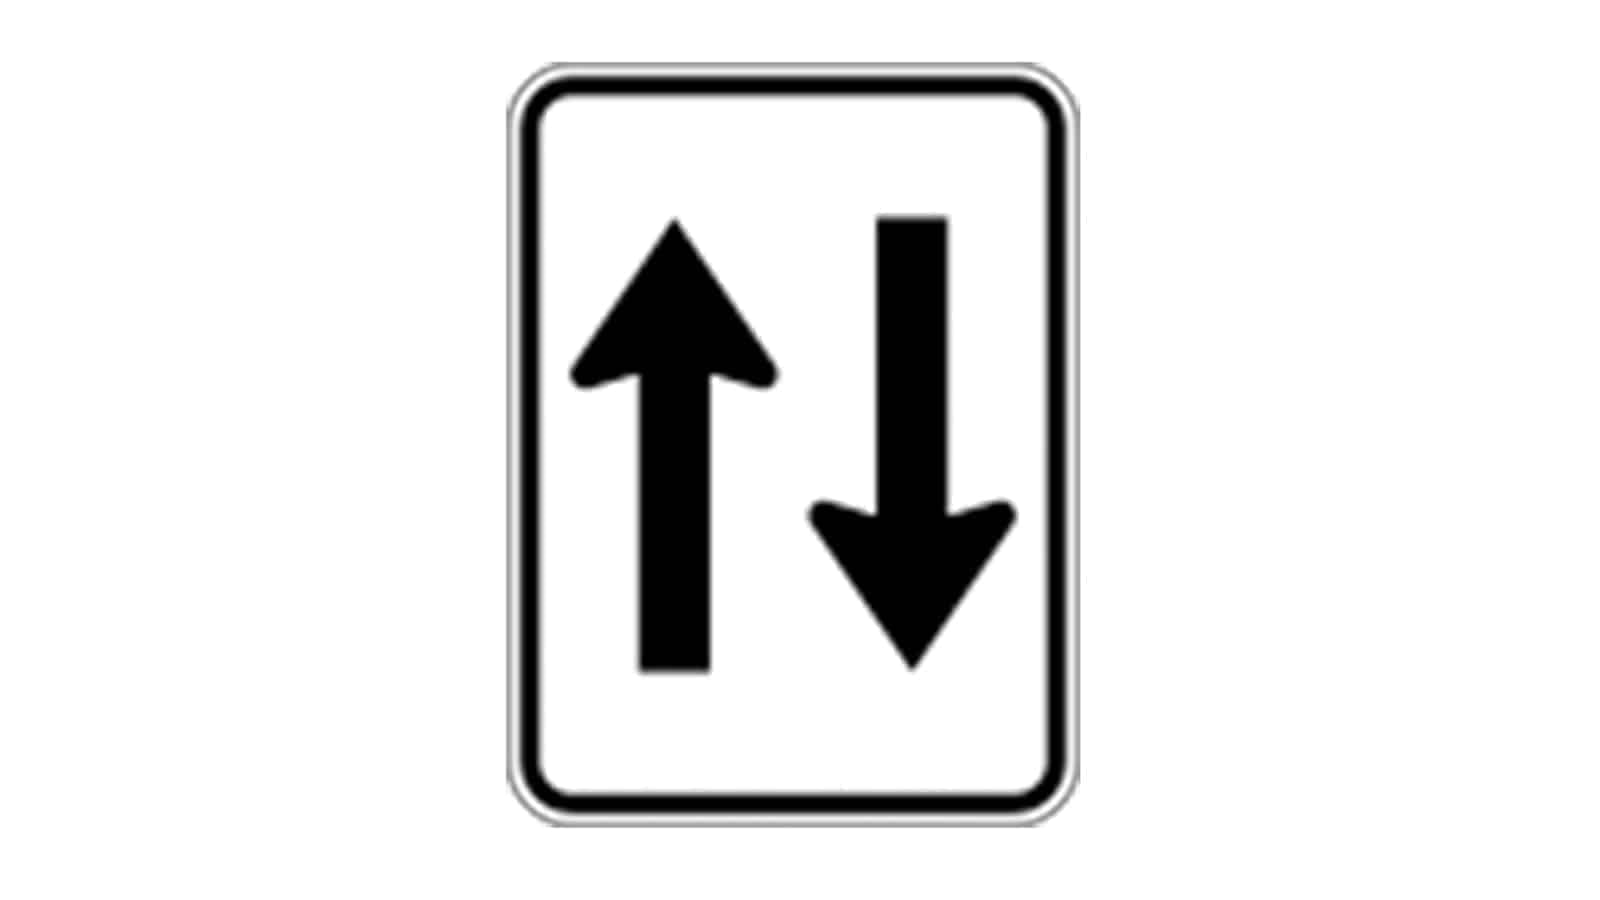
Two-Way Traffic Sign
These regulatory signs indicate that the road ahead will have two-way traffic, meaning vehicles will be travelling in both directions.
Where It Is Commonly Seen
• On roads transitioning from one-way to two-way traffic
• After intersections where the traffic flow changes
• In construction zones where temporary traffic patterns are implemented
Driving Tips
1. Stay Alert: Be aware of oncoming traffic and maintain a safe distance from vehicles travelling in the opposite direction.
2. Keep Right: In most countries, stay in the right lane to allow oncoming vehicles to pass on your left.
3. Observe Speed Limits: Adhere to posted speed limits and adjust your speed according to road conditions and traffic flow.
4. Use Turn Signals: Indicate your intentions when changing lanes or turning to alert other drivers.
5. Be Cautious: Exercise extra caution when overtaking, ensuring there is enough space and time to safely pass other vehicles.
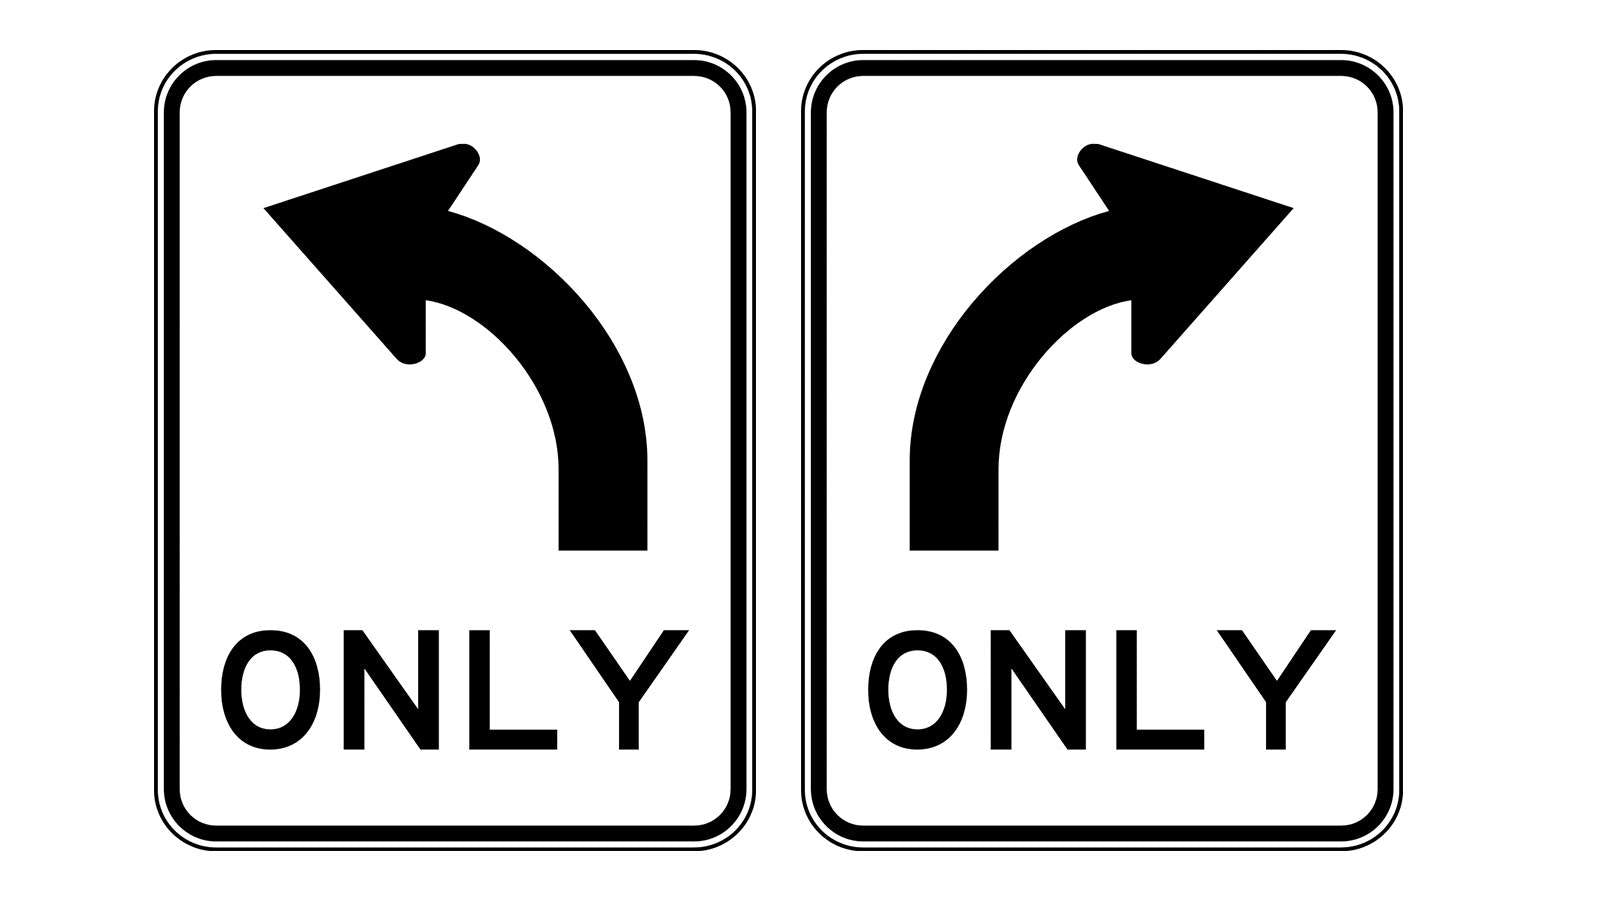
Turn Left or Right Only Sign
This sign indicates that drivers must turn in the direction shown by the arrow and are not permitted to go straight ahead.
Where It Is Commonly Seen
• At intersections where through traffic is prohibited
• On lanes designated for turning only
• In areas with one-way street systems requiring turns
Driving Tips
1. Follow the Direction: Ensure you turn in the direction indicated by the arrow.
2. Use Turn Signals: Always use your turn signals to indicate your intentions to other drivers.
3. Check for Traffic: Before making the turn, check for oncoming traffic and pedestrians.
4. Prepare in Advance: Position your vehicle in the correct lane well before reaching the intersection.
5. Observe Road Signs: Look for additional signs or markings that provide further instructions or restrictions.
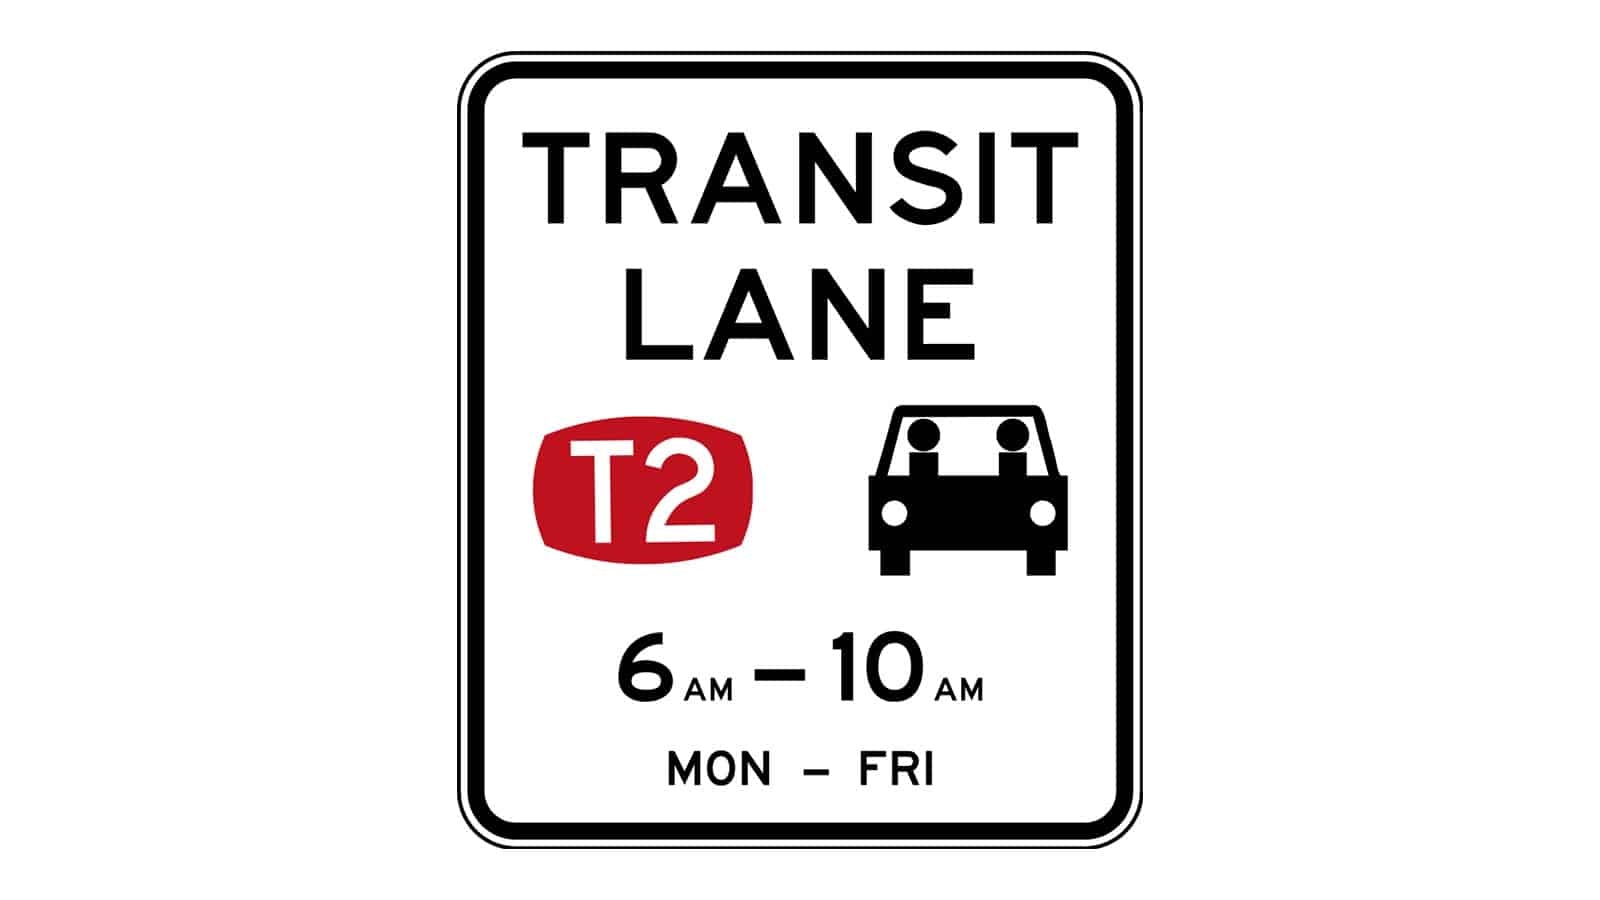
Transit Lane (T2) Sign
These regulatory signs indicate a transit lane, often referred to as a T2 lane, which is designated for vehicles carrying at least two occupants, including the driver, during specified times.
Where It Is Commonly Seen
• On major roads and highways in urban areas
• In cities with high traffic volumes
• Near public transportation routes
Driving Tips
1. Carpool Compliance: Ensure your vehicle has at least two occupants to use the transit lane during the indicated times.
2. Observe Time Restrictions: Note the times when the transit lane rules are in effect (e.g., 6 AM – 10 AM, Monday to Friday).
3. Use Other Lanes if Alone: If you’re driving alone, use the other lanes outside the transit lane during the restricted times.
4. Plan Ahead: To take advantage of the transit lane, plan your trips with carpooling in mind.
5. Safety First: Even in a transit lane, adhere to speed limits and drive safely, respecting all traffic rules and other road users.

T-Intersection Sign
This sign indicates that the road you are on will end at a “T” intersection ahead. You must prepare to turn either left or right.
Where It Is Commonly Seen
• At the end of a straight road
• Approaching intersections where the road does not continue straight ahead
• Rural and urban areas
Driving Tips
1. Prepare to Turn: Slow down as you approach the intersection and be ready to turn left or right.
2. Yield to Traffic: Look for and yield to any traffic on the intersecting road.
3. Use Turn Signals: Indicate your intended direction early to inform other drivers of your intentions.
4. Check for Traffic Signs: Observe any stop or yield signs at the intersection.
5. Stay in Your Lane: Make sure to turn into the correct lane when making your turn.
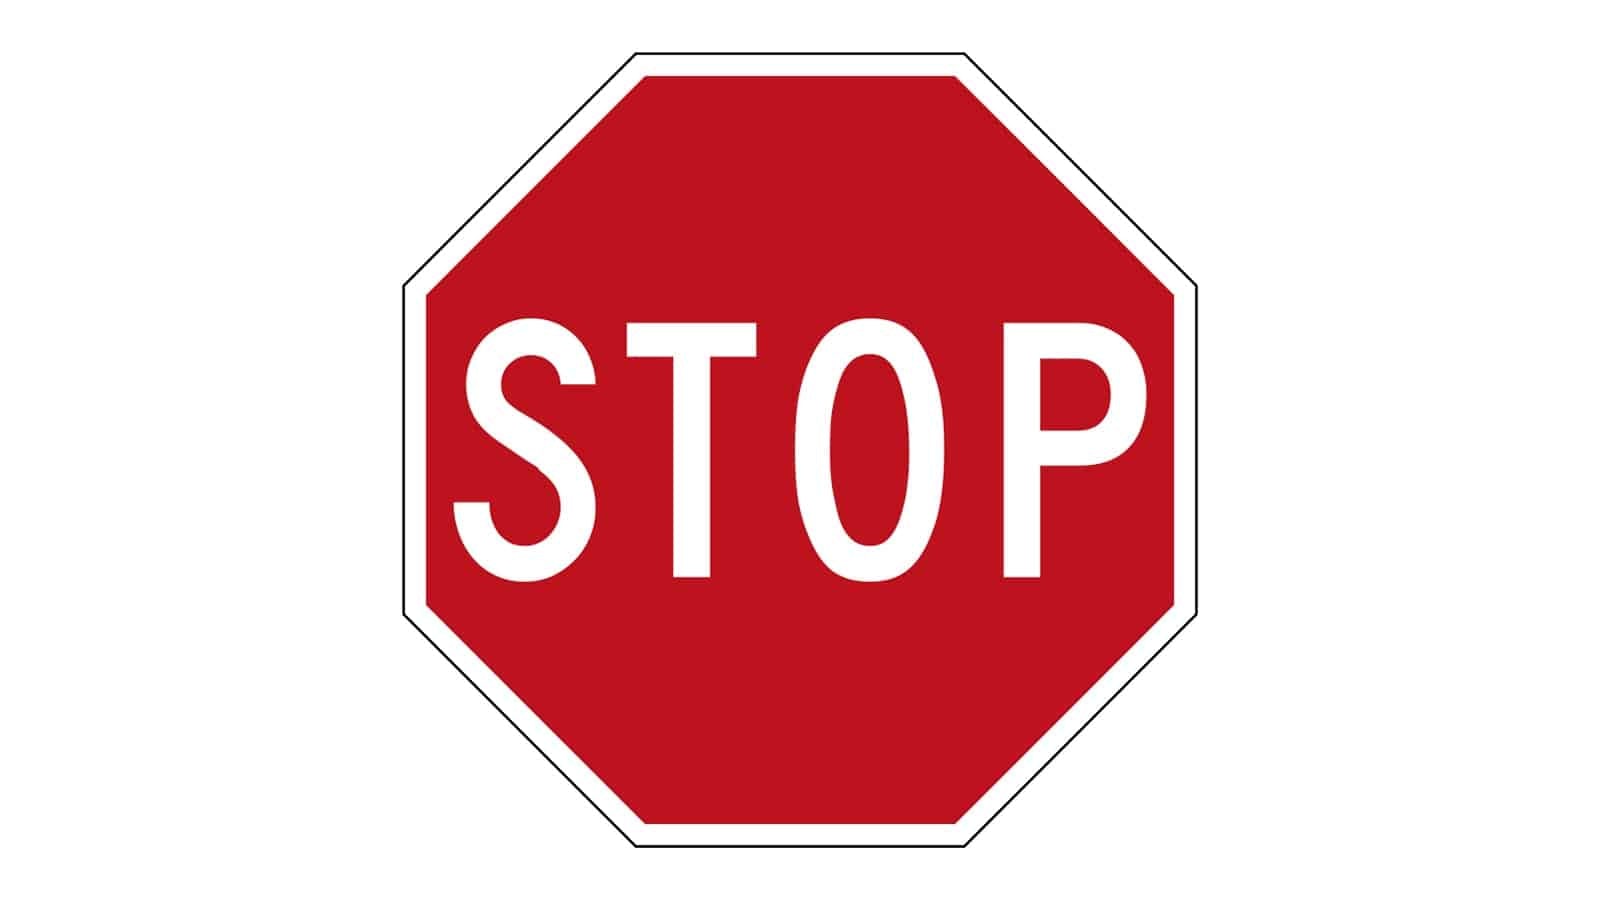
Stop Sign
These regulatory signs indicate that drivers must come to a complete stop at the intersection or junction. It is a regulatory sign that ensures safety and right-of-way.
Where It Is Commonly Seen
• At intersections with cross traffic
• At the end of streets where there is no continuation
• Near schools and pedestrian crossings
• At railway crossings
Driving Tips
1. Complete Stop: Come to a full stop at the stop line or before entering the crosswalk.
2. Check All Directions: Look left, right, and straight ahead for oncoming traffic or pedestrians before proceeding.
3. Yield Right-of-Way: Give way to vehicles and pedestrians who have the right-of-way.
4. Proceed When Safe: Only move forward when it is safe to do so, ensuring no immediate hazards.
5. Follow Additional Signs: Be aware of any additional signs or signals that might further regulate traffic at the intersection.
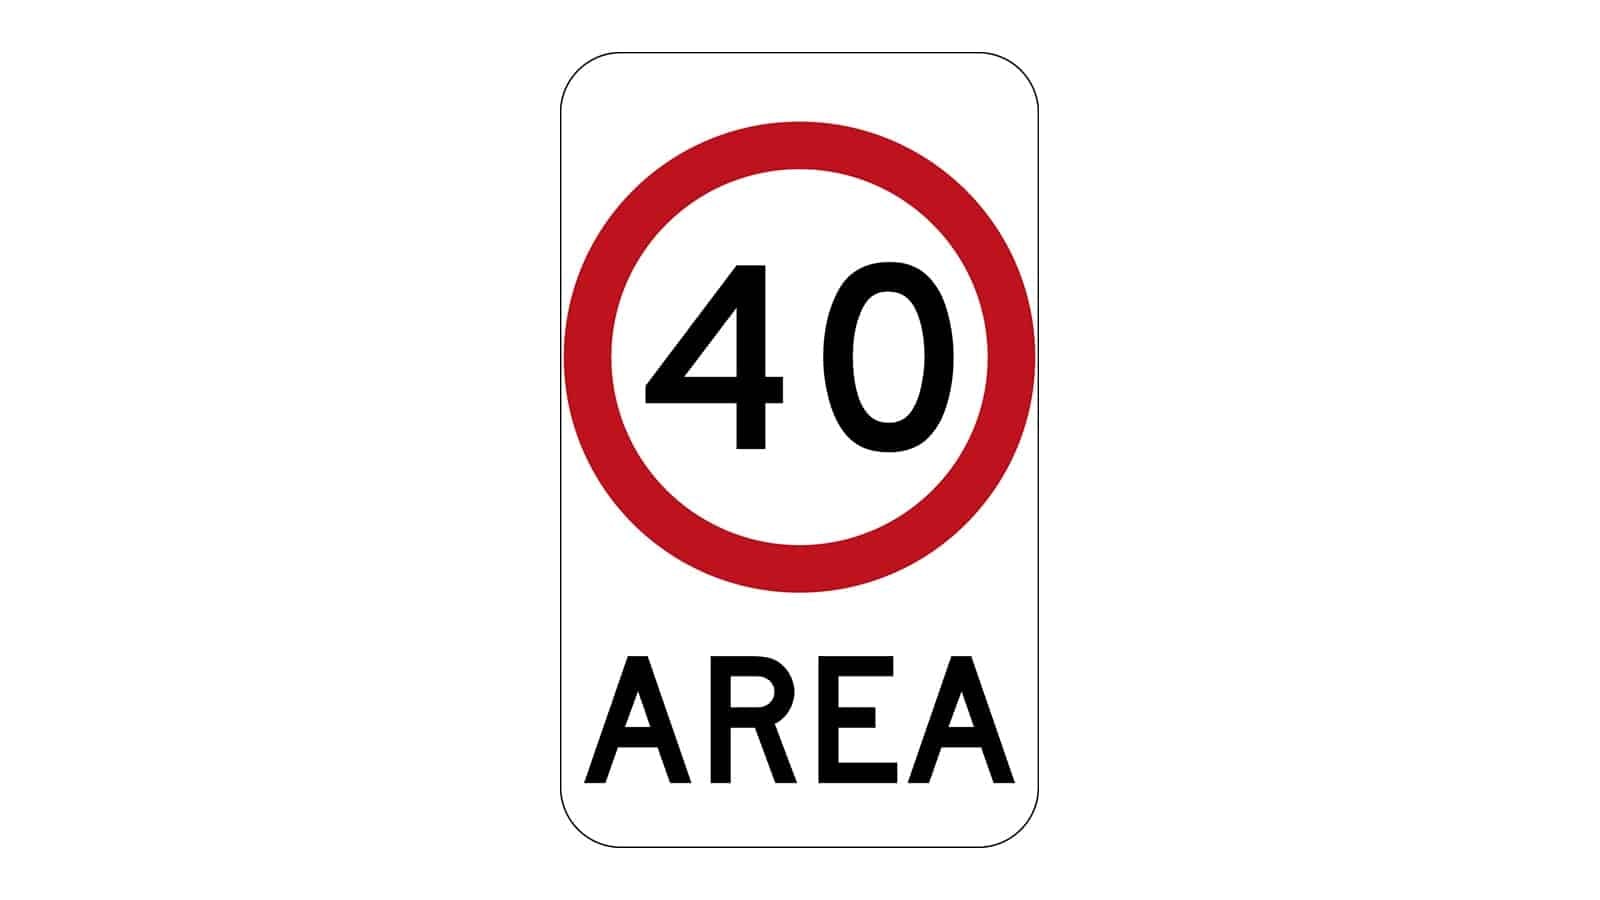
Speed Zone Area Sign
This sign indicates the maximum speed limit for a specific area. It is a regulatory sign used to enforce speed limits to enhance road safety.
Where It Is Commonly Seen
• Residential neighbourhoods
• School zones
• Areas with high pedestrian activity
• Construction zones
Driving Tips
1. Adhere to the Speed Limit: Always drive within the specified speed limit to ensure safety and compliance with traffic laws.
2. Be Aware of Pedestrians: In areas with lower speed limits, be vigilant for pedestrians crossing the road.
3. Adjust for Conditions: Reduce speed further if road conditions are poor, such as during bad weather or heavy traffic.
4. Watch for Changes: Be on the lookout for signs indicating a change in the speed limit as you enter or exit different zones.
5. Follow Local Laws: Ensure you are familiar with the specific speed limits for different areas within your region.
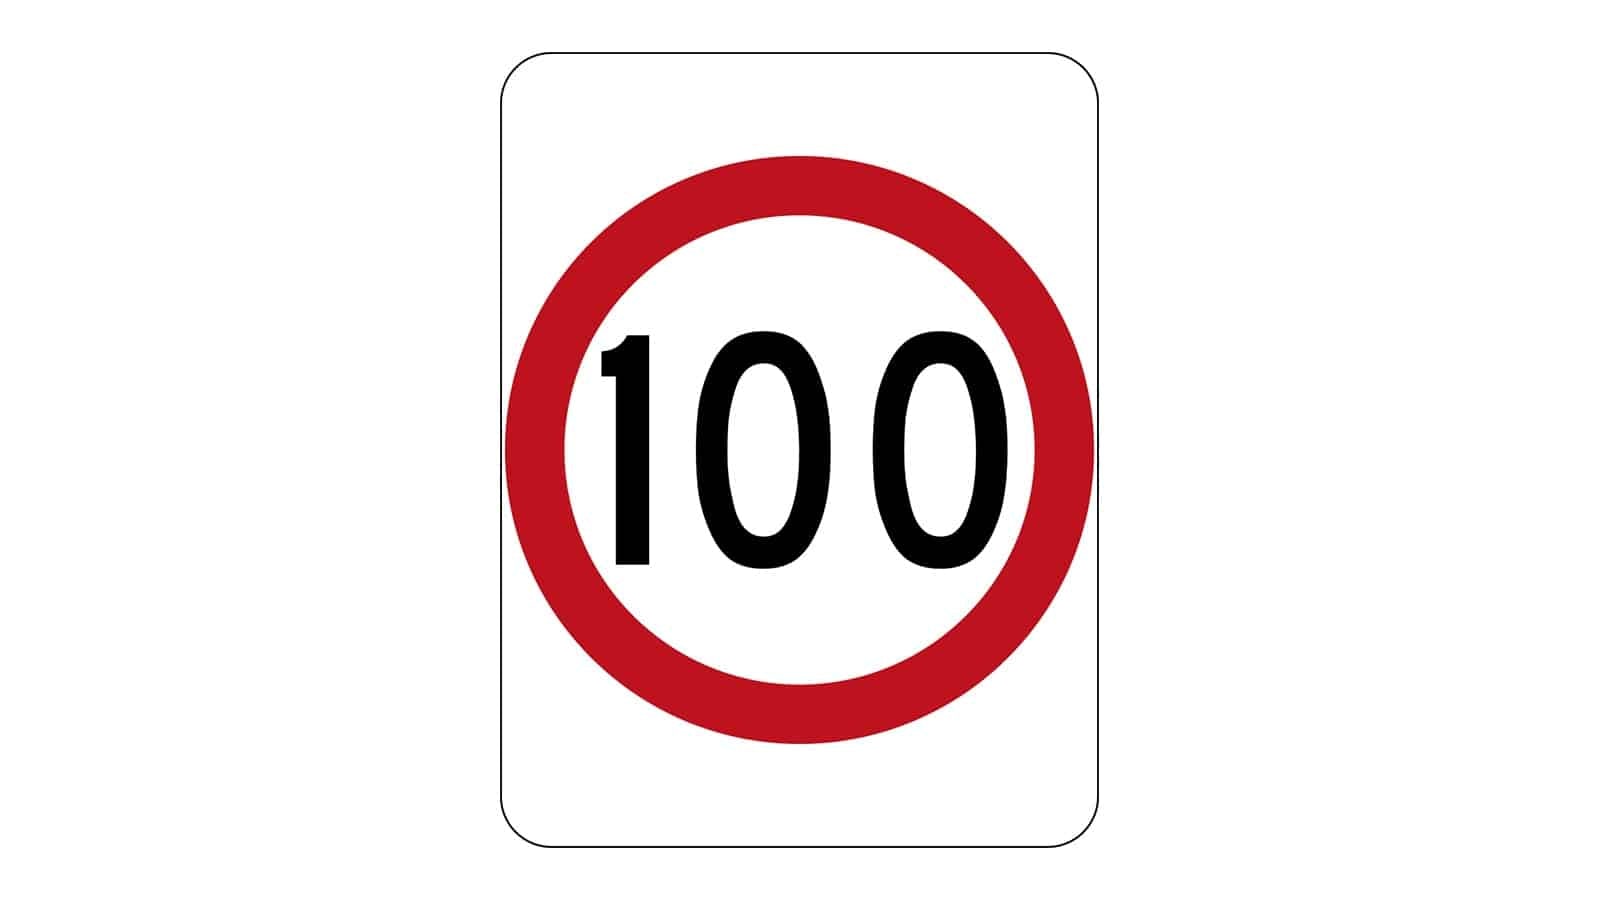
Speed Limit Sign
This sign indicates the maximum speed at which vehicles may legally travel on a particular road.
Where It Is Commonly Seen
• Highways
• Main roads
• Urban areas
• Rural areas
Driving Tips
1. Adhere to the Speed Limit: Always drive within the specified speed limit to ensure safety and avoid fines.
2. Be Mindful of Conditions: Adjust your speed according to road, weather, and traffic conditions even if it means driving below the speed limit.
3. Stay Alert for Changes: Look for signs indicating changes in speed limits as you drive through different zones.
4. Use Cruise Control Wisely: On long stretches of road, use cruise control to maintain a consistent speed and avoid speeding.
5. Observe Local Laws: Be aware of specific speed limits in school zones, residential areas, and construction zones, which may differ from general road limits.
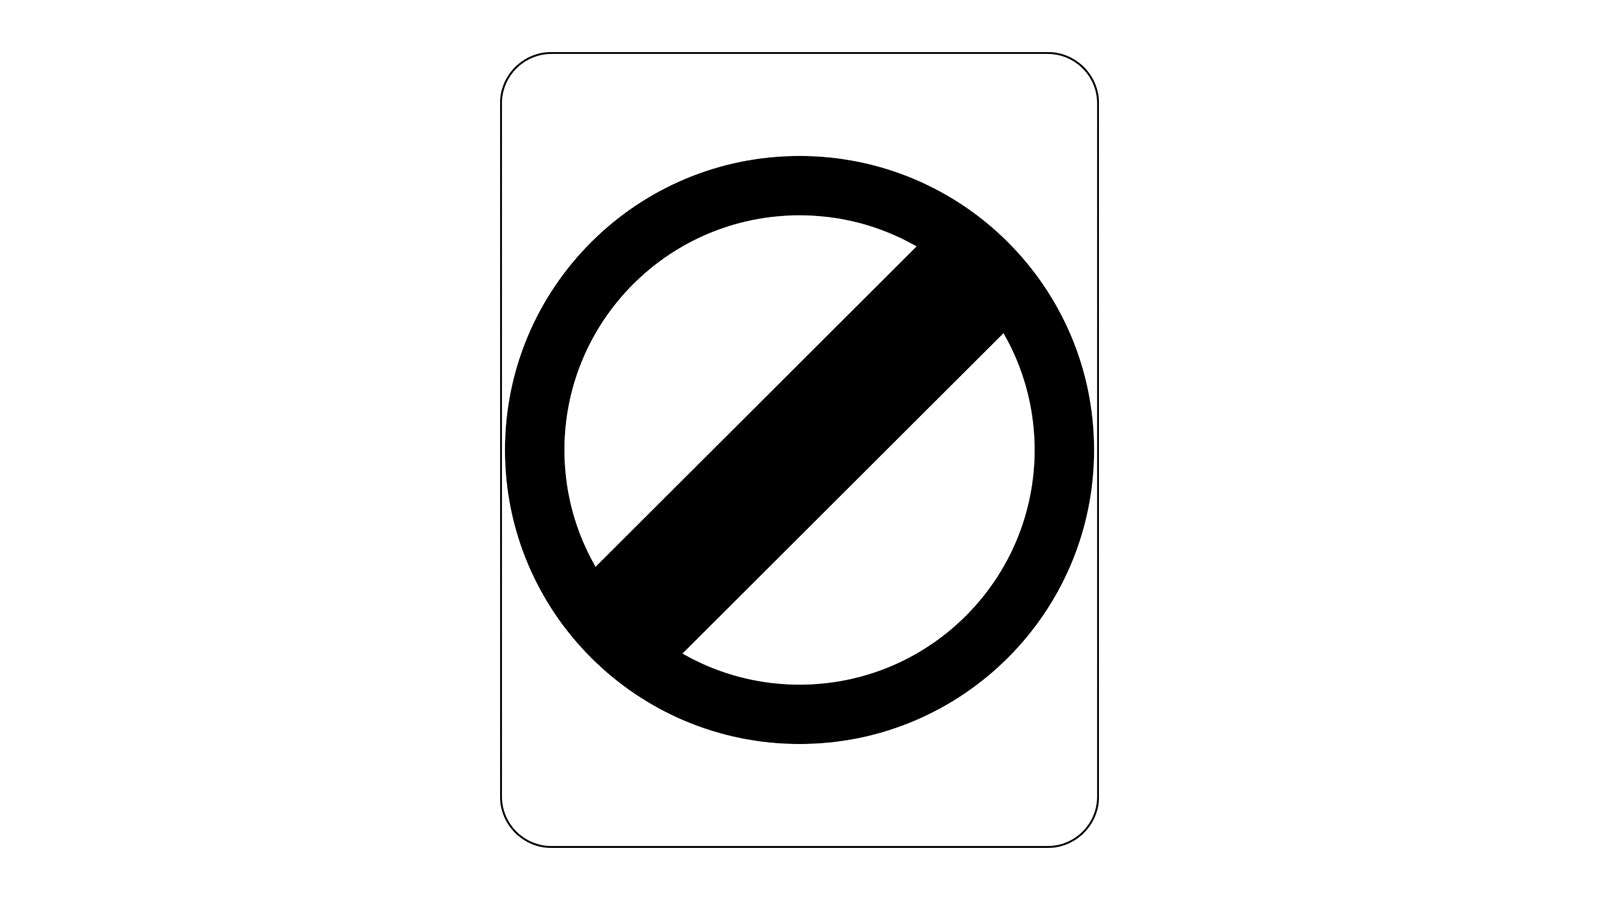
Speed Derestriction Sign
This sign indicates the end of a speed limit zone, allowing drivers to travel at any speed that is safe and appropriate for the conditions, within the bounds of general speed laws.
Where It Is Commonly Seen
• End of speed-restricted zones
• Transition areas between different road types
Driving Tips
1. Adjust Speed limit Accordingly: Increase speed only if it is safe to do so based on road, traffic, and weather conditions.
2. Be Cautious: Even though the specific speed limit ends, maintain control and drive responsibly.
3. Observe Road Signs: Continue to watch for any new speed limits or other regulatory signs.
4. Consider Visibility: Ensure you have clear visibility before accelerating, especially on winding or hilly roads.
5. Check Surroundings: Be aware of other vehicles and adjust your speed to match the flow of traffic.
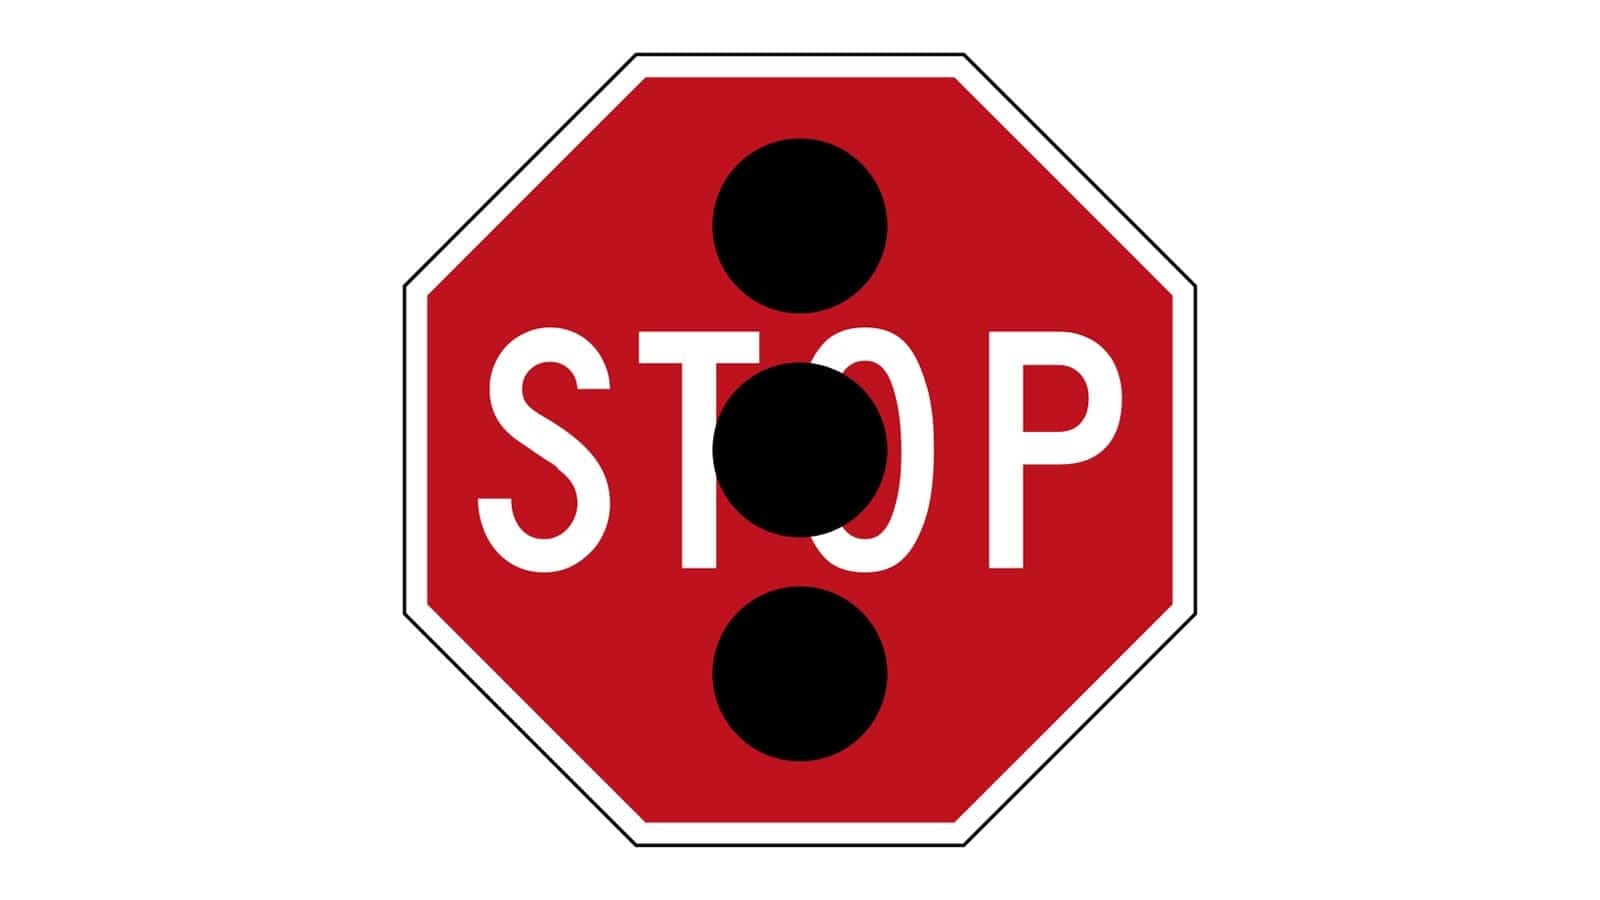
Special Stop Sign
This unique stop sign, incorporating the image of traffic lights, is designed to alert drivers to the presence of a traffic signal ahead.
Where It Is Commonly Seen
• Near intersections with traffic lights that may not be easily visible
• Areas where a traffic light is newly installed
Driving Tips
1. Stop Completely: Always come to a full stop at the sign.
2. Observe Traffic Signals: After stopping, proceed only when the traffic light permits.
3. Be Cautious: Look out for other vehicles and pedestrians even after the light changes.
4. Stay Alert: Be prepared for possible changes in traffic light signals.
5. Follow Right-of-Way Rules: Yield to other drivers and pedestrians as required by the traffic lights.
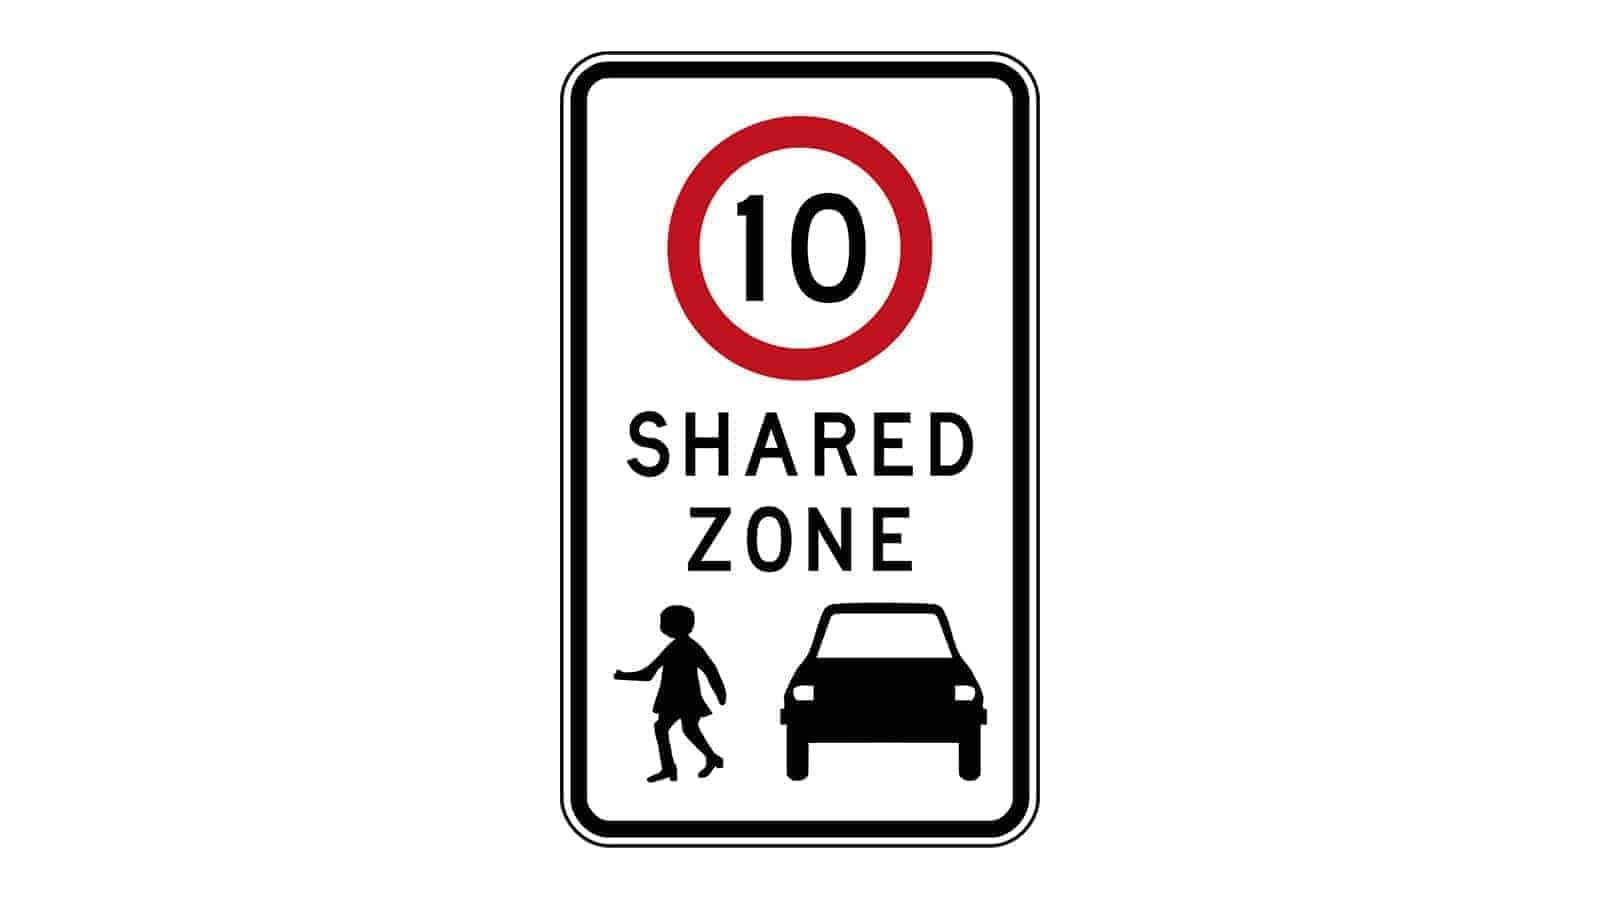
Shared Zone Sign
This sign indicates an area where vehicles and pedestrians share the road space, with a strict speed limit to ensure safety.
Where It Is Commonly Seen
• Residential areas
• Near parks and playgrounds
• Shopping precincts
Driving Tips
1. Reduce Speed: Adhere to the indicated speed limit of 10 km/h.
2. Be Vigilant: Keep an eye out for pedestrians, especially children, who may cross the road unexpectedly.
3. Yield to Pedestrians: Give way to pedestrians at all times in a shared zone.
4. Drive Slowly: Ensure your vehicle speed is appropriate for the environment to avoid accidents.
5. Use Caution: Be extra cautious in bad weather conditions, as visibility may be reduced.
Shared Path for Pedestrians and Cyclists Sign
This sign indicates a path that is designated for shared use by pedestrians and cyclists.
Where It Is Commonly Seen
• Parks and recreational areas
• Along riversides or scenic routes
• Urban pathways
Usage Tips
1. Respect All Users: Both pedestrians and cyclists should be aware of each other and share the path considerately.
2. Keep to the Side: Cyclists should keep to one side of the path to allow pedestrians to walk safely.
3. Announce Your Presence: Cyclists should use a bell or verbal alert when approaching pedestrians from behind.
4. Be Predictable: Both pedestrians and cyclists should move in a predictable manner to avoid collisions.
5. Observe Speed: Cyclists should ride at a safe speed that is appropriate for a shared path.
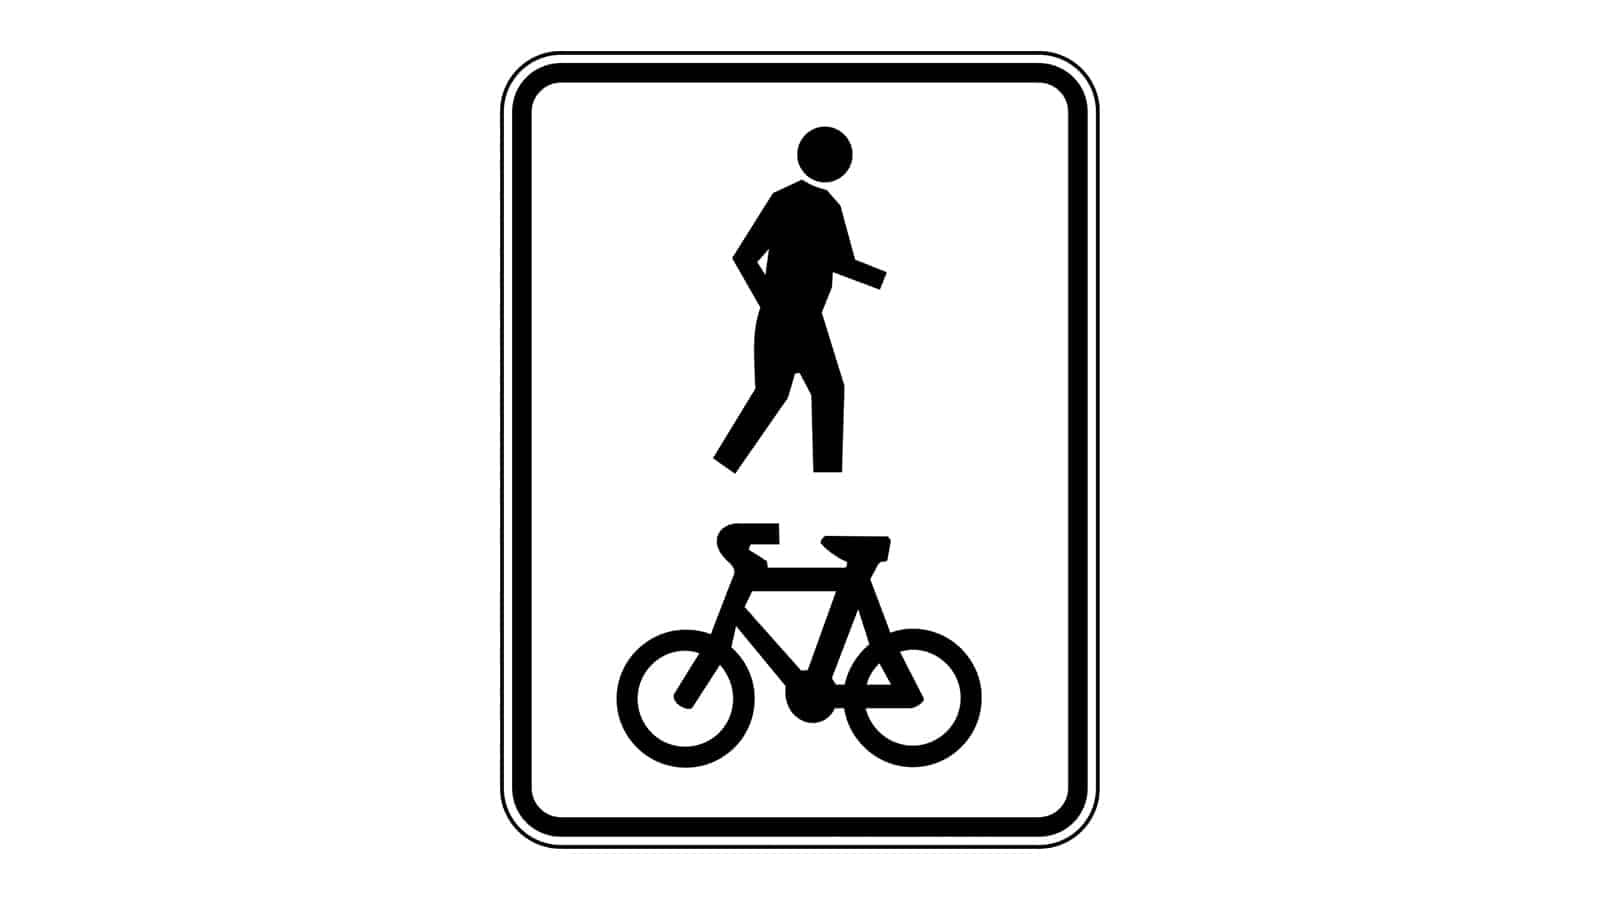
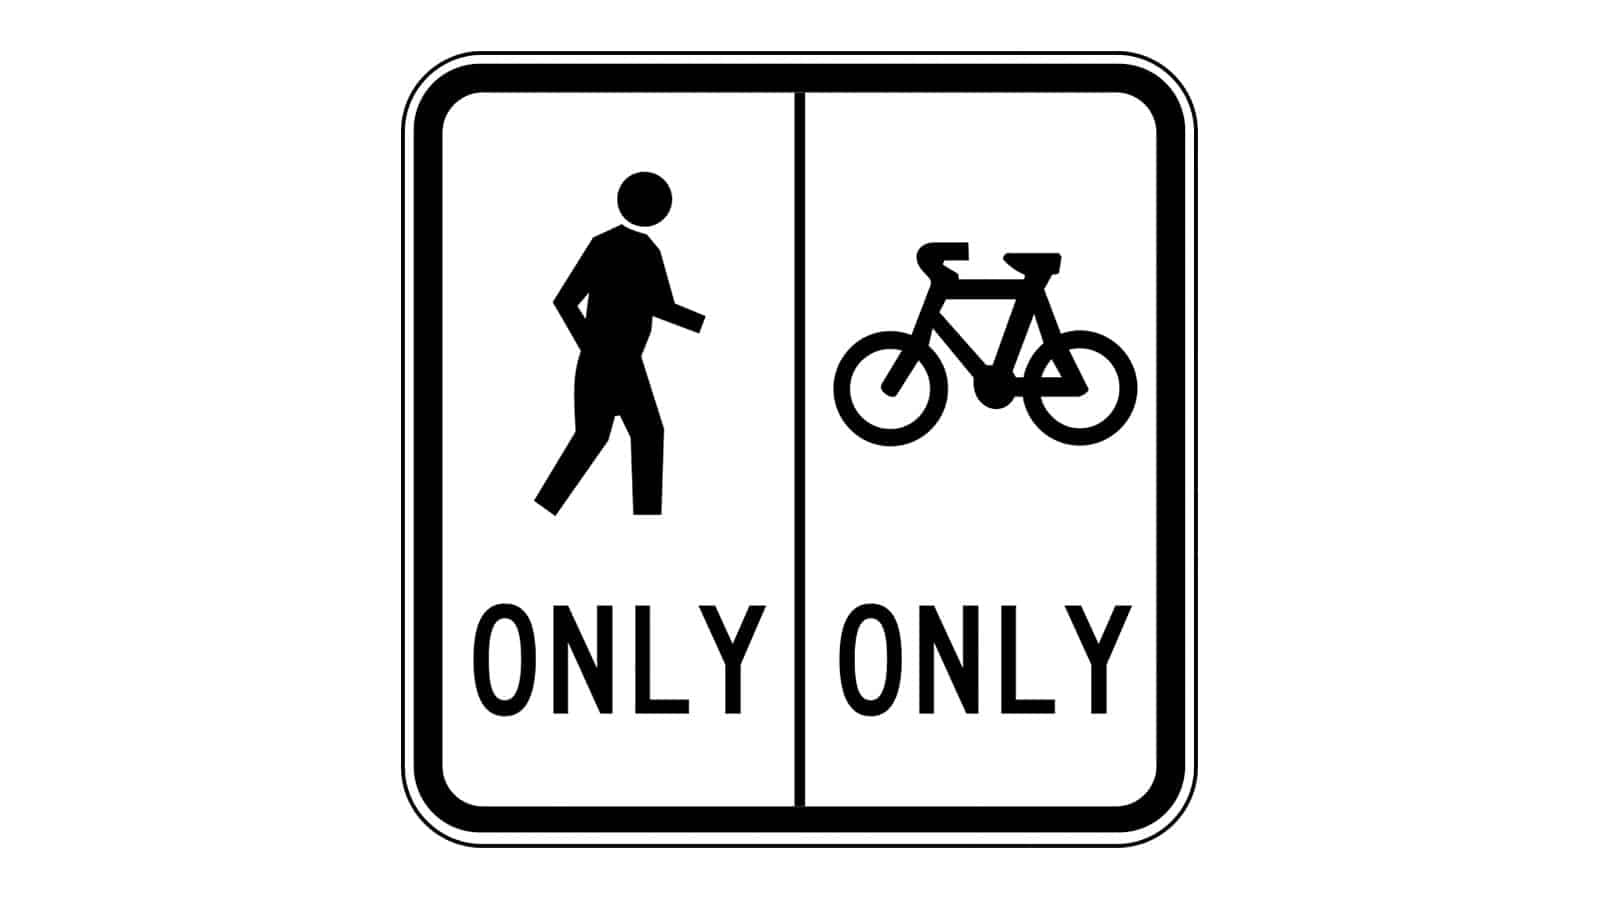
Separated Path for Pedestrians and Cyclists Sign
This sign indicates a path where the space is divided into separate lanes for pedestrians and cyclists, ensuring that each group has a designated area.
Where It Is Commonly Seen
• Urban walkways and bike paths
• Parks and recreational areas
• Near schools and universities
Usage Tips
1. Stay in Your Lane: Pedestrians should use the designated pedestrian lane, and cyclists should use the designated cycling lane.
2. Be Aware: Look out for signs and markings on the path that indicate the separation of lanes.
3. Respect Each Other: Both pedestrians and cyclists should be mindful of each other’s space and avoid crossing into the other lane.
4. Follow the Arrows: Observe directional arrows on the path to ensure proper flow of traffic.
5. Signal Your Moves: Cyclists should use hand signals to indicate their intentions to turn or stop, providing clear communication to pedestrians.
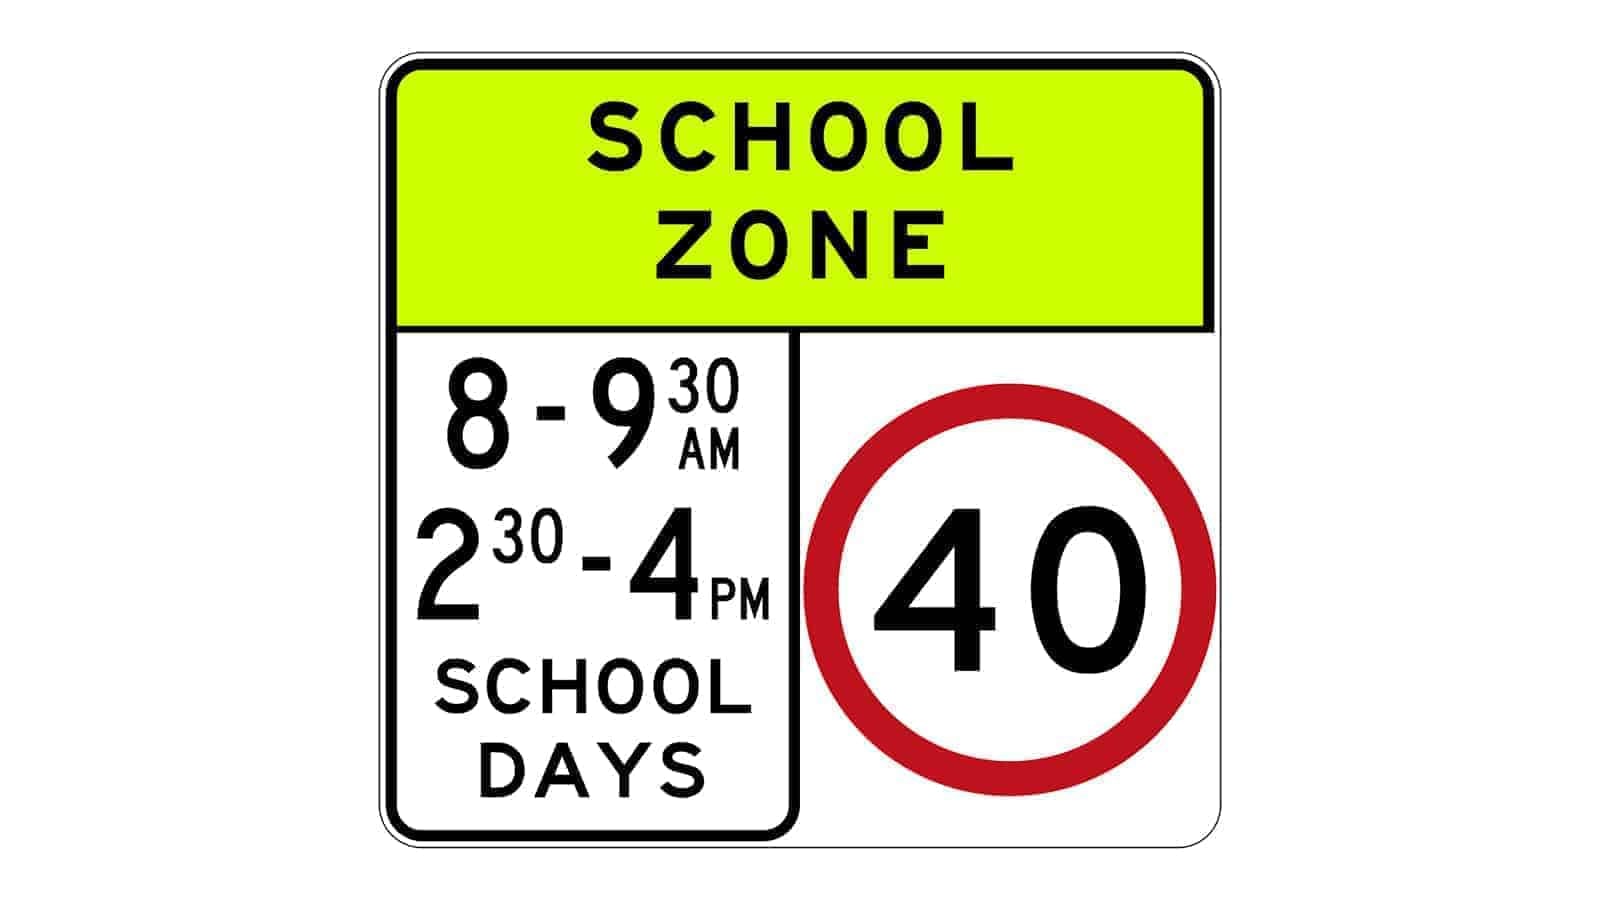
School Zone Sign
This sign indicates a school zone where a reduced speed limit is enforced during specific hours to ensure the safety of children and pedestrians.
Where It Is Commonly Seen
• Near primary and secondary schools
• Around playgrounds and parks adjacent to schools
• In residential areas with high foot traffic of children
Usage Tips
1. Observe the Times: The speed limit is enforced during the times indicated on the sign, typically during school start and end times.
2. Reduce Speed: Slow down to the posted speed limit to ensure the safety of children and other pedestrians.
3. Be Vigilant: Watch for children crossing the road or entering/exiting school buses.
4. Follow Crossing Guards: Obey the instructions of crossing guards who are present to assist children safely across the street.
5. Stay Alert: Be prepared for sudden stops or movements from children who might not always follow pedestrian rules.
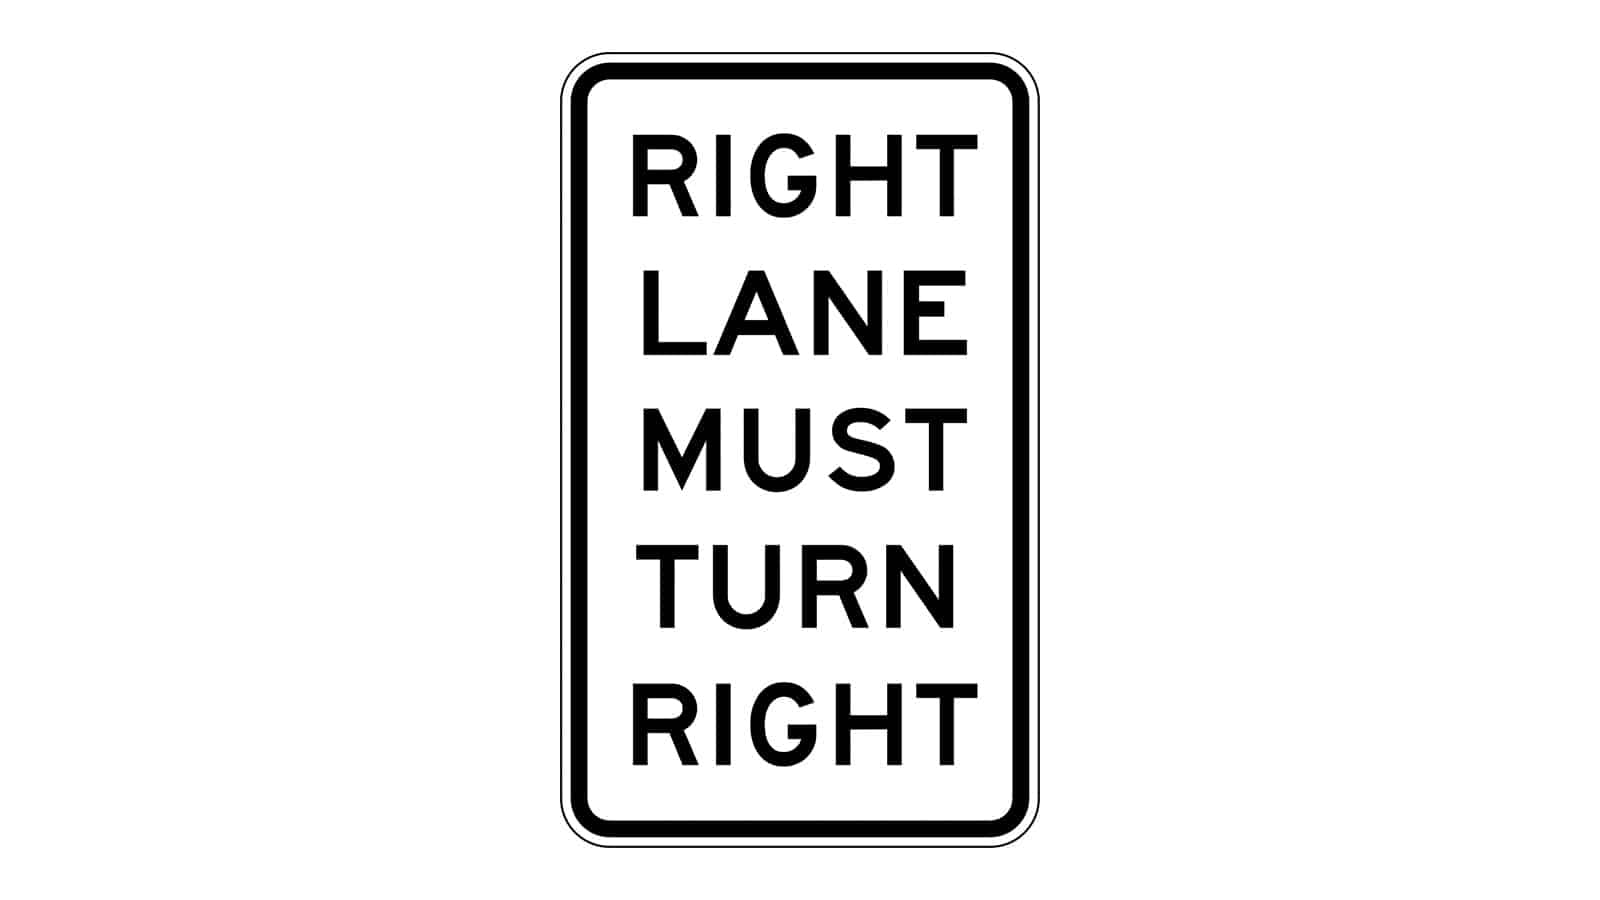
Right Lane Must Turn Right Sign
This sign indicates that vehicles in the right lane must turn right at the upcoming intersection.
Where It Is Commonly Seen
• At intersections with dedicated turn lanes
• On roads with specific lane usage regulations
• Near complex junctions where traffic flow needs to be managed
Usage Tips
1. Move to the Correct Lane Early: Ensure you are in the correct lane well before reaching the intersection if you need to go straight or left.
2. Observe Lane Markings: Follow road markings and arrows that guide lane-specific movements.
3. Signal Your Intentions: Use your indicators well in advance to inform other drivers of your intended turn.
4. Check Blind Spots: Always check your blind spots for vehicles, cyclists, or pedestrians before changing lanes or turning.
5. Follow the Flow: Adhere to the sign’s instructions to maintain smooth traffic flow and avoid unnecessary lane changes.
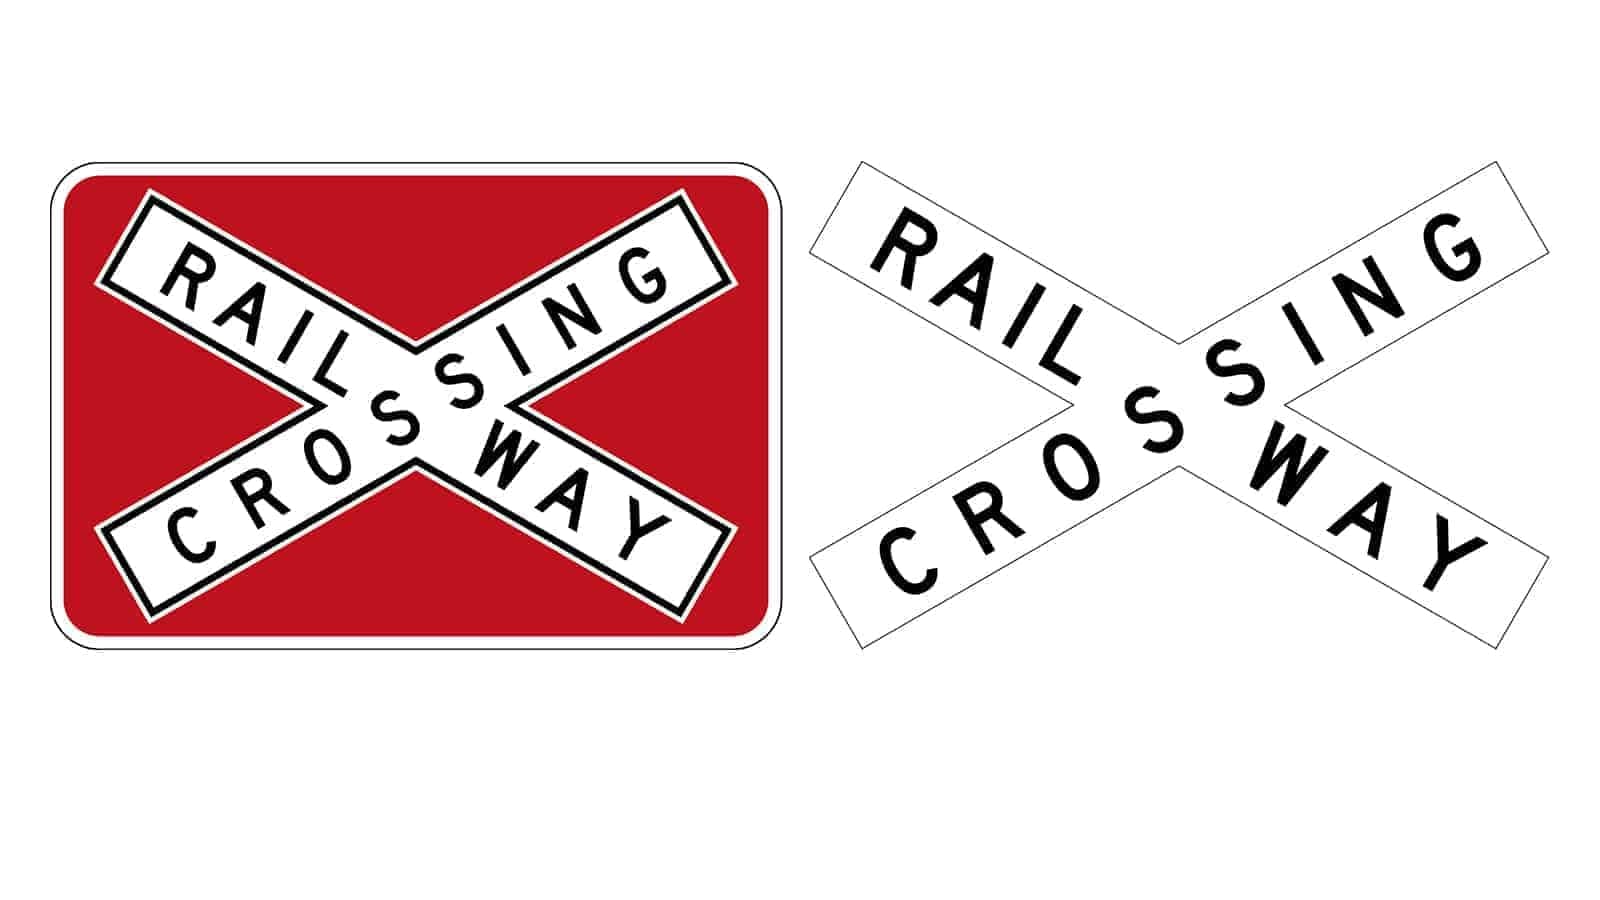
Railway Crossbuck Signs
These signs indicate a railway crossing ahead. The two types shown have slightly different designs but serve the same purpose.
Where They Are Commonly Seen
• At railway crossings
• Near train tracks that intersect with roads
Usage Tips
1. Approach with Caution: Slow down as you approach the railway crossing.
2. Look and Listen: Look both ways and listen for any approaching trains.
3. Obey Signals: Follow any additional signals, lights, or gates that may be present.
4. Do Not Stop on Tracks: Never stop your vehicle on the tracks, even temporarily.
5. Proceed When Safe: Cross the tracks only when you are sure no trains are approaching and it is safe to do so.
These signs are crucial for ensuring the safety of both motorists and trains, preventing collisions at railway crossings.
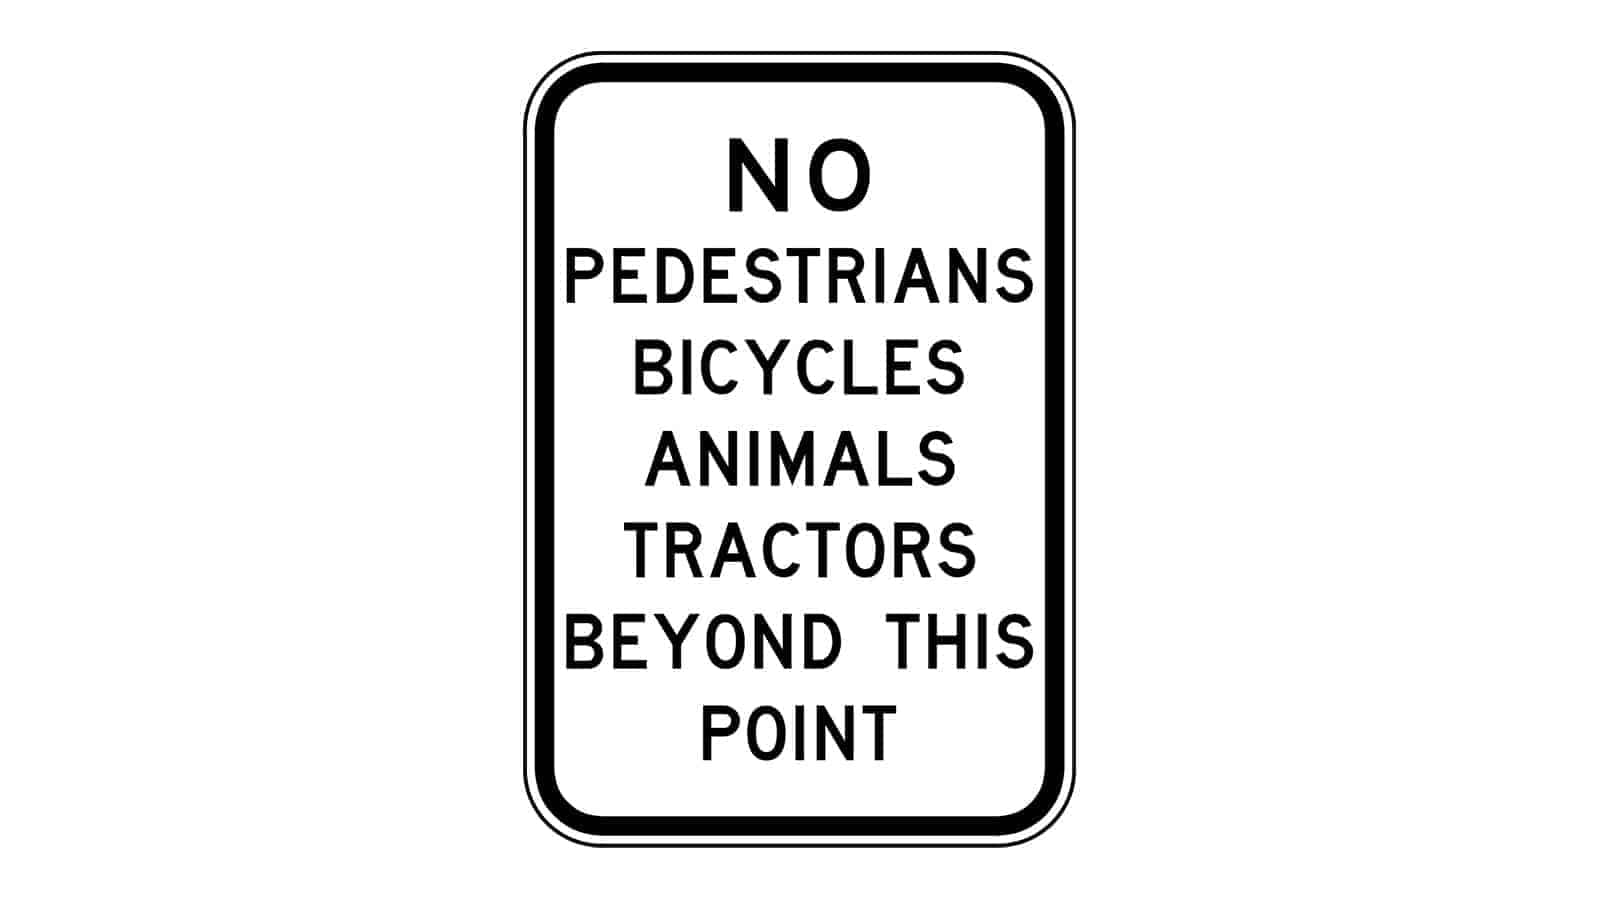
No Pedestrians, Bicycles, Animals, Tractors Beyond This Point
This sign indicates that the area beyond the sign is restricted and prohibits pedestrians, bicycles, animals, and tractors.
Where It Is Commonly Seen
• Entrance ramps to motorways or freeways
• High-speed roads where non-motorised traffic is not permitted
Usage Tips
1. Observe Restrictions: Ensure that if you are a pedestrian, cyclist, or operating a tractor or transporting animals, you do not proceed beyond this point.
2. Safety Compliance: These restrictions are in place for the safety of all road users. Adhere strictly to ensure safety.
3. Alternative Routes: Look for alternative routes or paths designed for pedestrians, cyclists, or tractors.
4. Motor Vehicles Only: Beyond this point, the road is typically designated for motor vehicles only.
This sign helps maintain safety on high-speed roads by keeping non-motorised traffic off these dangerous sections.
Permit Zone
This sign indicates a zone where parking is restricted to vehicles that have a valid permit. The time and days during which the permit requirement is enforced are specified on the sign.
Where It Is Commonly Seen
• Residential areas with limited parking
• Commercial districts
• Near schools and institutions
Usage Tips
1. Check for Permits: Ensure your vehicle has the required permit to park in the zone during the specified hours.
2. Observe Time Restrictions: Note the times and days when the permit is required (in this case, 9 AM to 4 PM, Monday to Friday).
3. Avoid Fines: Parking in the permit zone without a valid permit during the restricted times can result in fines or your vehicle being towed.
4. Look for Alternatives: If you don’t have a permit, seek alternative parking outside of the restricted zone or check if a temporary permit is available for visitors.
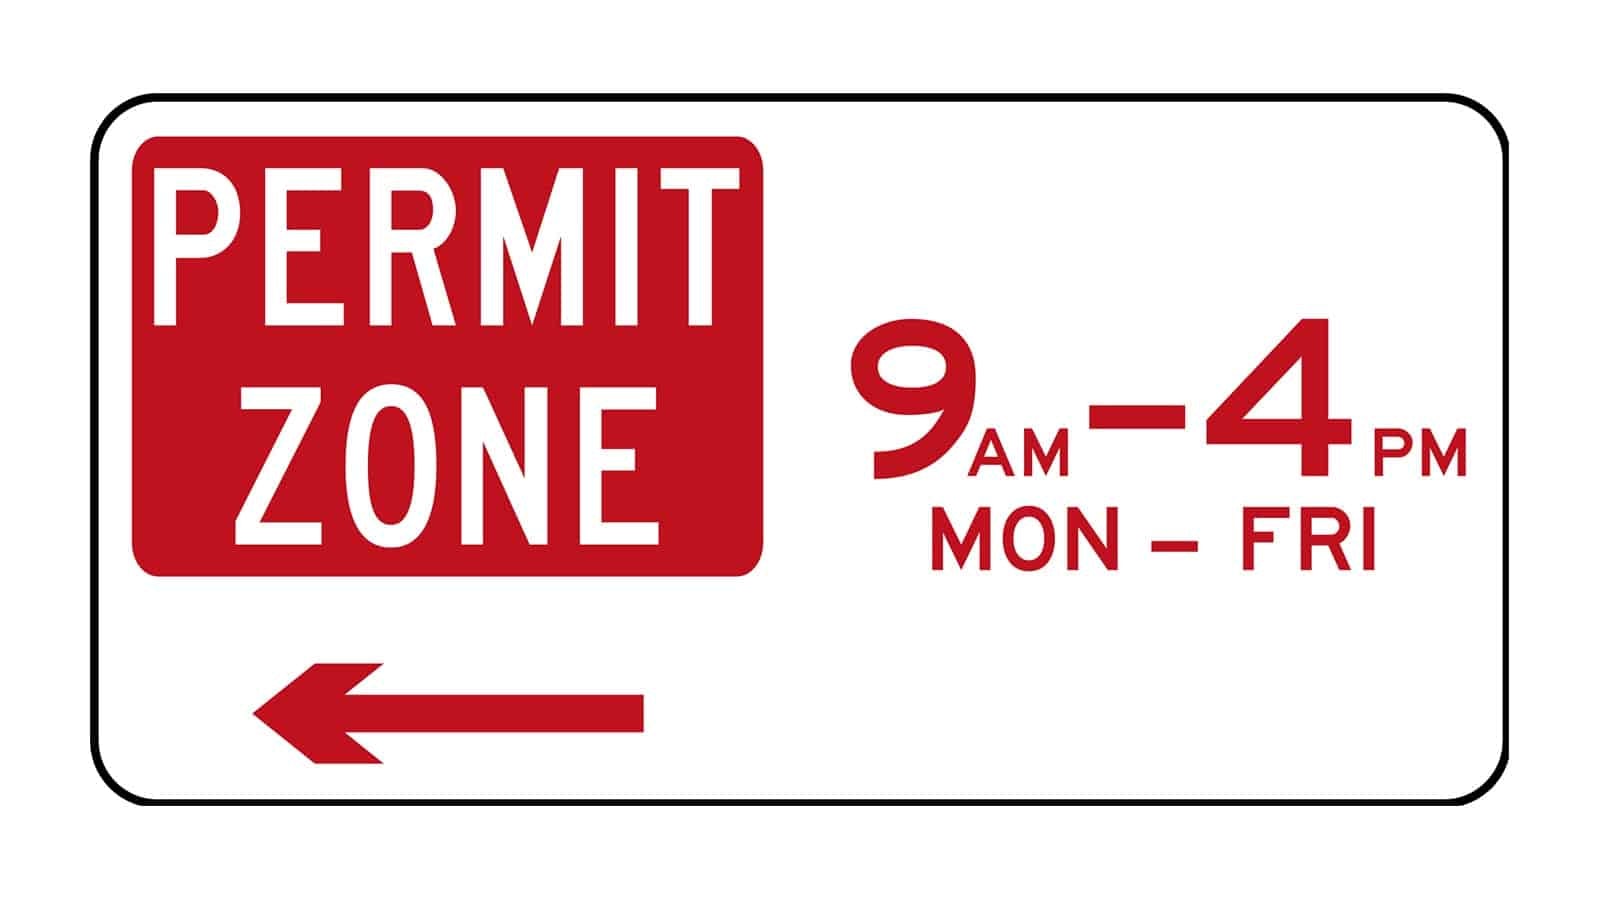
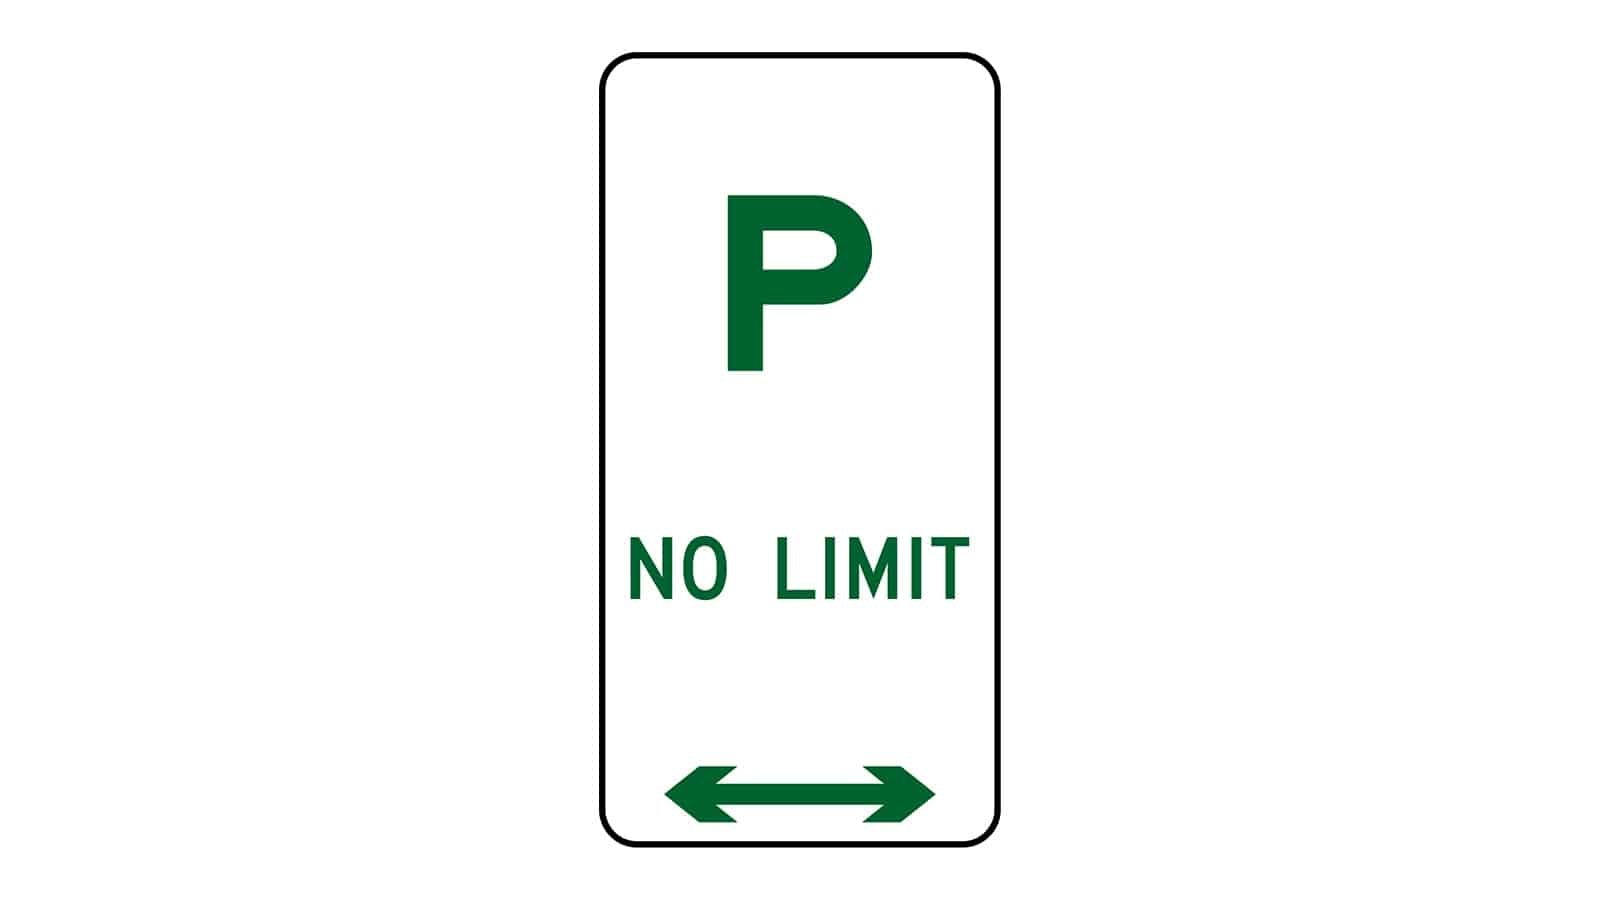
Parking Permitted – No Limit
This sign indicates that parking is permitted in the designated area without any time limit.
Where It Is Commonly Seen
• Residential streets
• Low-traffic commercial areas
• Near parks and recreational facilities
Usage Tips
1. Free Parking: You can park your vehicle for an unlimited amount of time in this zone.
2. Check for Additional Signs: Ensure there are no other parking restrictions in the area, such as street cleaning times or temporary no-parking signs.
3. Observe Local Laws: Always adhere to local parking regulations, as they may override the no-limit parking if special circumstances arise.
4. Be Courteous: While there’s no time limit, consider moving your vehicle if it’s been parked for an extended period to allow others access to the space.
Parking Permitted – Time Limited
This sign indicates that parking is permitted, but with specific time limits.
Details of the Sign:
• 1/2 P: Represents half-hour parking (30 minutes).
• 9 AM – 4 PM MON – FRI: Time limits are enforced from 9 AM to 4 PM on weekdays.
• 9 AM – 12 NOON SAT: Time limits are enforced from 9 AM to 12 Noon on Saturdays.
Where It Is Commonly Seen:
• Commercial areas
• Near schools and hospitals
• Shopping districts
Usage Tips:
1. Observe the Time Limits: Ensure you park for no longer than the indicated half-hour during the specified times.
2. Check for Additional Restrictions: Look out for other signs that may affect parking regulations, such as no parking during street cleaning hours.
3. Outside Time Limits: You may be able to park for longer periods outside of the specified hours, but always double-check for any other signs or regulations.
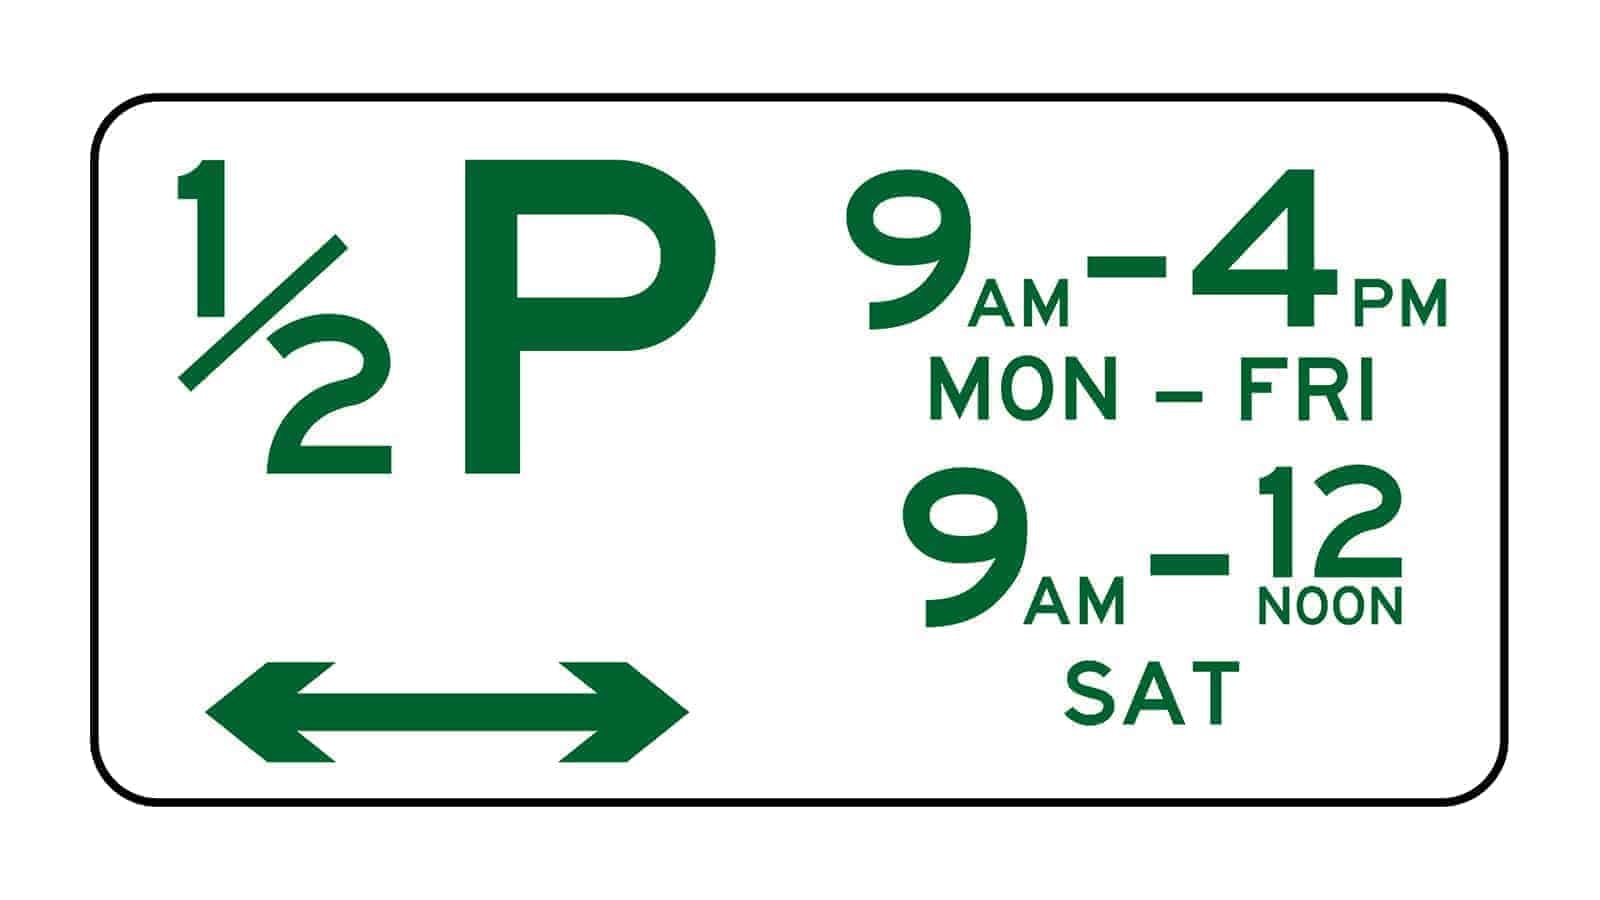
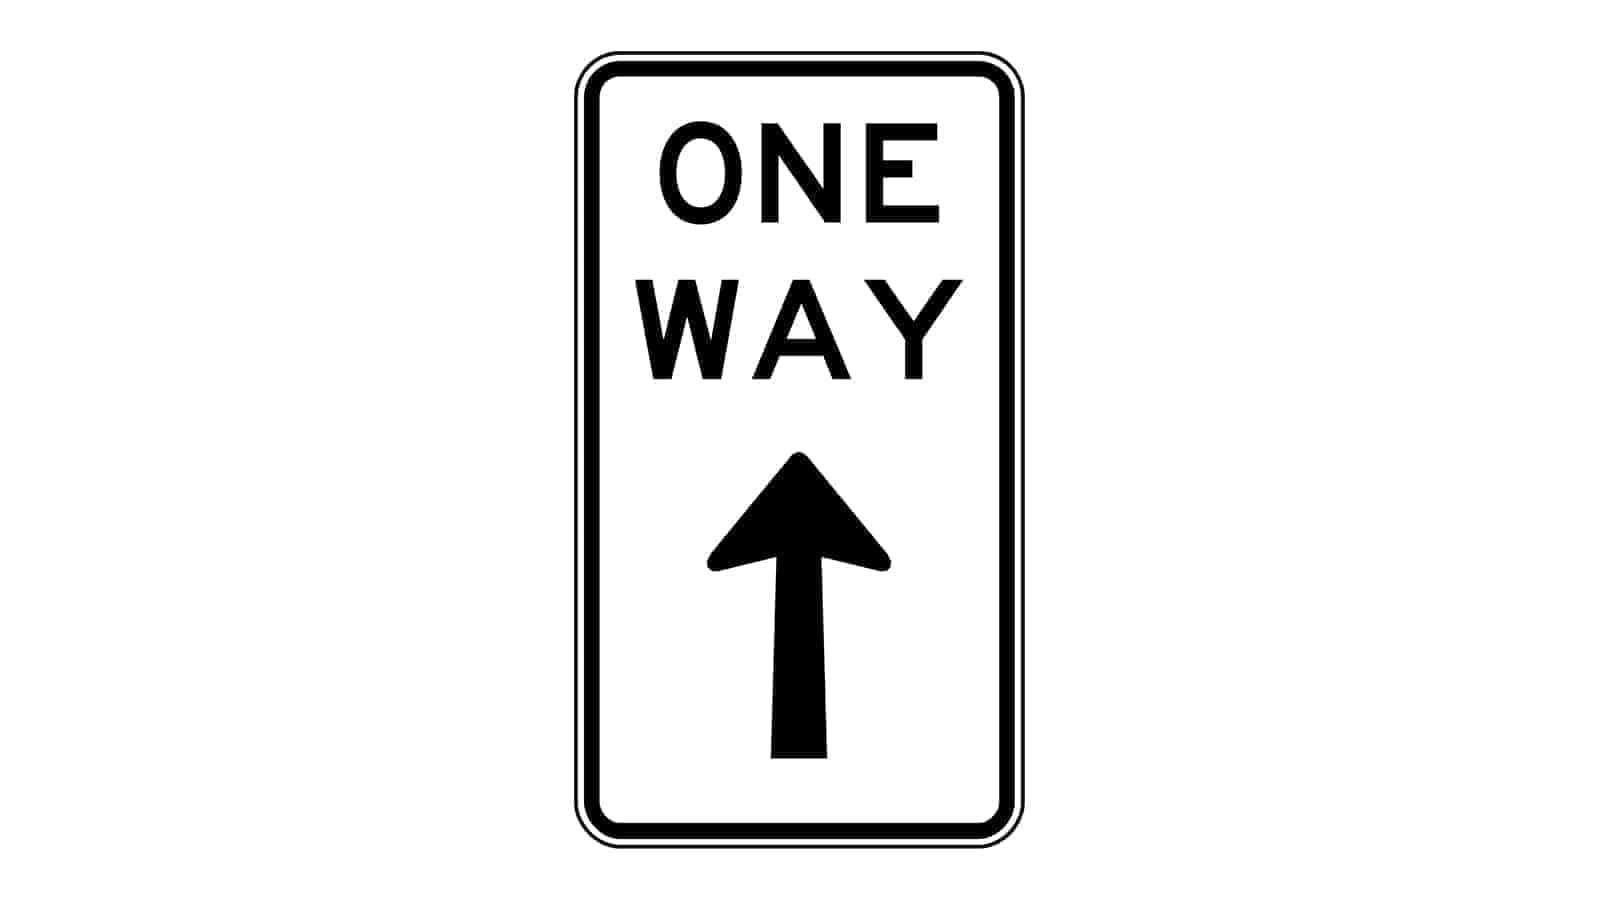
One-Way Traffic Signs
This traffic signs indicate that traffic is only allowed to flow in the direction indicated by the arrow.
Details of the Sign:
• One-Way: These traffic signs indicate that the road or street is restricted to traffic moving in one direction only.
• Arrow Direction: The arrow shows the allowed direction of traffic flow.
Where It Is Commonly Seen:
• In urban areas to manage traffic flow and reduce congestion.
• Near intersections to direct traffic safely.
• In places with narrow roads where two-way traffic signs are not feasible.
Usage Tips:
1. Follow the Arrow: Always drive in the direction of the arrow.
2. Watch for Opposing Traffic: Be aware of vehicles that might mistakenly enter the one-way street.
3. Look for Additional Signs: Check for other signs indicating turns, exits, or any changes in traffic patterns.
One-Way Left or Right Sign
These signs indicate that these traffic signs are only allowed to flow in the direction indicated by the arrow, either left or right.
Details of the Sign:
• One-Way Left: Indicates that traffic must move to the left.
• One-Way Right: Indicates that traffic must move to the right.
• Arrow Direction: The arrow specifies the required direction of traffic flow.
Where It Is Commonly Seen:
• At intersections to manage traffic flow.
• In urban areas to reduce congestion and improve safety.
• Near entries and exits of one-way streets.
Usage Tips:
1. Follow the Arrow: Always drive in the direction indicated by the arrow on the sign.
2. Be Aware of Opposing Traffic: Ensure you are not driving against the flow of traffic.
3. Observe Additional Signs: Look for other signs that might indicate changes in traffic patterns or additional rules.
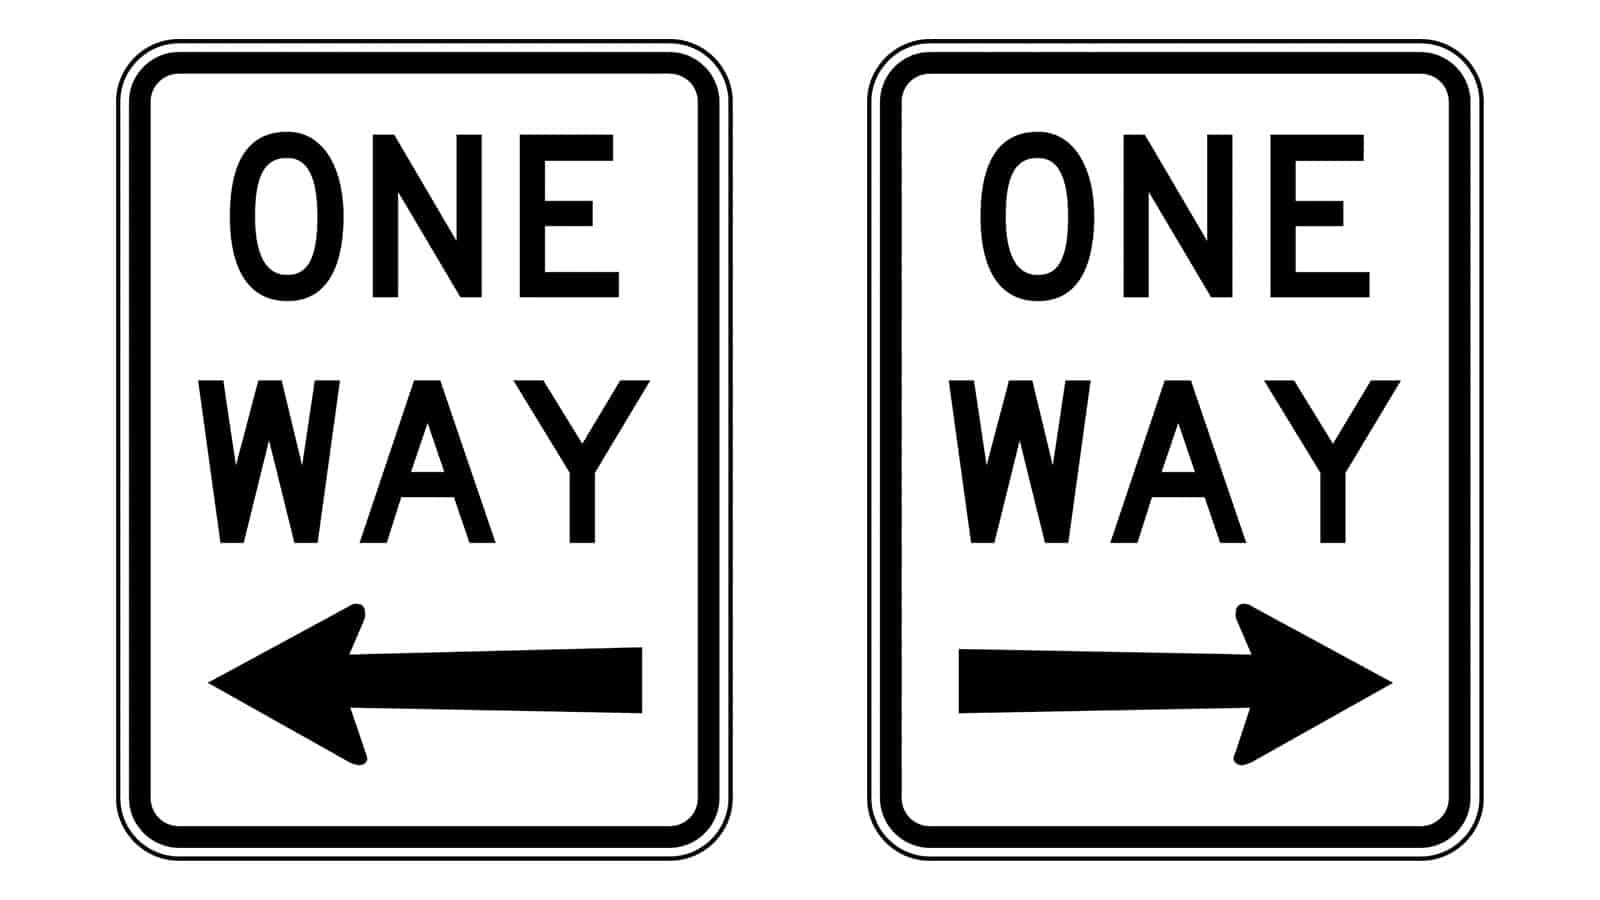
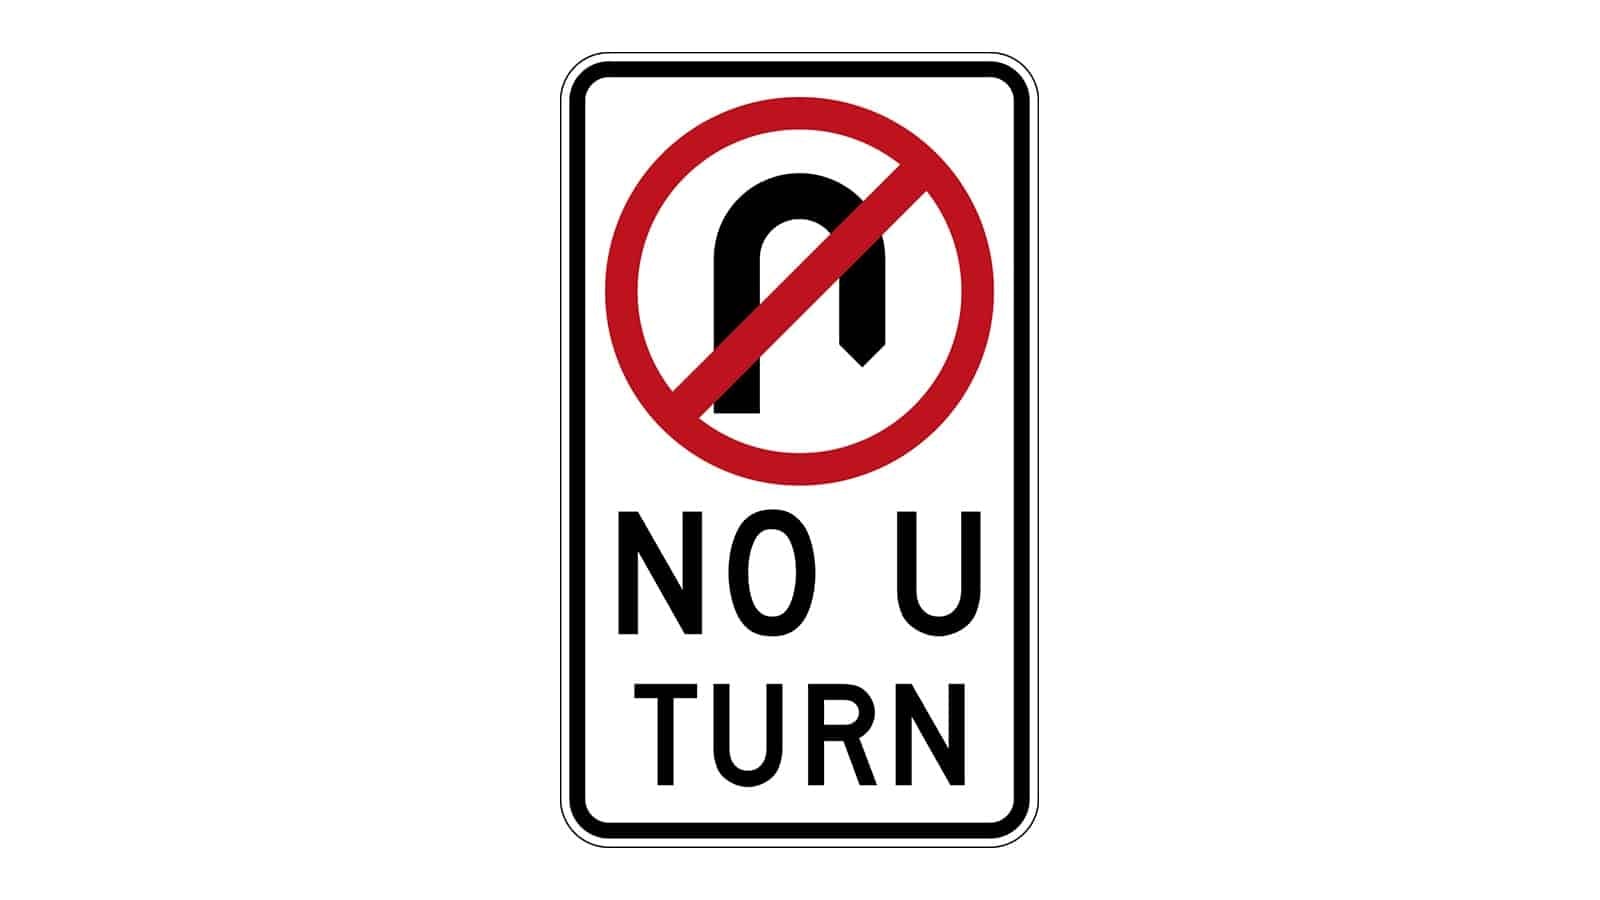
No U-Turn Sign
This sign indicates that U-turns are not permitted at the location where the sign is posted.
Details of the Sign:
• Symbol: The sign typically shows a U-turn symbol with a red circle and a diagonal line through it.
• Text: Below the symbol, the sign usually reads “NO U TURN” in bold letters.
• Colour Scheme: It often uses a white background with black and red text and symbols for clear visibility.
Where It Is Commonly Seen:
• At intersections or sections of the road where making a U-turn would be dangerous.
• Near medians or barriers where U-turns could disrupt traffic flow.
• In areas with high traffic volumes or complex road layouts.
Usage Tips:
1. Observe Closely: Always look for this sign before attempting a U-turn.
2. Follow the Rule: Respect the sign and avoid making a U-turn where it is prohibited.
3. Plan Your Route: If you miss a turn, proceed to a location where U-turns are permitted or safely turn around using other legal manoeuvres.
No Stopping Sign
This sign indicates that stopping is not allowed during the specified times.
Details of the Sign:
• Symbol: The sign typically features a red circle with a black “S” crossed out by a diagonal line.
• Text: To the right of the symbol, the sign usually indicates the specific times and days when stopping is prohibited, such as “4-6 PM MON – FRI”.
• Arrow: Often, there is an arrow pointing in the direction where the no-stopping zone begins or applies.
Where It Is Commonly Seen:
• Bus Lanes: To ensure that bus lanes remain clear during peak hours.
• High Traffic Areas: To prevent congestion in areas with heavy traffic flow.
• Near Intersections: To maintain visibility and access for turning vehicles and pedestrians.
Usage Tips:
1. Observe Closely: Always check for these signs when parking or stopping your vehicle.
2. Follow the Times: Ensure you adhere to the specified times and days to avoid fines or towing.
3. Plan Ahead: If you need to stop, plan to do so outside the restricted hours or in areas where stopping is allowed.
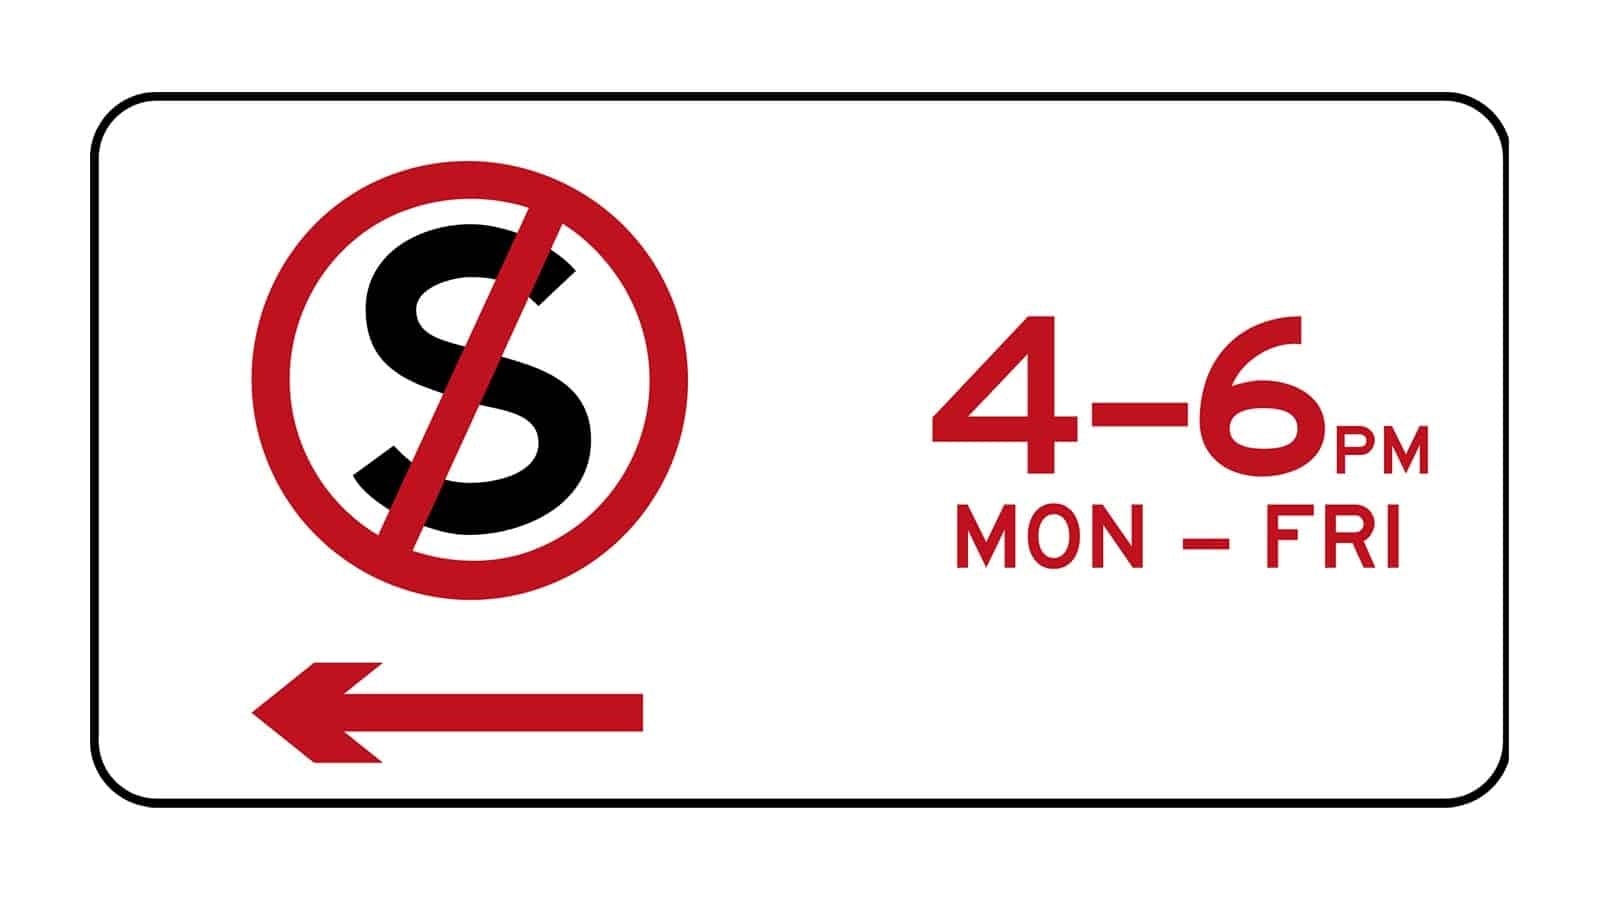
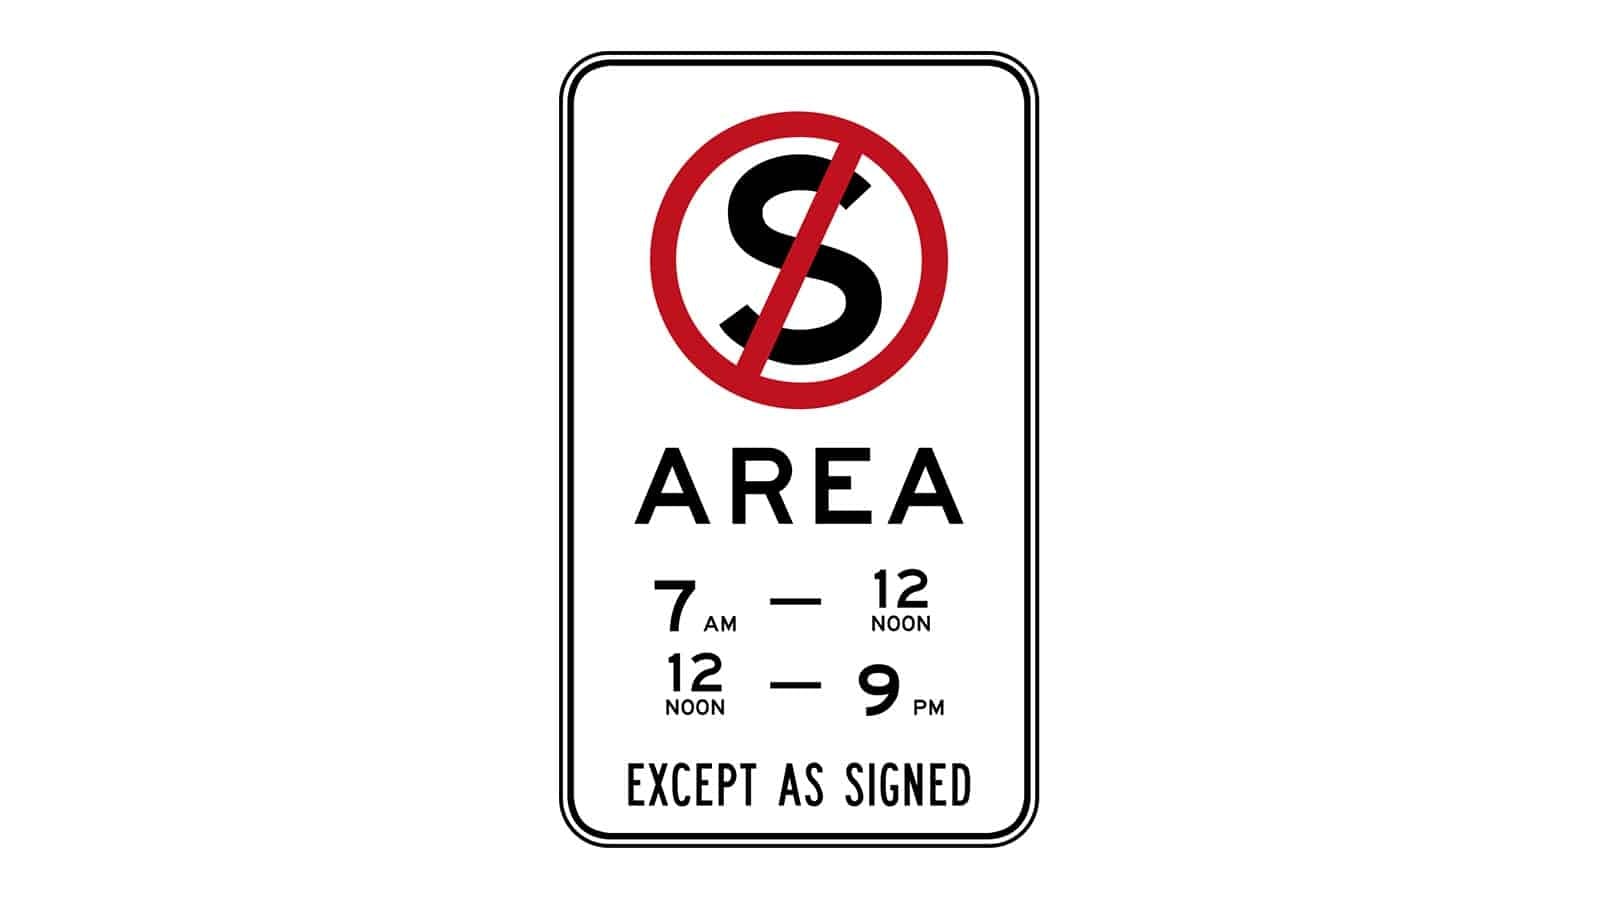
No Stopping Area Sign
This sign indicates that stopping is not allowed in the designated area during the specified times.
Details of the Sign:
• Symbol: A red circle with a black “S” crossed out by a diagonal line.
• Text: Below the symbol, the sign indicates the word “AREA” and specifies the times when stopping is prohibited, such as “7 AM – 12 NOON” and “12 NOON – 9 PM”.
• Additional Information: At the bottom, it states “EXCEPT AS SIGNED,” indicating that there might be specific conditions or exemptions in other signs.
Where It Is Commonly Seen:
• High Traffic Zones: To ensure smooth traffic flow and prevent congestion.
• Near Schools or Pedestrian Areas: To maintain safety and clear paths for pedestrians.
• Commercial Areas: To facilitate loading and unloading without blocking traffic.
Usage Tips:
1. Adhere to Times: Make sure to follow the specified times to avoid penalties.
2. Check for Exceptions: Look for additional signs that may provide exceptions or specific instructions.
3. Plan Stops Accordingly: If you need to stop, find designated areas where stopping is allowed.
No Parking Signs
These signs indicate areas where parking is prohibited. They can specify the times when parking is not allowed or indicate a general prohibition in the designated area.
Details of the Signs:
1. General No Parking Sign:
• Symbol: A red circle with a black “P” crossed out by a diagonal line.
• Direction Arrows: The arrows at the bottom indicate the boundaries of the no-parking zone.
2. Time-Specific No Parking Sign:
• Symbol: Similar to the general no-parking sign.
• Text: Specifies the times when parking is prohibited, e.g., “4-6 PM MON – FRI.”
• Direction Arrow: Points to the direction of the no-parking zone.
Where They Are Commonly Seen:
• Busy Streets: To prevent congestion and ensure smooth traffic flow.
• Near Intersections: To maintain clear sight lines for drivers.
• Loading Zones: To allow space for loading and unloading without obstruction.
• Special Events: Temporary signs may be used to manage parking during events.
Usage Tips:
1. Adhere to Times: If the sign specifies times, make sure to comply to avoid fines.
2. Look for Arrows: Pay attention to the direction arrows to understand the exact boundaries of the no-parking zone.
3. Check for Additional Signs: There may be other signs nearby that provide more context or exceptions.
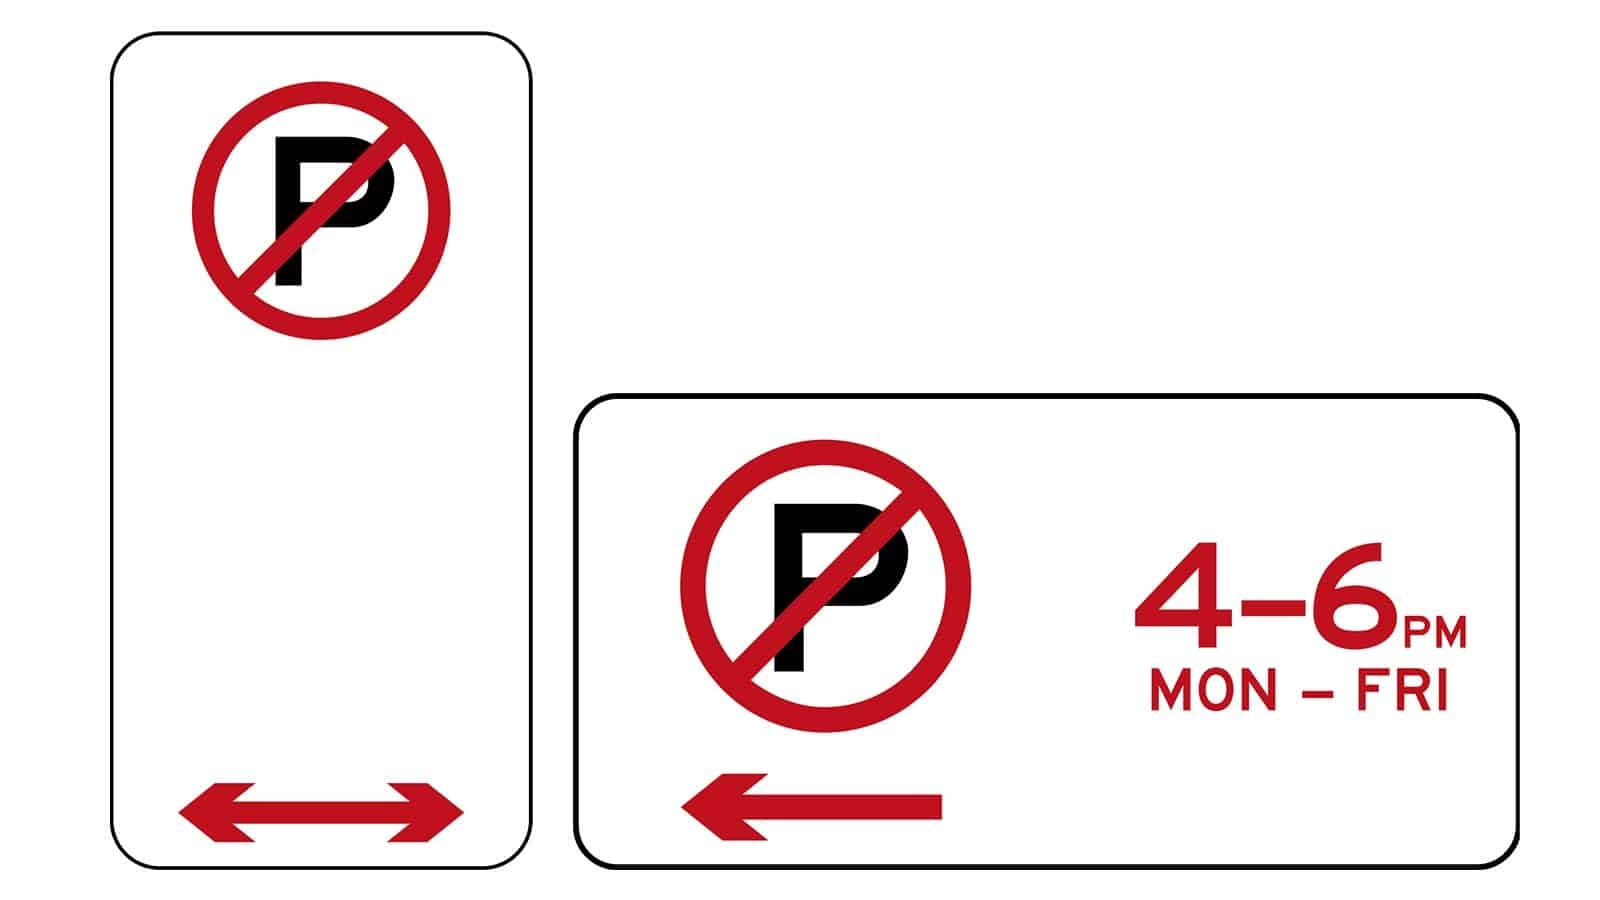
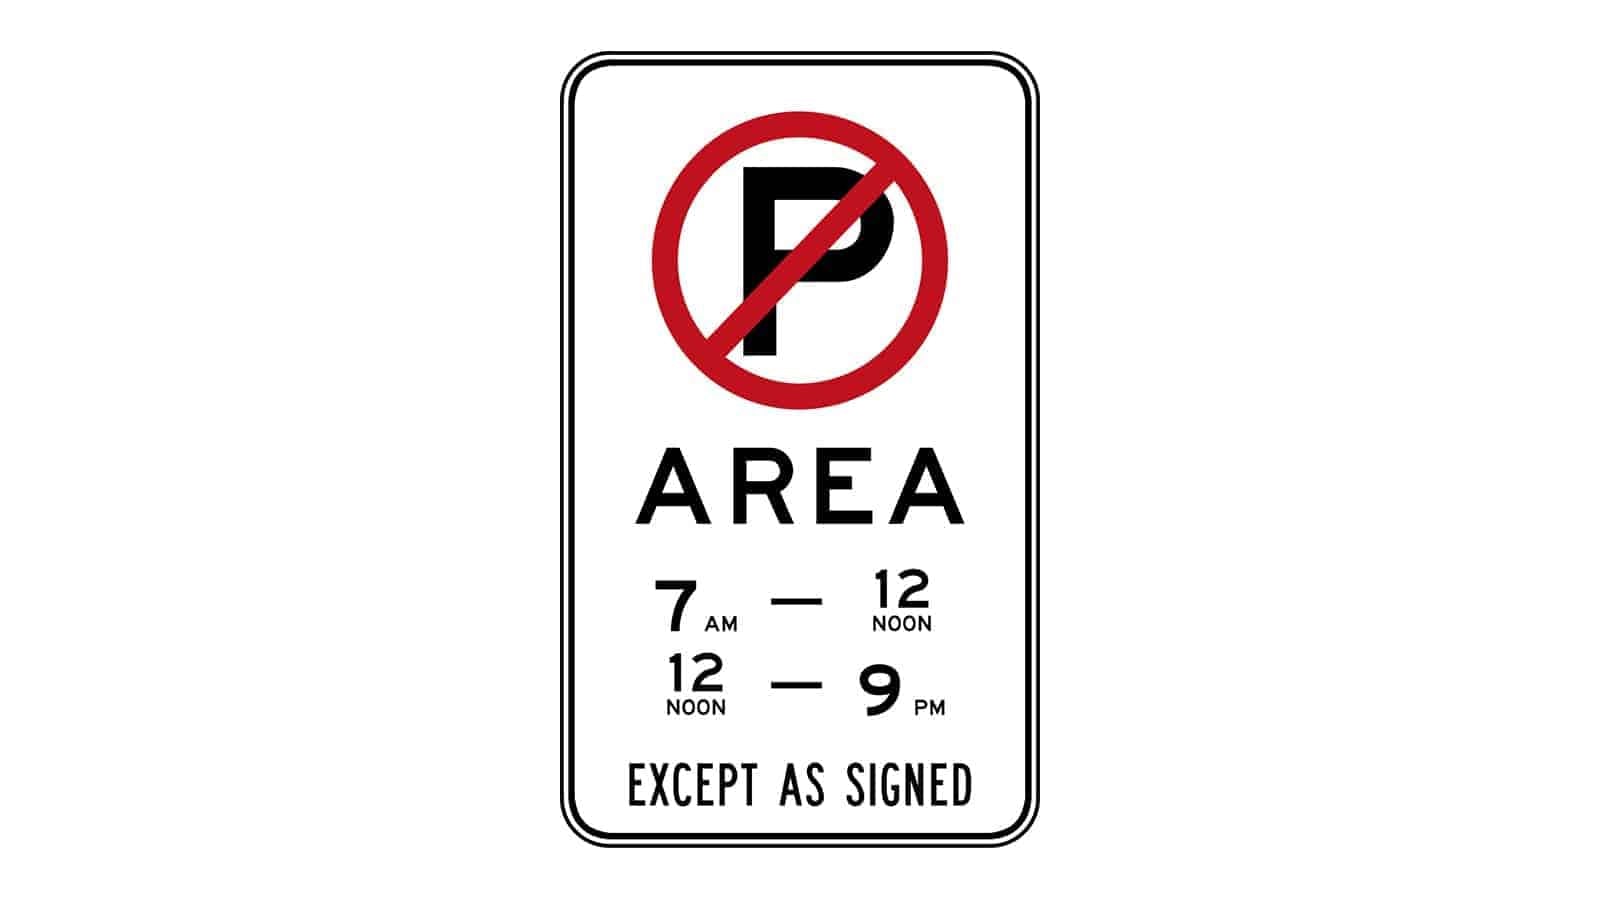
No Stopping Area Sign
This sign indicates that stopping is prohibited in the designated area during the specified times.
Details of the Sign:
• Symbol: A red circle with an “S” crossed out by a diagonal line, representing “No Stopping.”
• Text:
• “AREA”: Indicates that the rule applies to the entire area, not just a single spot.
• Times: Specifies the hours during which stopping is prohibited, e.g., “7 AM – 12 Noon” and “12 Noon – 9 PM.”
• “EXCEPT AS SIGNED”: There may be exceptions to the rule as indicated by other signs in the area.
Where They Are Commonly Seen:
• Busy Streets: To prevent congestion and ensure smooth traffic flow.
• Near Intersections: To maintain clear sight lines for drivers.
• Special Zones: Such as school zones, hospital zones, and other areas requiring free flow of traffic.
• Event Zones: Temporary signs may be used to manage traffic during events.
Usage Tips:
1. Adhere to Times: Ensure you do not stop in the area during the specified times to avoid fines.
2. Look for Additional Signs: Pay attention to other signs that might provide exceptions or additional information.
3. Be Cautious: Even outside the specified times, consider whether stopping might still obstruct traffic or pose safety hazards.
No Overtaking or Passing Sign
This sign indicates that overtaking or passing other vehicles is prohibited in the designated area. It is used to ensure safety on roads where such manoeuvres could be particularly dangerous.
Details of the Sign:
• Text: The sign reads “NO OVERTAKING OR PASSING.”
• Colour Scheme: Typically, the sign has black text on a white background, framed by a black border.
Where They Are Commonly Seen:
• Narrow Roads: Where there isn’t enough space for safe overtaking.
• Curves and Bends: Where visibility is limited, making overtaking risky.
• Near Intersections: To prevent conflicts between vehicles turning and those trying to overtake.
• Construction Zones: Where road conditions may change suddenly, posing risks to overtaking vehicles.
• School Zones: To protect children who may be crossing the road.
Usage Tips:
1. Obey the Sign: Do not attempt to overtake or pass any vehicle in areas where this sign is posted.
2. Be Patient: Understand that the restriction is in place for safety reasons, and look for designated passing zones if you need to overtake.
3. Stay Alert: These signs are often placed in areas with additional hazards, so maintain high awareness and follow the speed limit.
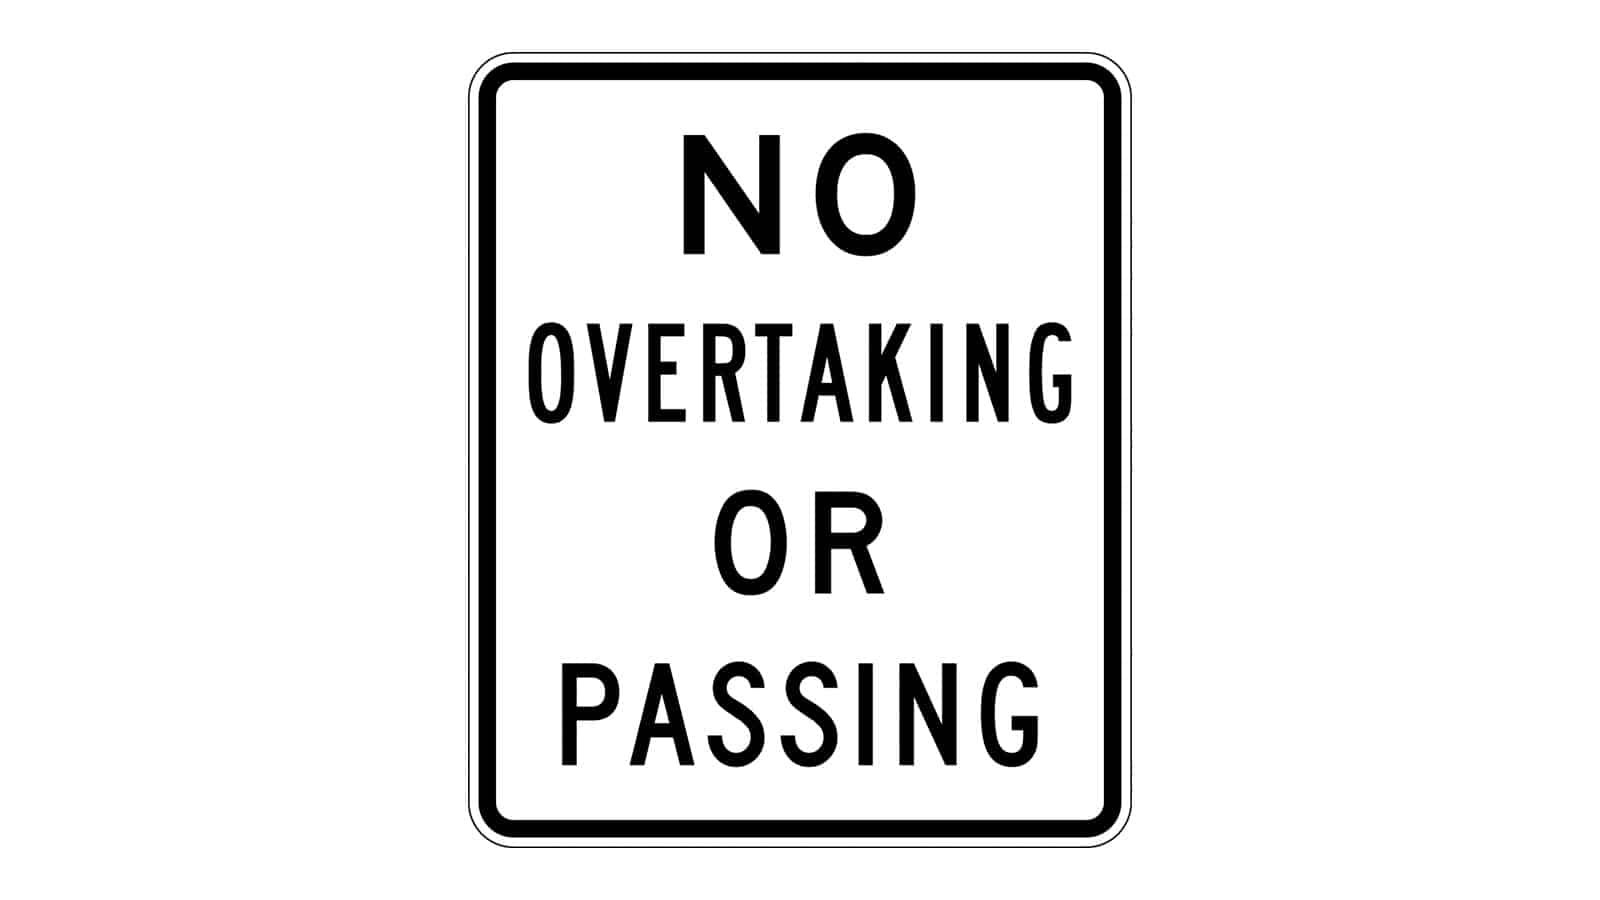
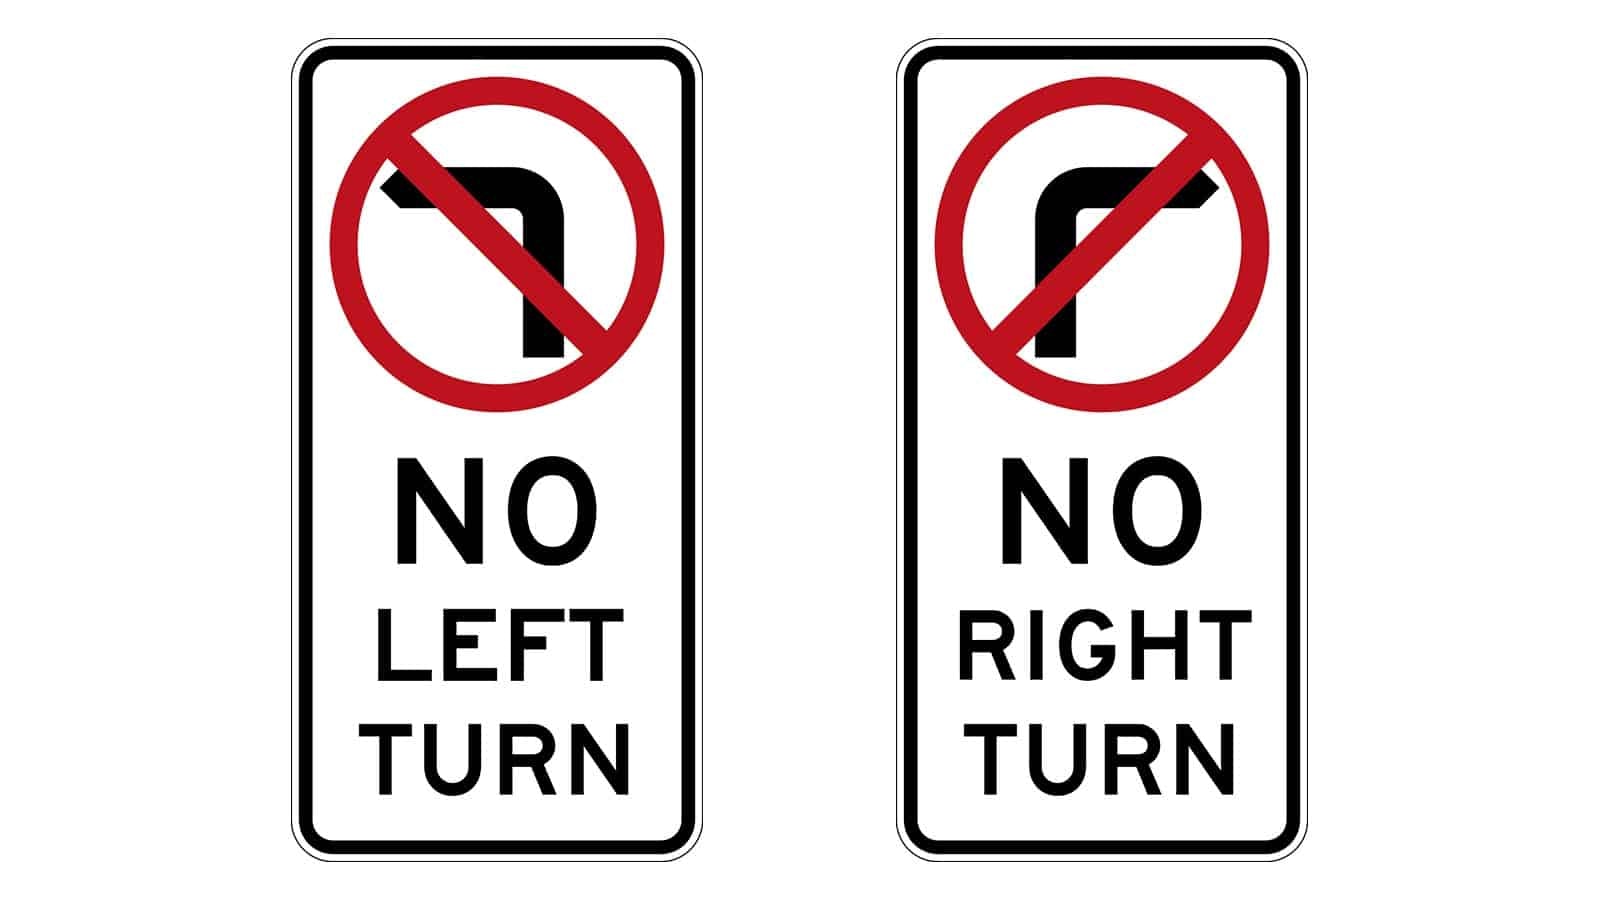
No Entry Sign
The No Entry sign indicates that vehicles are not allowed to enter a particular area or road. It is used to prevent traffic from entering a prohibited zone, such as a one-way street from the wrong direction or a restricted area.
Where It Is Commonly Seen:
• One-Way Streets: At the ends of streets to prevent vehicles from entering against the flow of traffic.
• Private Property: To restrict access to areas such as driveways, parking lots, or private roads.
• Restricted Areas: To prevent unauthorized vehicles from entering areas such as construction sites, military zones, or pedestrian-only zones.
Usage Tips:
1. Do Not Enter: Obey the sign and do not attempt to drive past it, as this could lead to traffic violations or accidents.
2. Find Alternative Routes: Use other streets or paths to reach your destination. If you are unsure, follow detour signs or use a GPS for guidance.
3. Watch for Additional Signs: There may be other signs indicating the direction or path vehicles should take, so pay attention to all road signs in the area.
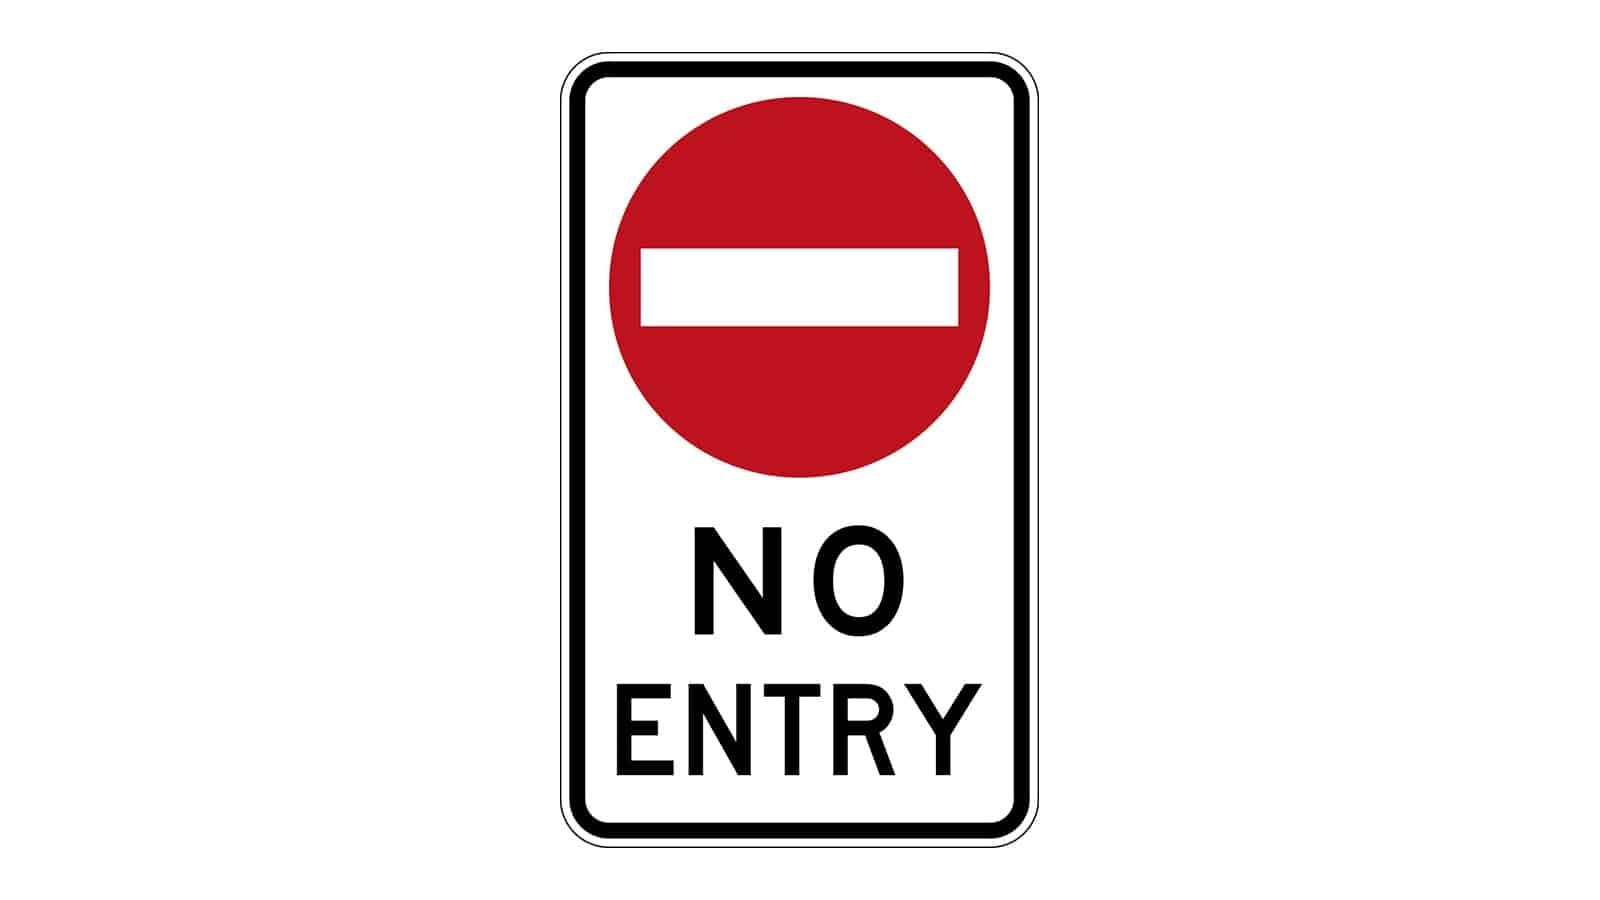
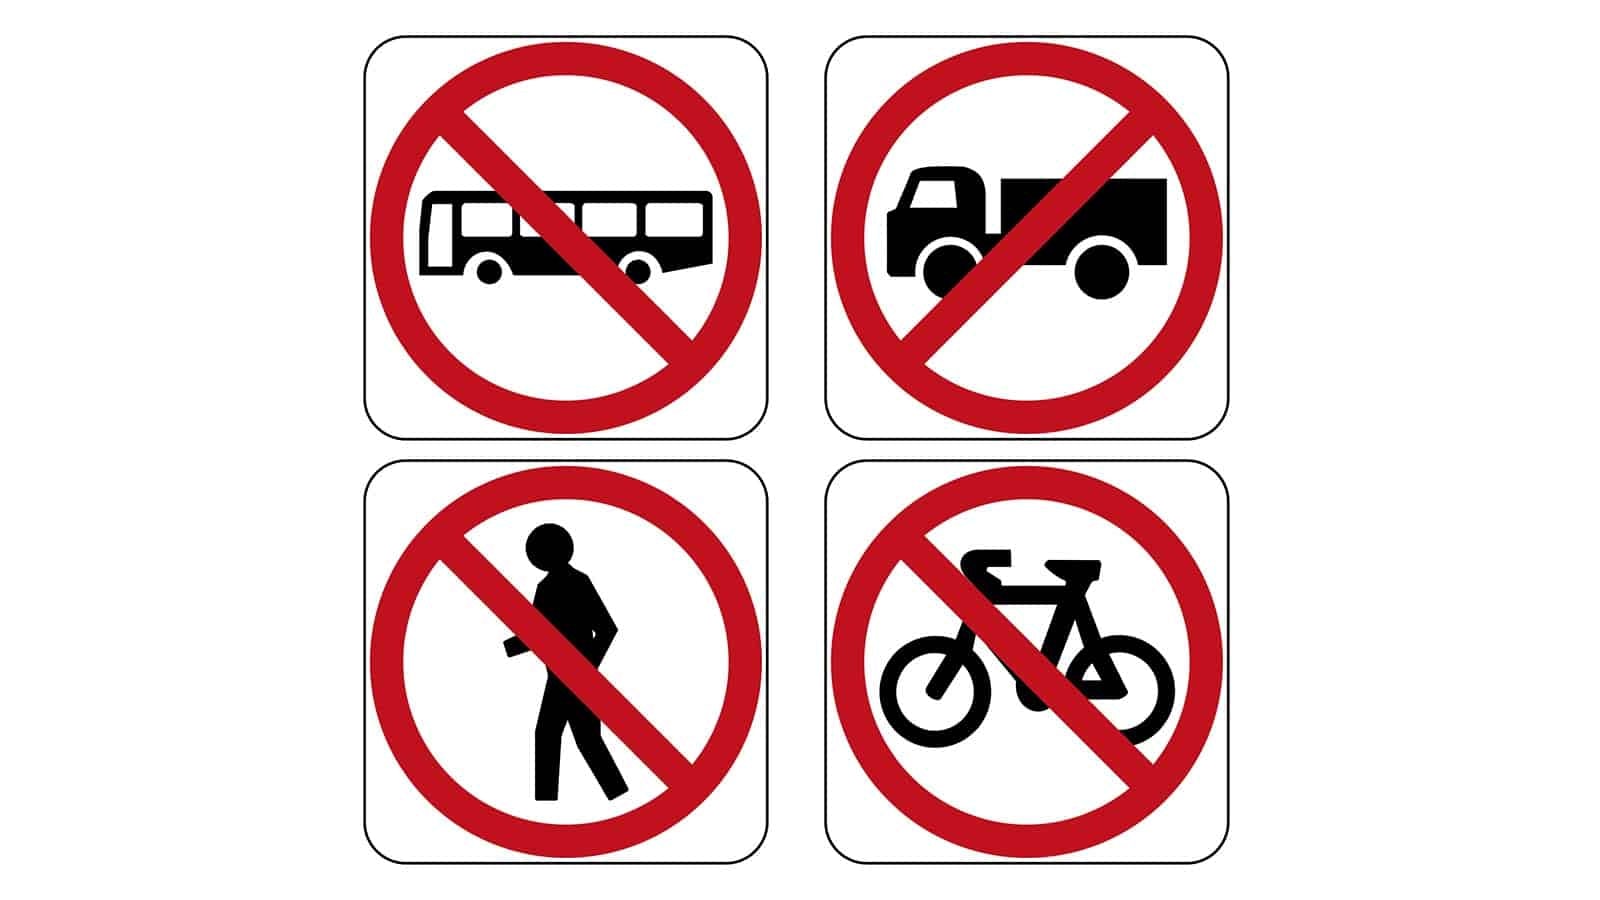
No Buses, Trucks, Pedestrians, and Bicycles Signs
These signs indicate restrictions on specific types of vehicles and pedestrians from entering certain areas. They are used to ensure safety, manage traffic flow, and prevent congestion in areas where these types of vehicles or pedestrians are not allowed.
Where They Are Commonly Seen:
• No Buses: In residential areas, narrow streets, or places where bus traffic would cause congestion or safety issues.
• No Trucks: In residential zones, restricted urban areas, or roads with weight limits.
• No Pedestrians: On highways, bridges, tunnels, or construction zones where pedestrian access is dangerous.
• No Bicycles: On highways, certain urban areas, or roads where bicycle traffic could cause safety issues.
Usage Tips:
1. Observe and Comply: Always obey these signs to avoid traffic violations and ensure safety.
2. Alternative Routes: Use alternate paths or routes if your vehicle type or if you are a pedestrian/bicyclist. Follow detour signs or use a map/GPS for guidance.
3. Stay Informed: Be aware of the local regulations and restrictions that apply to specific areas to avoid entering prohibited zones.
Median Turning Lane Sign
This sign indicates the presence of a median turning lane, which allows vehicles to make left or right turns from the centre of a road. It is designed to improve traffic flow and safety by providing a designated space for turning vehicles.
Where They Are Commonly Seen:
• On roads with a central median where turning lanes are provided for left or right turns.
• At intersections or junctions to facilitate smooth and safe turning movements.
Usage Tips:
1. Use Median Lane for Turns: Only use the median turning lane for making left or right turns.
2. Yield to Oncoming Traffic: Ensure the way is clear and yield to oncoming traffic before making your turn.
3. Signal Early: Signal your intention to turn well in advance to inform other drivers of your intended movement.
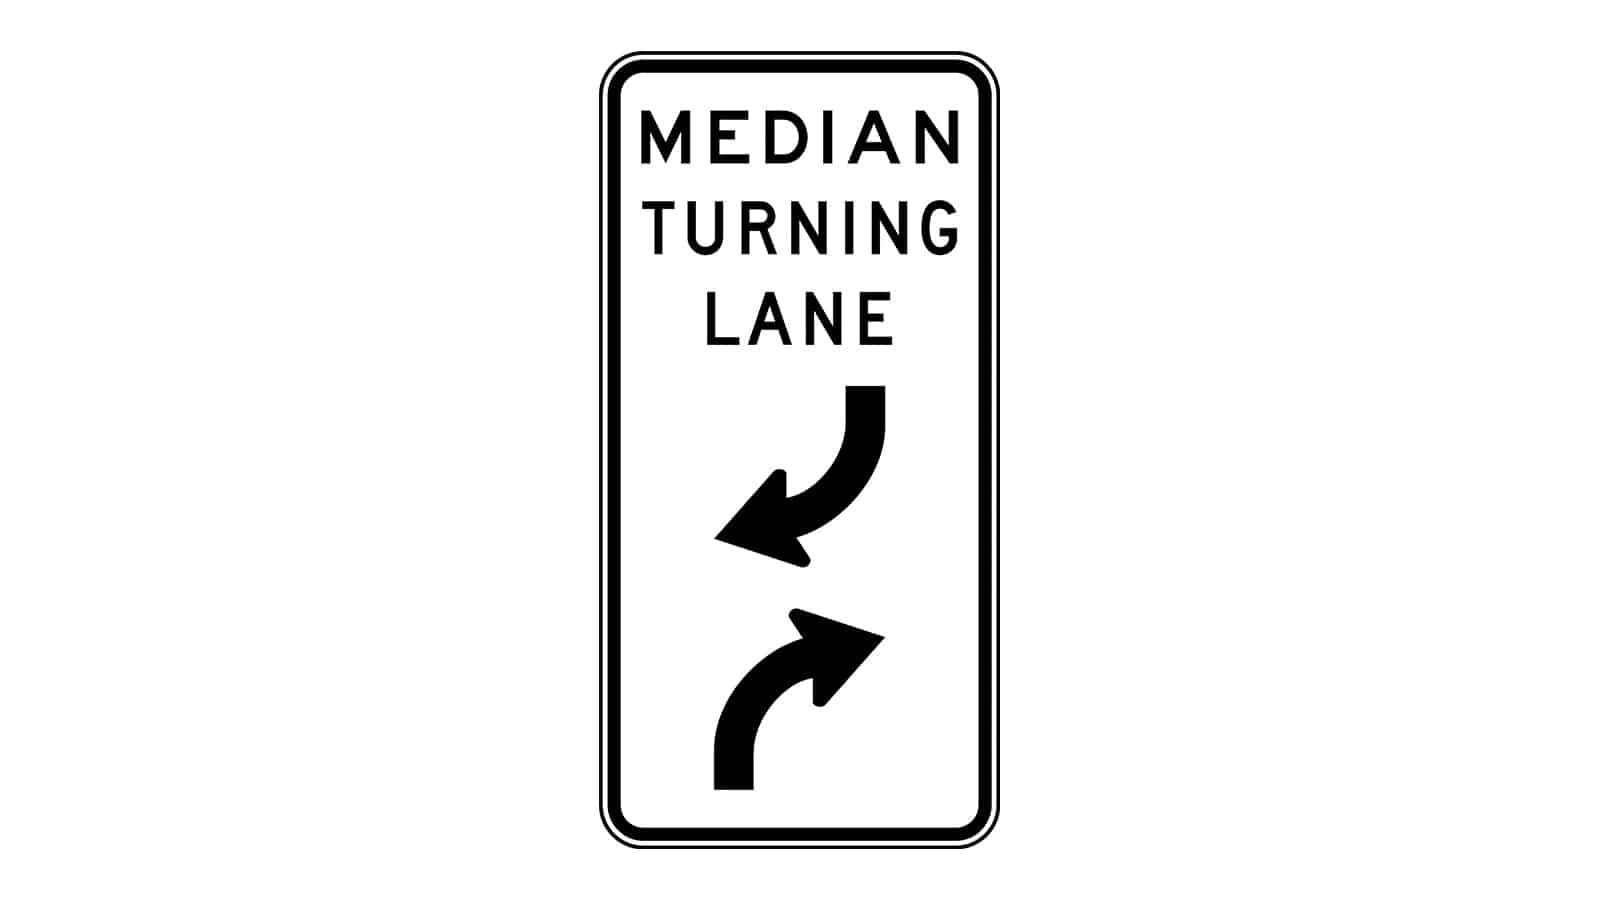
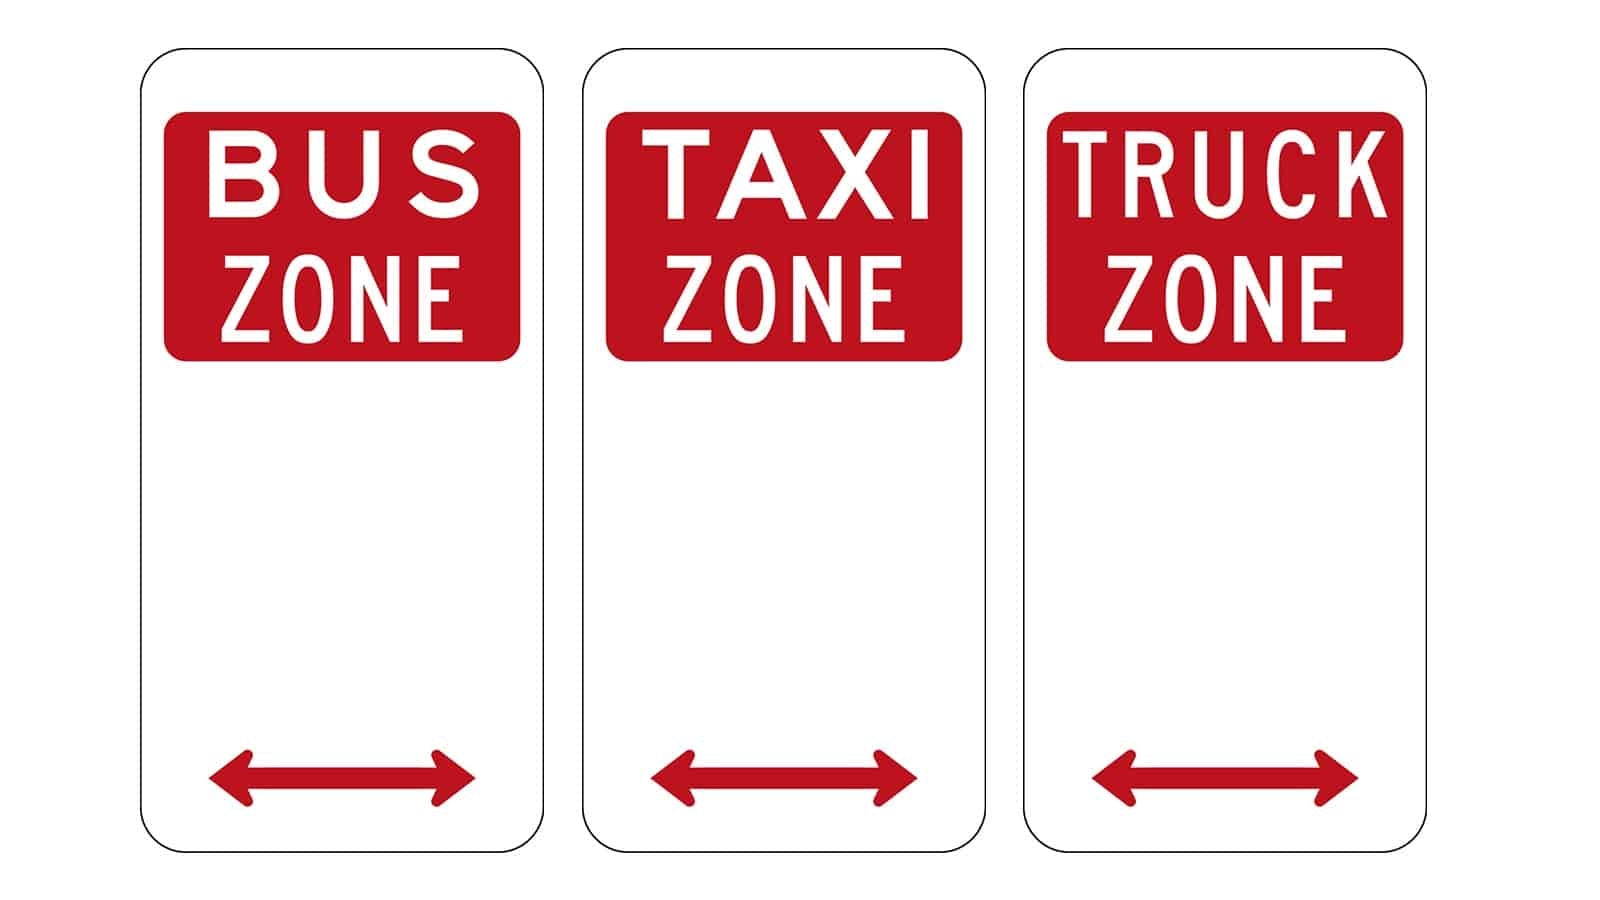
Bus Zone / Taxi Zone / Truck Zone
These signs indicate specific areas reserved for certain types of vehicles to stop or park. Each zone is designated for the corresponding vehicle type, ensuring smooth traffic flow and efficient use of space.
Where They Are Commonly Seen:
• Bus Zone: Near bus stops or terminals.
• Taxi Zone: Near airports, train stations, or areas with high taxi demand.
• Truck Zone: Loading docks, industrial areas, or places where deliveries are frequent.
Usage Tips:
1. Bus Zone: Only buses are permitted to stop in this area. Other vehicles should not block or park here.
2. Taxi Zone: Reserved for taxis. Other vehicles should avoid stopping or parking here to keep the area clear for taxis.
3. Truck Zone: Designated for trucks, often for loading and unloading purposes. Other vehicles should not park in these areas.
Compliance:
• Always observe and follow these signs to avoid fines or penalties.
• Keep these areas clear to ensure the designated vehicles can perform their functions efficiently.
Left Turn on Red Permitted After Stopping Sign
This sign indicates that drivers are allowed to make a left turn at a red traffic light, provided they come to a complete stop first. This rule is applicable only when the sign is posted.
Where They Are Commonly Seen:
• At intersections where traffic flow can be safely managed with left turns on red.
• Locations where traffic regulations have been adjusted to improve intersection efficiency.
Usage Tips:
1. Complete Stop Required: Ensure your vehicle comes to a complete stop before making the turn.
2. Check for Traffic and Pedestrians: Yield to all oncoming traffic and pedestrians before proceeding with the turn.
3. Proceed with Caution: Make the turn only when it is safe to do so, following all other traffic signals and rules.
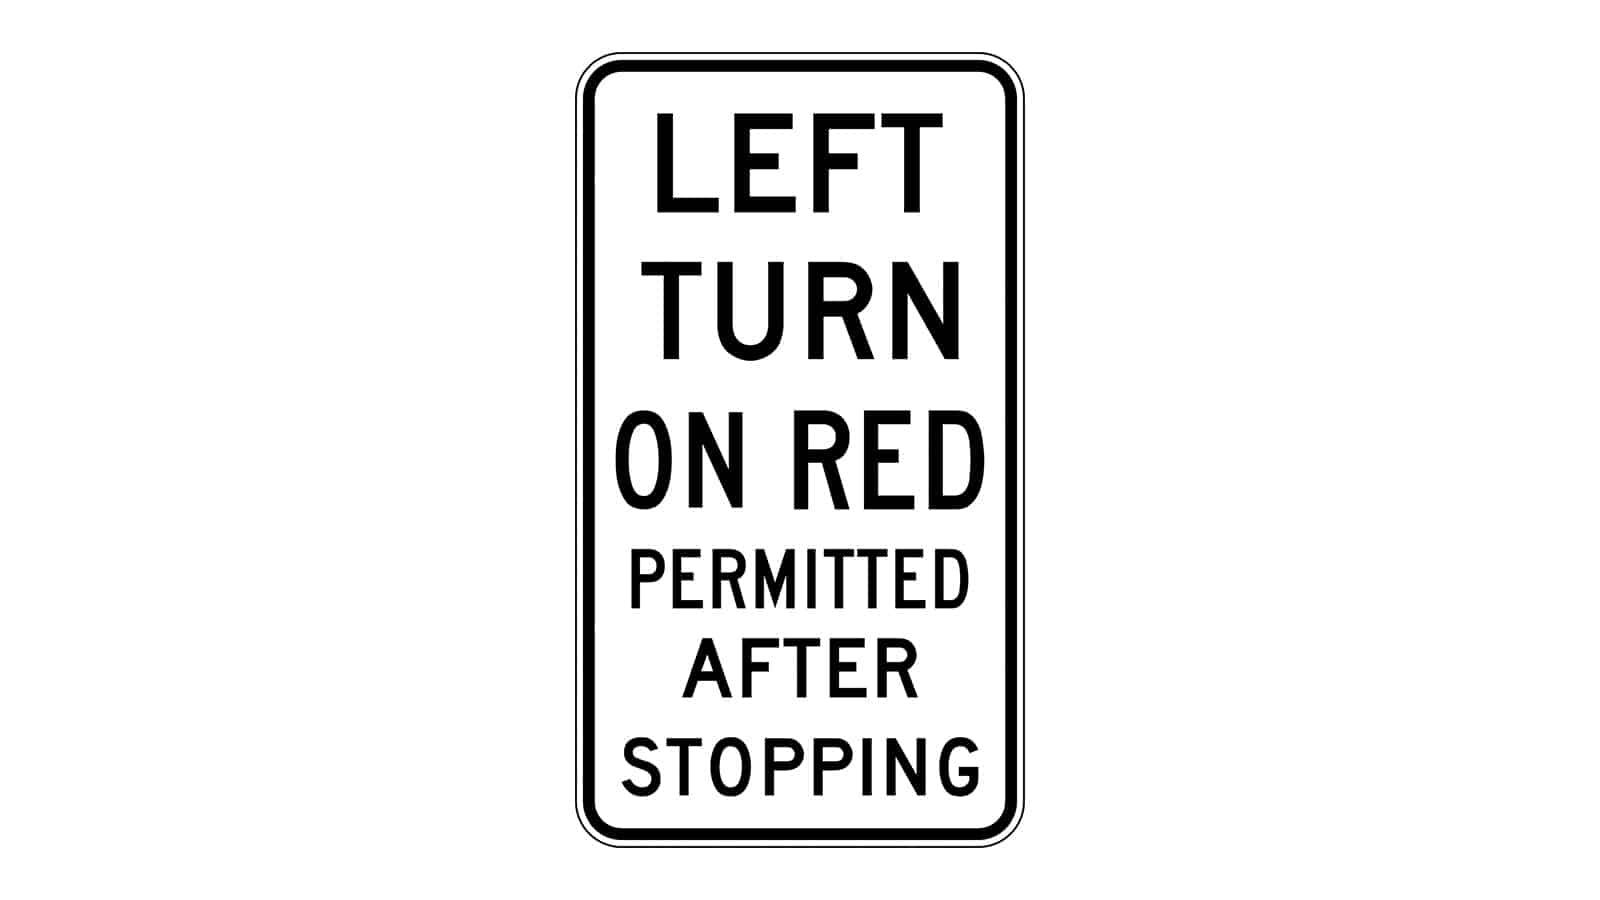
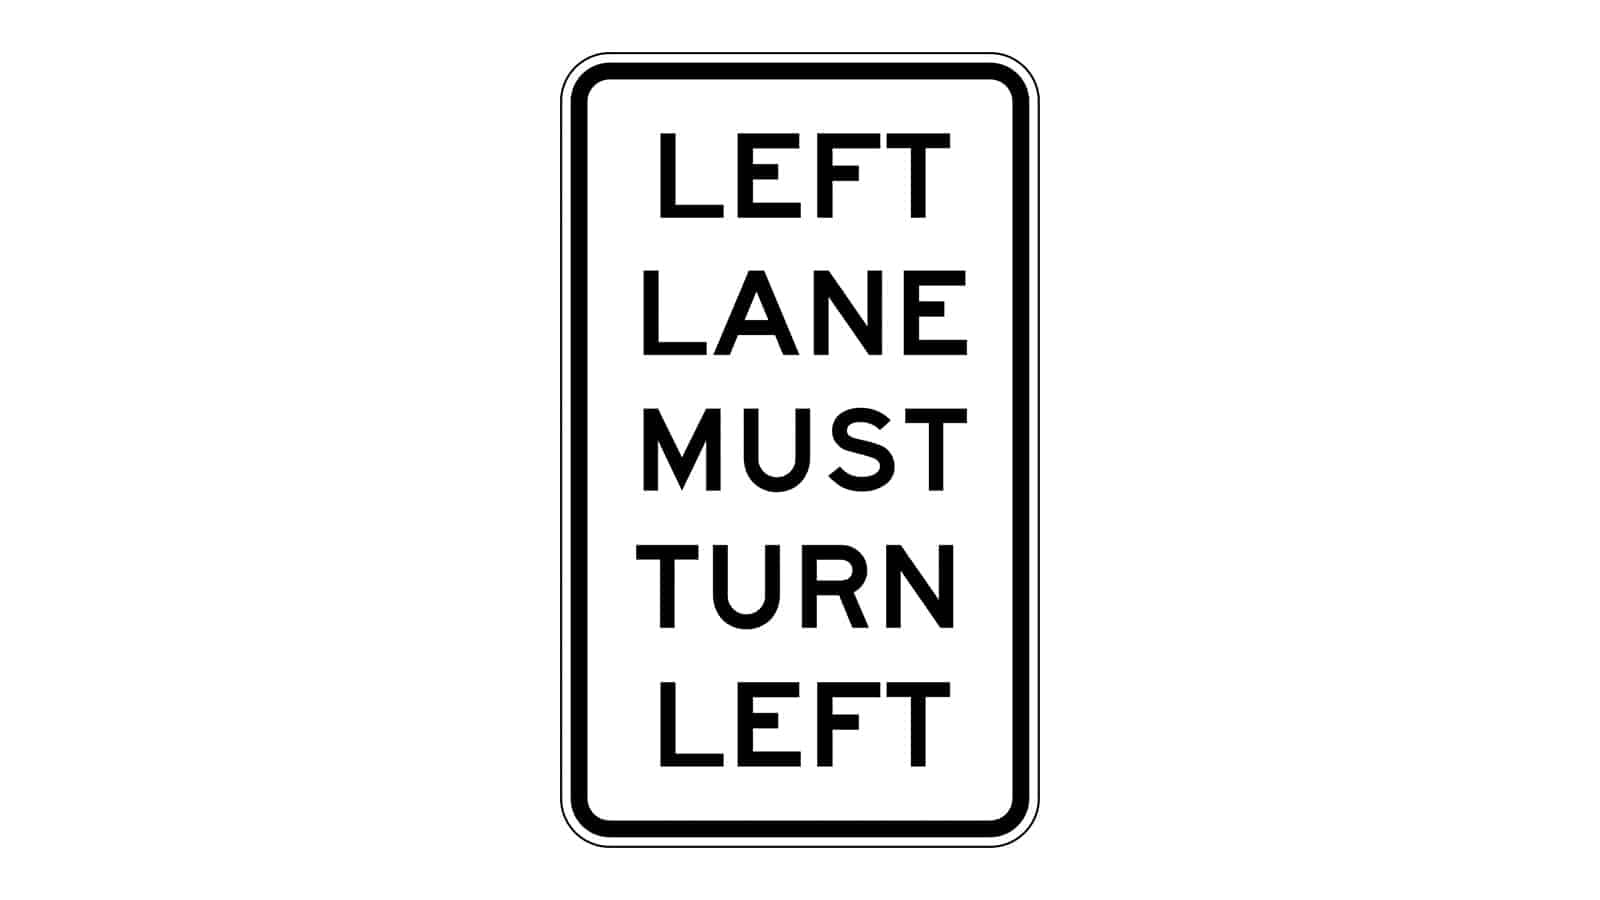
Left Lane Must Turn Left
This sign indicates that vehicles in the left lane must make a left turn. It is used to manage traffic flow and ensure vehicles in the left lane prepare to turn left.
Where They Are Commonly Seen:
• At intersections where the left lane is designated for left turns only.
• Near traffic signals or stop signs where turning left from the left lane is mandatory.
Usage Tips:
1. Preparation: If you are in the left lane and see this sign, prepare to make a left turn.
2. Signalling: Use your left turn signal to indicate your intention to turn left.
3. Compliance: Do not continue straight or make a right turn from the left lane when this sign is present.
Compliance:
• Follow the instructions on the sign to avoid fines or penalties by violating traffic signs and regulations.
• Ensure you are in the correct lane well before reaching the intersection to make the required turn safely.
Left Lane Must Exit
This sign indicates that vehicles in the left lane must take the next exit. It is used to manage traffic flow, especially near exits on highways or freeways, ensuring that vehicles in the left lane prepare to exit.
Where They Are Commonly Seen:
• On highways or freeways approaching an exit ramp.
• At road junctions where the left lane leads to a specific exit.
Usage Tips:
1. Preparation: If you are in the left lane and see this sign, prepare to take the exit.
2. Signalling: Use your left turn signal to indicate your intention to exit.
3. Compliance: Do not continue straight from the left lane when this sign is present; you must exit.
Compliance:
• Follow the instructions on the sign to avoid fines or penalties.
• Ensure you are in the correct lane well before reaching the exit to make the required manoeuvre safely.
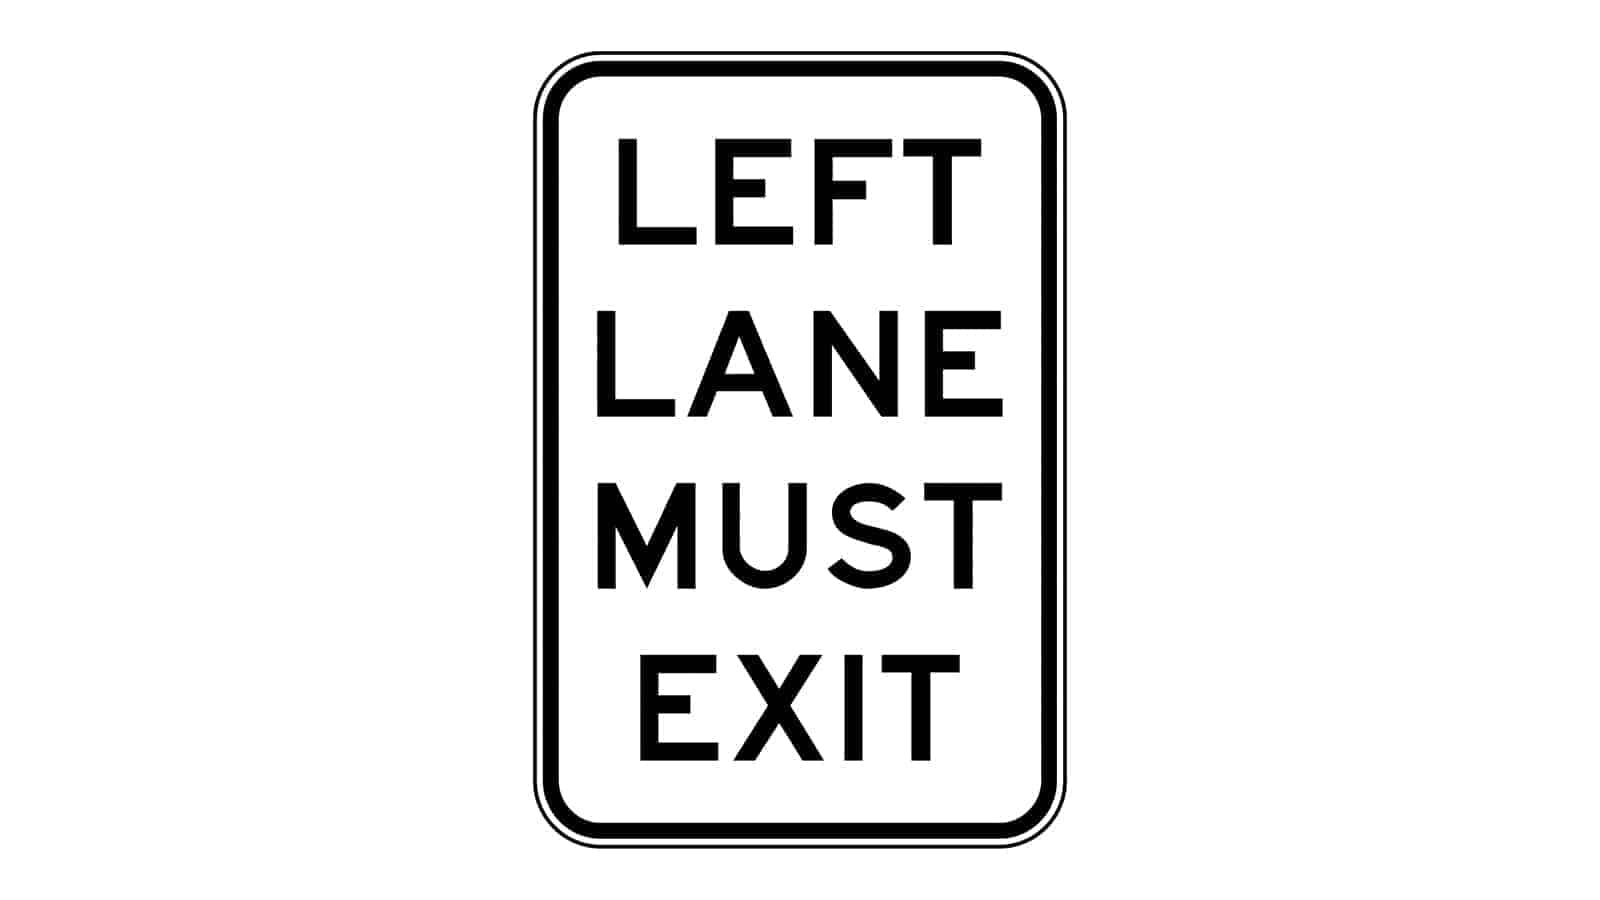
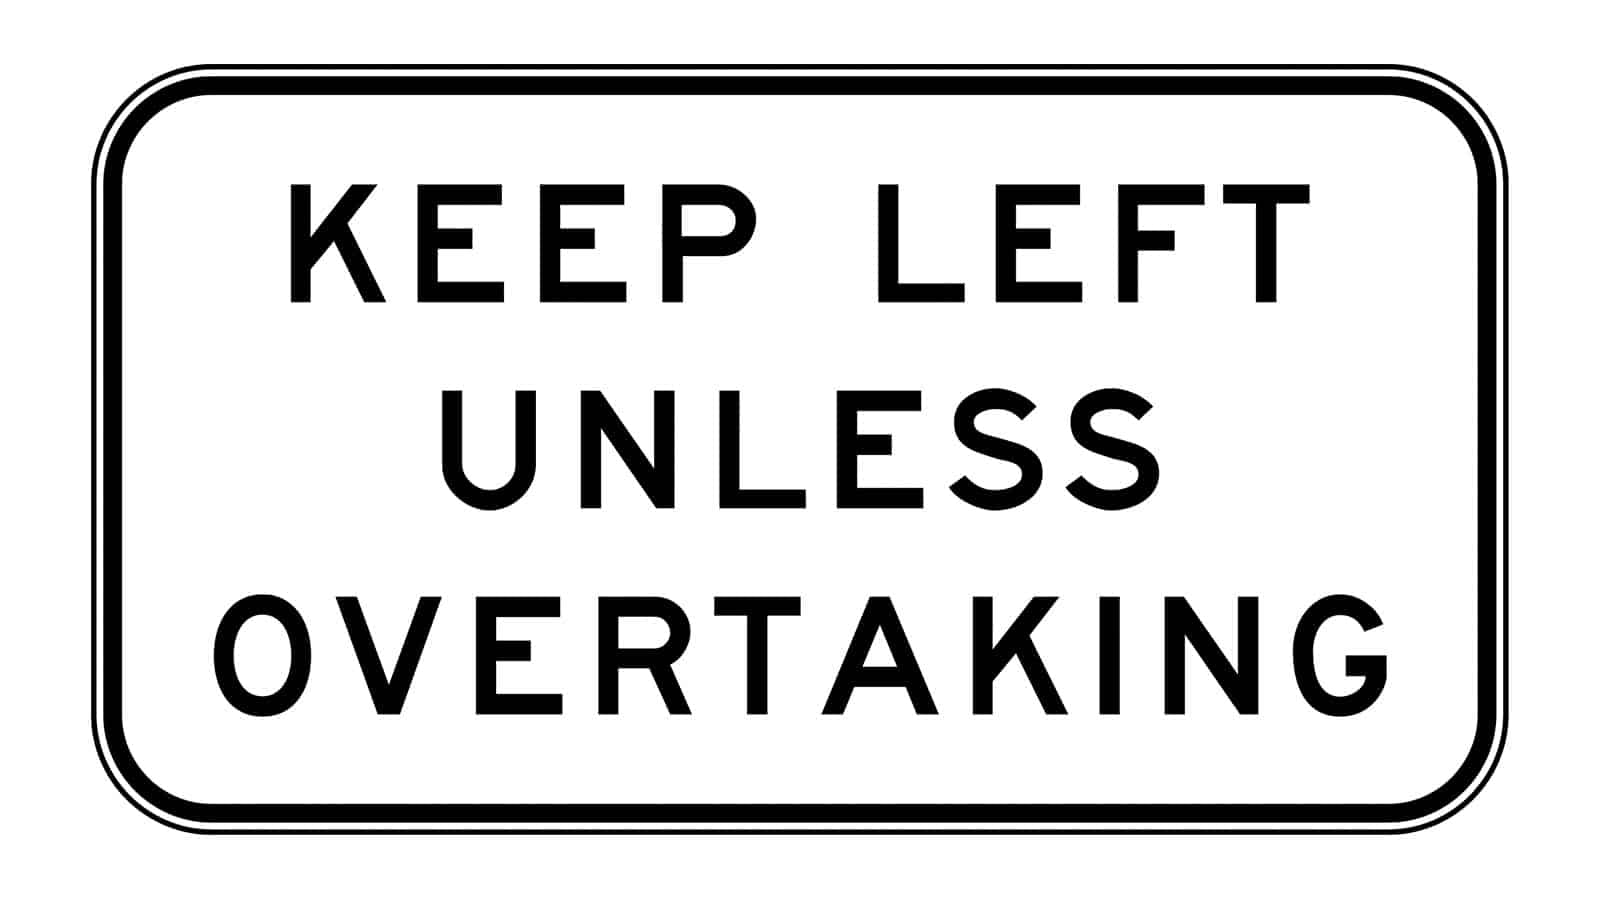
Keep Left Unless Overtaking
This sign instructs drivers to stay in the left lane unless they are overtaking another vehicle. It is designed to ensure smooth traffic flow and reduce congestion, particularly on multi-lane roads and highways.
Where They Are Commonly Seen:
• On multi-lane roads and highways.
• In areas where lane discipline is crucial for maintaining traffic flow.
Usage Tips:
1. Stay Left: Always drive in the left lane unless you need to overtake another vehicle.
2. Overtaking: When overtaking, move to the right lane to pass the slower vehicle and then return to the left lane.
3. Lane Discipline: Avoid staying in the right lane if you are not overtaking, as this can cause congestion and frustrate other drivers.
Compliance:
• Follow the instructions on the sign to avoid fines or penalties.
• Practice good lane discipline to contribute to a smoother and safer driving environment.
Give Way to Buses
This sign instructs drivers to yield to buses, particularly when buses are merging back into traffic from a bus stop or lane. The goal is to facilitate the smooth re-entry of buses into the flow of traffic, ensuring that public transportation operates efficiently and without unnecessary delays.
Where They Are Commonly Seen:
• Near bus stops.
• On roads with designated bus lanes.
• Areas with high bus traffic.
Usage Tips:
1. Yield: When you see a bus signaling to merge into your lane, slow down or stop to let the bus go ahead.
2. Be Vigilant: Pay extra attention to buses pulling out from bus stops or designated lanes.
3. Stay Safe: Ensure you maintain a safe distance from buses to avoid collisions and give them enough space to maneuver.
Compliance:
• Follow the sign’s instruction to give way to buses to avoid fines or penalties.
• Helping buses merge into traffic promptly supports efficient public transportation and overall traffic flow.
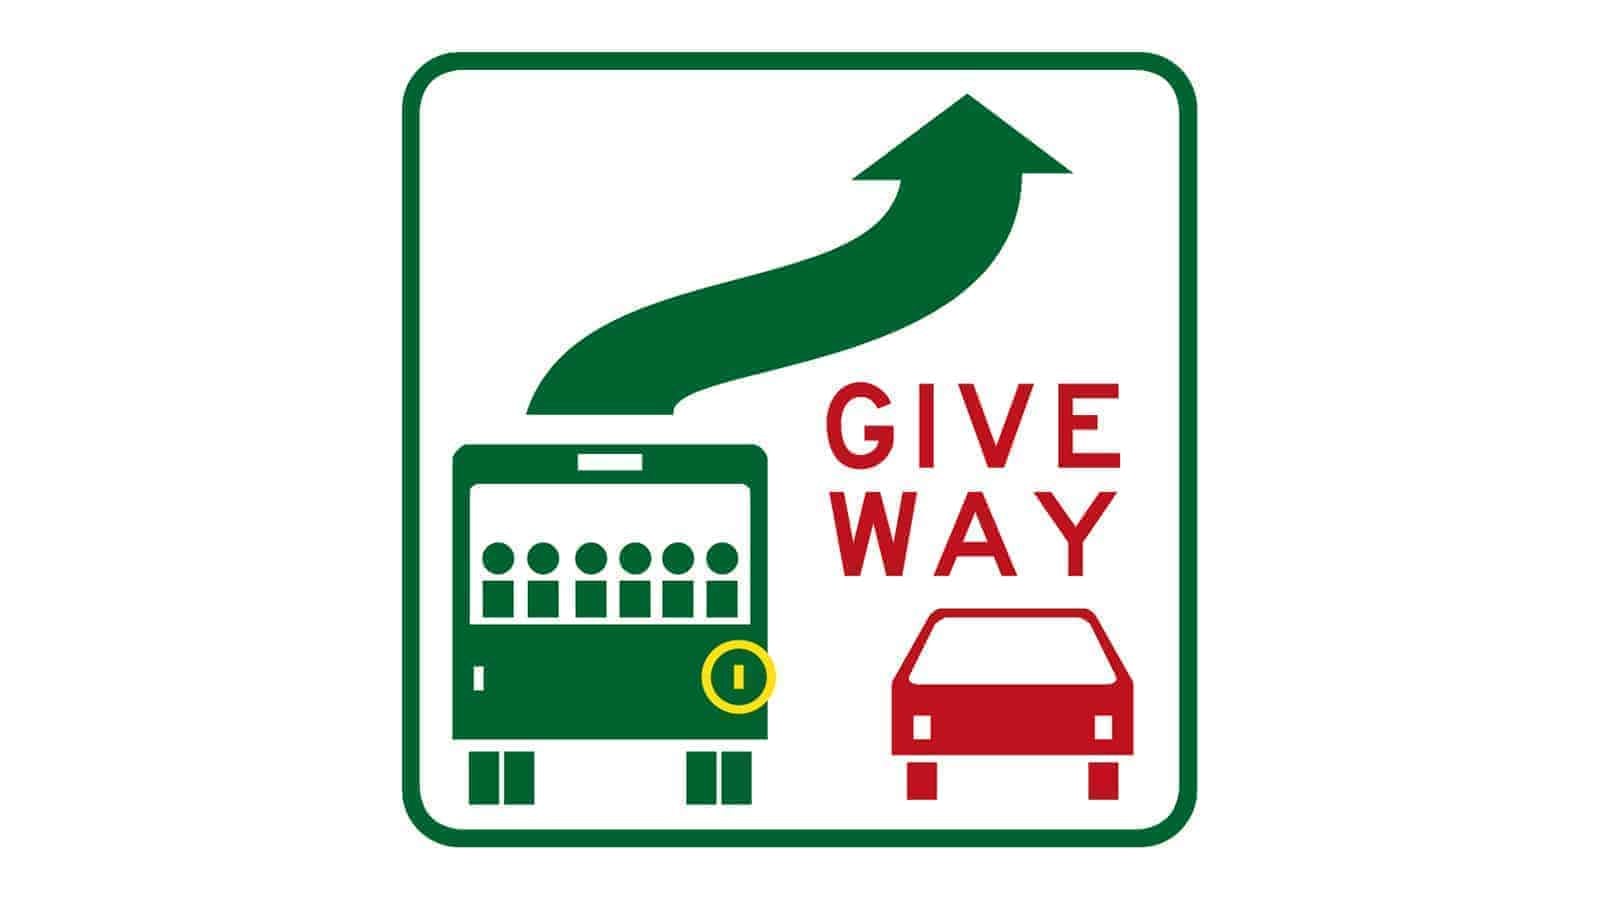
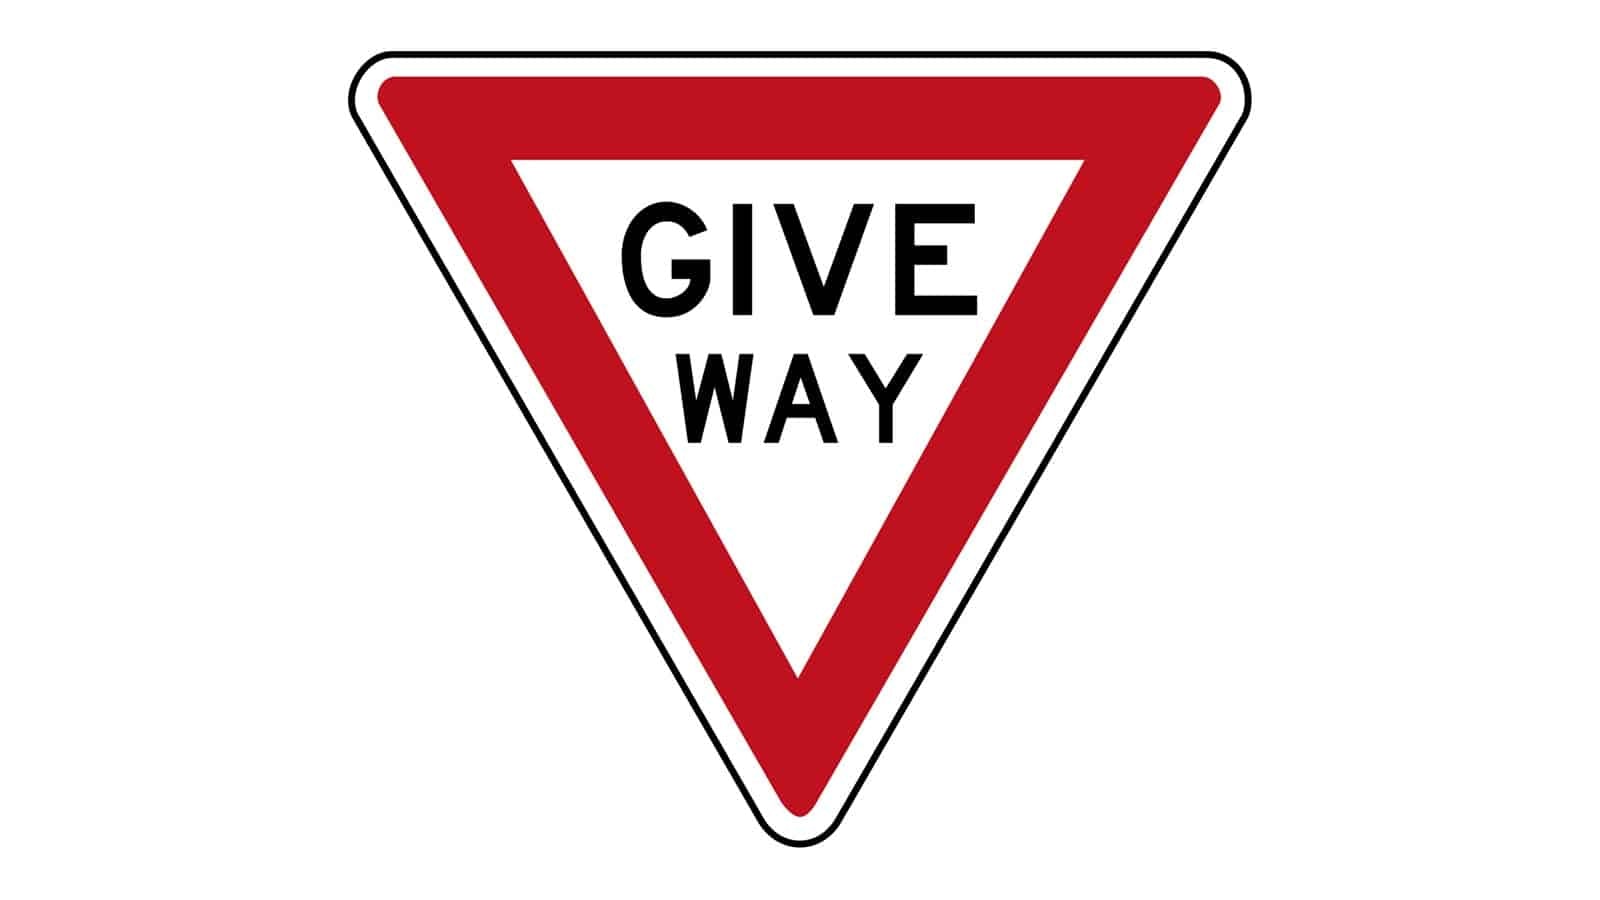
Give Way Sign
This sign indicates that drivers must slow down and yield the right-of-way to other vehicles or pedestrians. If necessary, drivers should stop to allow others to proceed before continuing.
Where They Are Commonly Seen:
• Intersections where other roads have priority.
• Roundabouts.
• Merging lanes.
• Pedestrian crossings.
Usage Tips:
1. Slow Down: Approach the give way sign at a reduced speed.
2. Observe: Look for oncoming traffic and pedestrians.
3. Yield: Allow others to pass if they have the right of way. Stop if necessary to avoid collisions.
4. Proceed with Caution: Once the way is clear, continue driving safely.
Compliance:
• Failing to give way when required can result in fines or penalties.
• Always be vigilant and courteous to ensure safe and smooth traffic flow.
Give Way at Roundabout Sign
This sign indicates that drivers must give way to traffic already circulating within the roundabout. It ensures the smooth flow of traffic and prevents collisions within the roundabout.
Where They Are Commonly Seen:
• At the entrance to roundabouts.
Usage Tips:
1. Slow Down: Approach the roundabout at a reduced speed.
2. Observe: Check for vehicles already in the roundabout, as they have the right of way.
3. Yield: Allow vehicles in the roundabout to pass before entering.
4. Enter When Safe: Once the way is clear, enter the roundabout and navigate to your exit.
Compliance:
• Failing to give way at a roundabout can result in fines or penalties.
• Always be vigilant and ensure to yield to avoid accidents and maintain traffic flow.
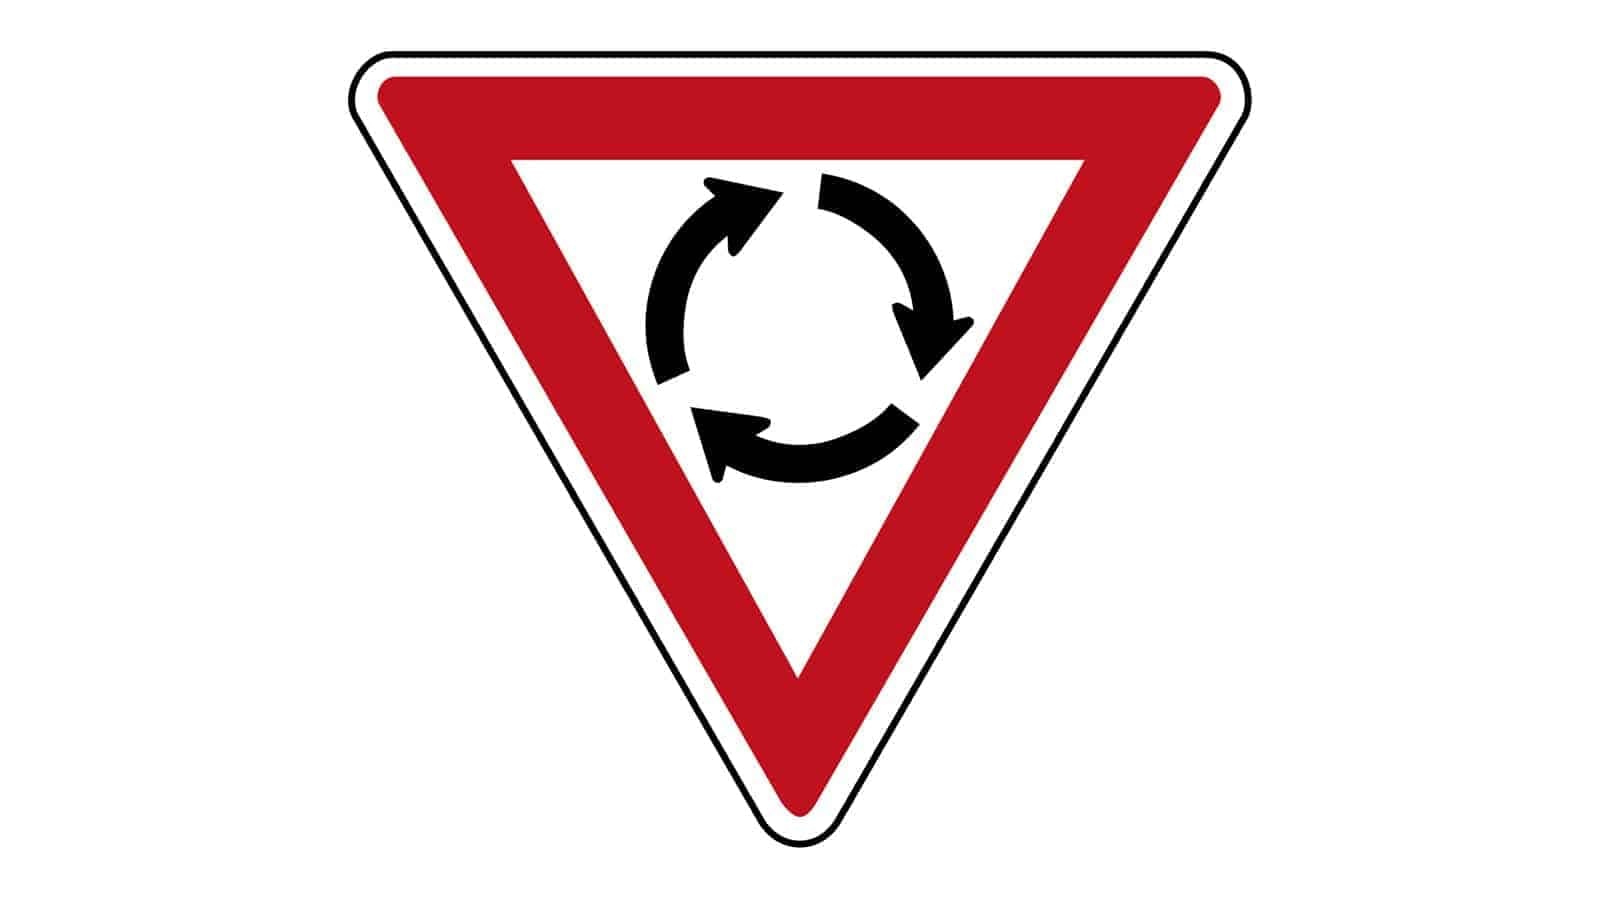
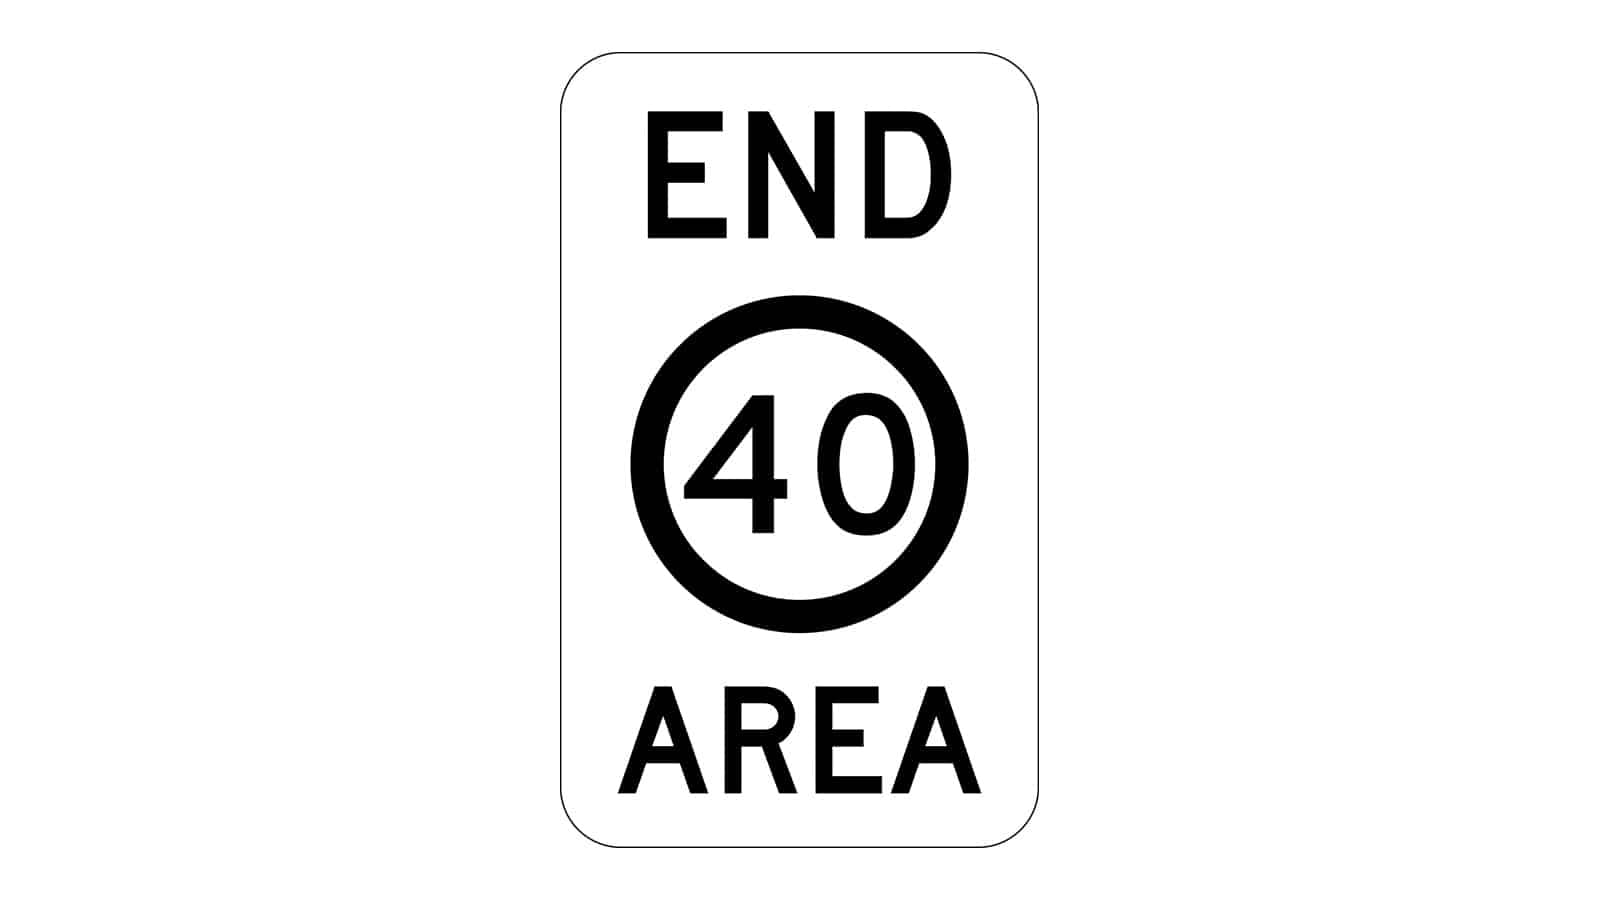
End of Speed Zone Area Sign
This sign indicates the end of a speed-restricted zone. It informs drivers that they are leaving an area with a specific speed limit and can adjust their speed accordingly to comply with the general road speed limits.
Where They Are Commonly Seen:
• At the exit of a speed-restricted area, such as a school zone, construction zone, or residential area.
Usage Tips:
1. Observe: Notice the change in speed limit as you exit the restricted zone.
2. Adjust Speed: Gradually increase or decrease your speed to match the new speed limit.
3. Stay Alert: Be aware of the new road conditions and traffic patterns as speed limits change.
Compliance:
• Ensure you comply with the speed limits after passing the sign to maintain safety and avoid fines or penalties.
• Always drive at a safe speed for the current road conditions, even if the speed limit increases.
End of Speed Limit Sign
This sign indicates the end of a speed limit zone, such as 60 km/h. It informs drivers that the specific speed limit restriction has ended, and they can adjust their speed accordingly to comply with the new or general speed limits of the road.
Where They Are Commonly Seen:
• At the exit of a speed-restricted area, like near schools, construction zones, or certain sections of highways.
Usage Tips:
1. Observe: Notice the change in speed limit as you exit the restricted zone.
2. Adjust Speed: Gradually increase or decrease your speed to match the new speed limit.
3. Stay Alert: Be aware of the new road conditions and traffic patterns as speed limits change.
Compliance:
• Ensure you comply with the speed limits after passing the sign to maintain safety and avoid fines or penalties.
• Always drive at a safe speed for the current road conditions, even if the speed limit increases.
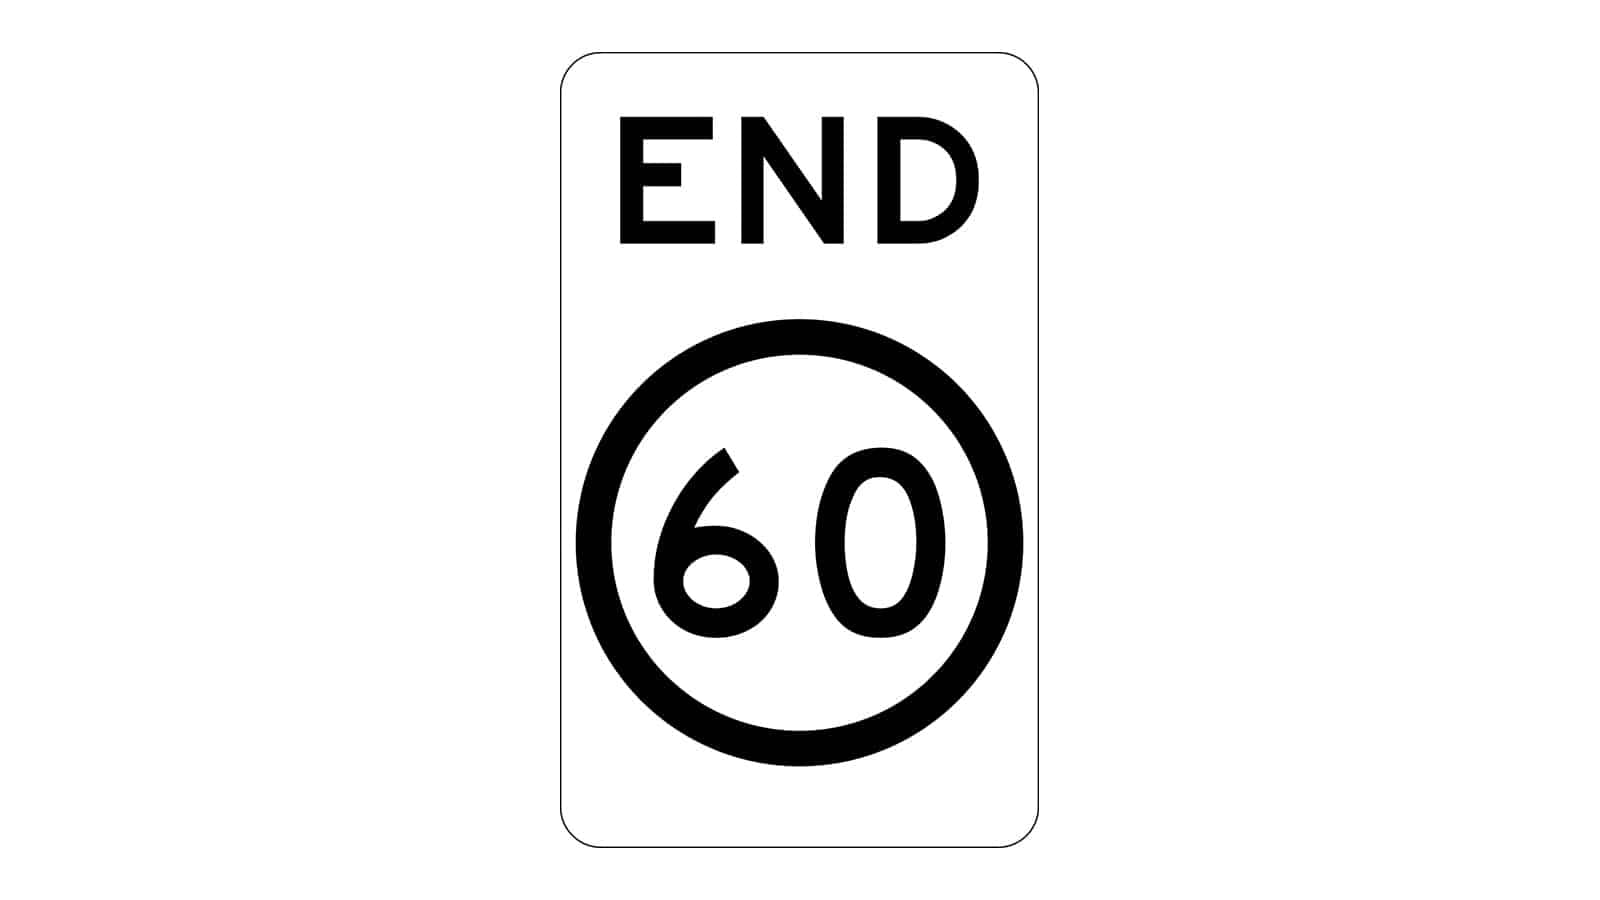
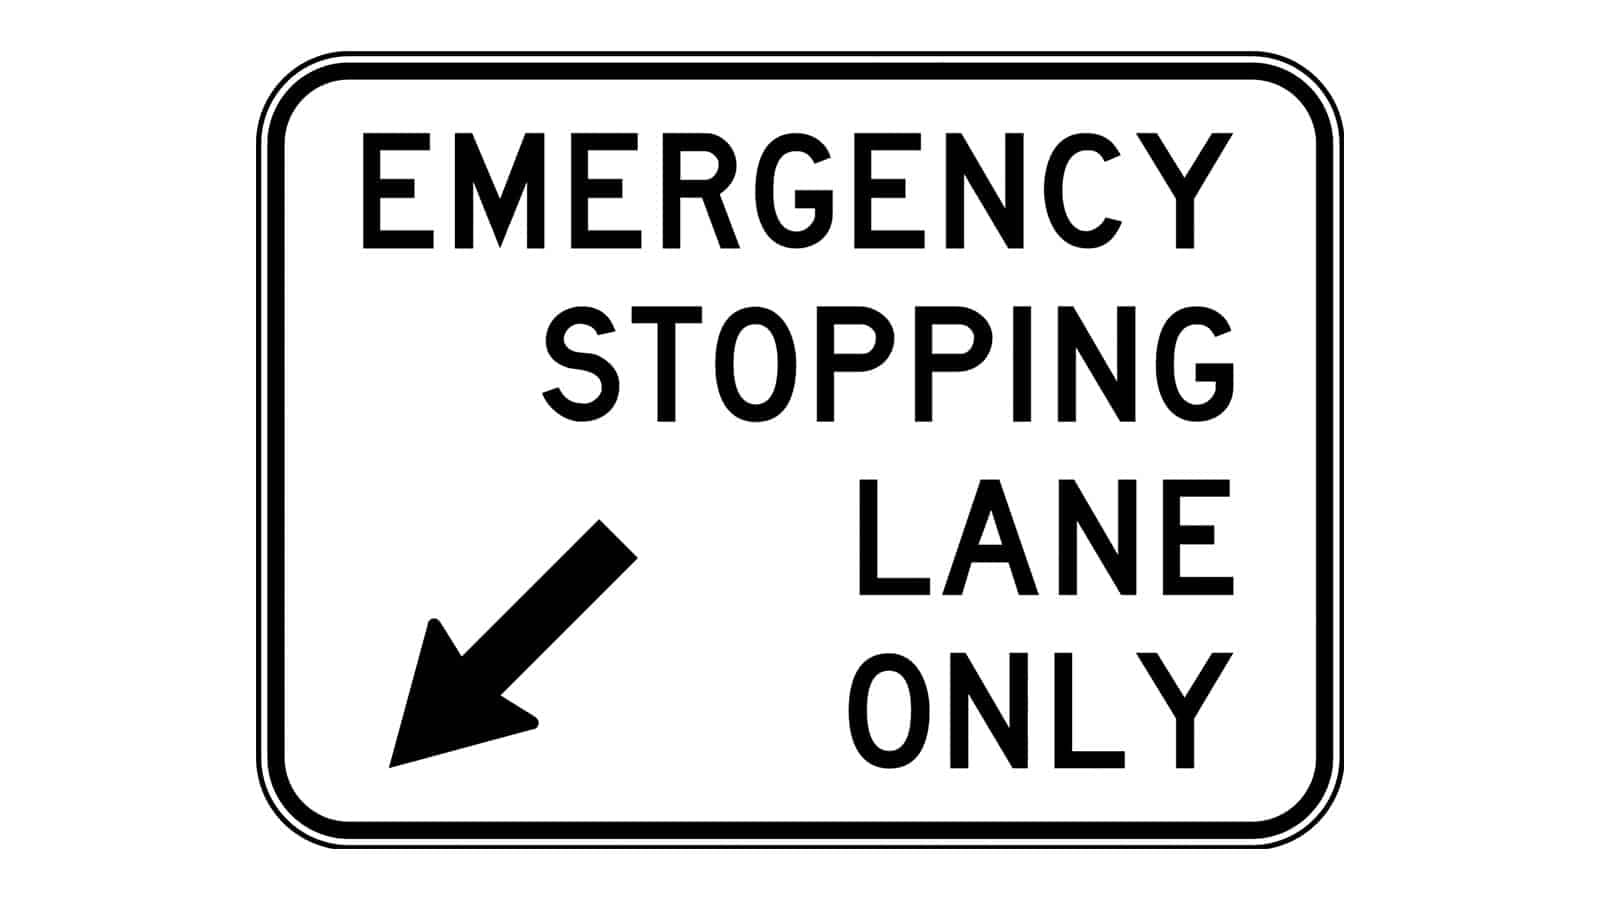
Emergency Stopping Lane Only Sign
This sign indicates a lane that is designated solely for emergency stopping. It is used to provide a safe area for vehicles to stop in case of an emergency without obstructing the flow of traffic.
Where They Are Commonly Seen:
• Highways and Motorways: To provide a safe area for emergency stops.
• Busy Urban Roads: Where space is designated for emergency use to avoid traffic disruptions.
• Bridges and Tunnels: Where stopping in the main lanes could cause significant safety hazards.
Usage Tips:
1. Use Only for Emergencies: Do not use this lane for regular stops or parking; it is intended for emergencies only.
2. Signal Appropriately: If you need to use the emergency lane, signal clearly and safely merge into the lane.
3. Stay Safe: If you must stop in the emergency lane, ensure your hazard lights are on and, if safe, exit the vehicle and stand away from traffic.
Clearway Sign
This sign indicates a clearway, a section of road where stopping and parking are not allowed during specified times to ensure smooth traffic flow and prevent congestion.
Where They Are Commonly Seen:
• Busy Urban Areas: To prevent traffic build-up during peak hours.
• Main Roads: Where stopping could obstruct traffic flow.
• Near Intersections: To ensure clear sightlines and prevent blockage.
• School Zones: To maintain clear routes for buses and emergency vehicles.
Usage Tips:
1. Observe the Time Restrictions: Do not stop or park during the times indicated on the sign.
2. Plan Ahead: Be aware of clearway times and seek alternative parking or stopping points.
3. Stay Alert: These signs are often placed in high-traffic areas; follow the regulations to avoid fines and ensure smooth traffic flow.
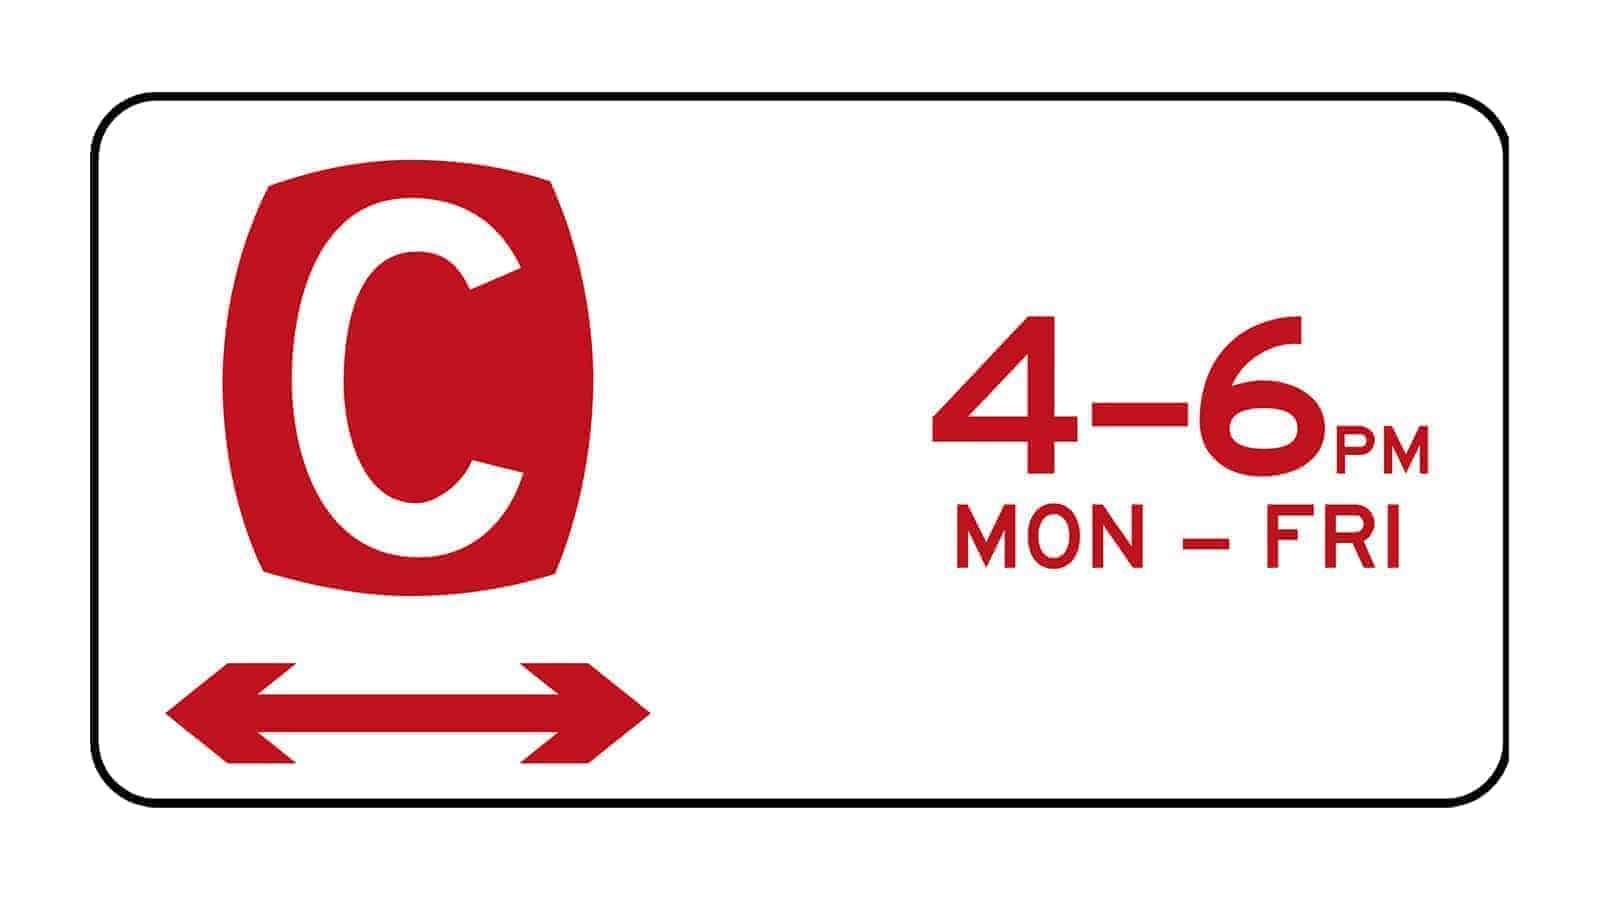
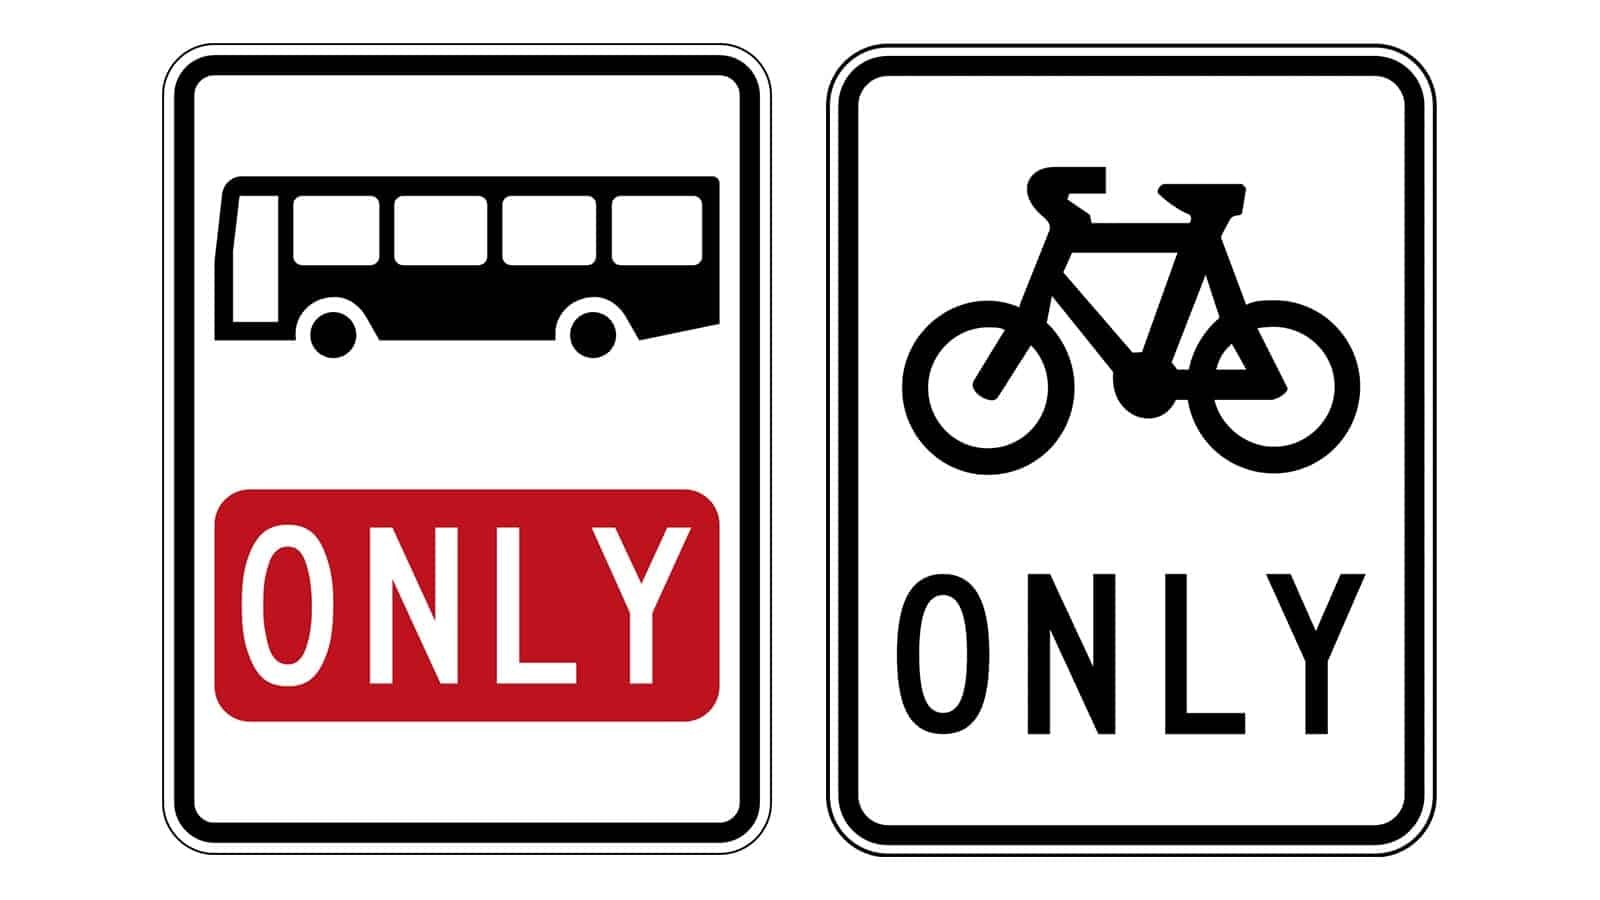
Buses Only and Bicycles Only Signs
These signs indicate lanes or areas designated exclusively for buses and bicycles, respectively. They are used to ensure the safe and efficient flow of specific types of traffic.
Where They Are Commonly Seen:
• Bus Lanes: To provide a dedicated lane for buses, reducing delays and improving transit times.
• Bus Stops: To ensure that buses have a clear area for picking up and dropping off passengers.
• High Traffic Areas: To prioritise public transport in congested zones.
Usage Tips:
1. Avoid These Lanes: Do not drive in lanes marked with this sign unless you are driving a bus.
2. Yield to Buses: If you need to cross a bus lane, do so with caution and yield to any approaching buses.
3. Plan Your Route: Be aware of bus-only lanes in your area to avoid fines and ensure smooth driving.
Loading Zone and Works Zone Signs
These signs indicate designated areas for specific purposes, such as loading/unloading goods and construction works. They help manage road use and ensure safe and efficient operations in these areas.
Loading Zone Sign
Details of the Sign:
• Text: The sign reads “LOADING ZONE.”
• Colour Scheme: The sign has white text on a red background.
Where They Are Commonly Seen:
• Commercial Areas: Where goods need to be loaded and unloaded frequently.
• Near Warehouses: To facilitate the smooth transfer of goods.
• Urban Streets: To manage loading activities without obstructing traffic.
Usage Tips:
1. Use Only for Loading/Unloading: Do not park in loading zones unless actively loading or unloading goods.
2. Observe Time Limits: Be aware of any time restrictions posted for loading zones.
3. Keep Area Clear: Once loading or unloading is complete, move your vehicle promptly to avoid congestion.
Works Zone Sign
Details of the Sign:
• Text: The sign reads “WORKS ZONE.”
• Colour Scheme: The sign has white text on a red background.
Where They Are Commonly Seen:
• Construction Sites: To designate areas for construction-related activities.
• Road Works: To indicate zones where road construction or maintenance is taking place.
• Public Works Projects: To manage space for government or utility work.
Usage Tips:
1. Avoid Parking: Do not park in works zones to avoid obstructing construction activities.
2. Be Cautious: Exercise caution around works zones due to potential hazards.
3. Follow Instructions: Adhere to any additional signage or directions provided by workers in the zone.
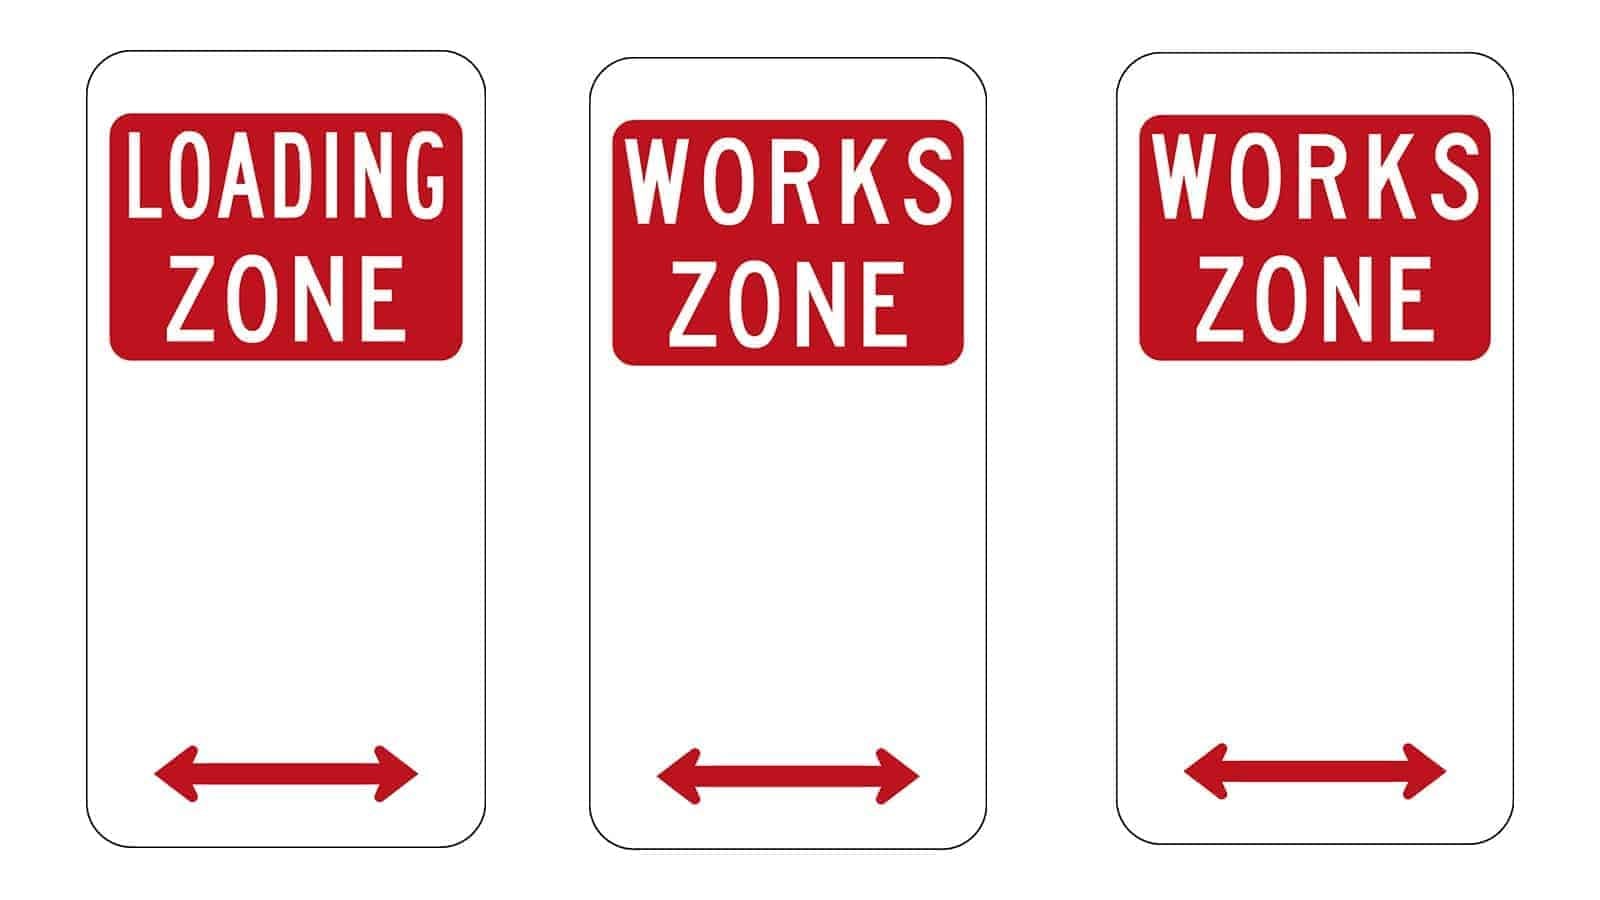
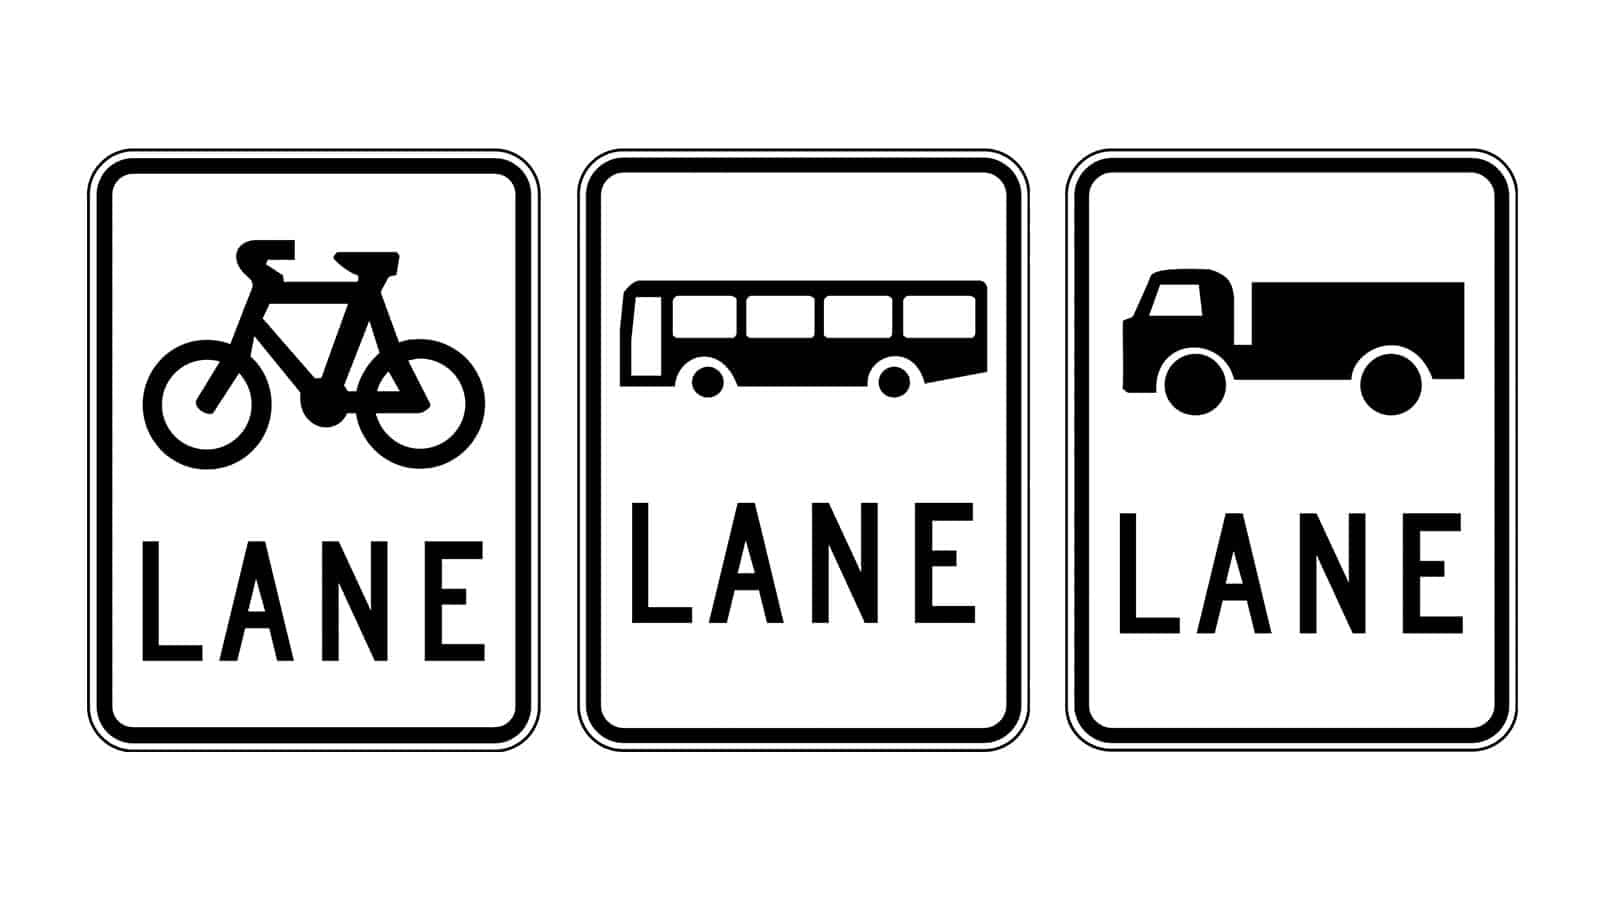
Bicycle Lane, Bus Lane, and Truck Lane Signs
These signs designate specific lanes for bicycles, buses, and trucks. They help manage traffic flow and enhance safety by separating different types of vehicles.
Bicycle Lane Sign
Details of the Sign:
• Text: The sign reads “LANE.”
• Colour Scheme: The sign has a black bicycle symbol above the word “LANE” in black text on a white background, framed by a black border.
Where They Are Commonly Seen:
• Urban Streets: To provide safe paths for cyclists.
• Recreational Areas: To designate bicycle paths.
• Near Schools and Parks: To protect children and other cyclists.
Usage Tips:
1. Use for Cycling: Only use this lane if you are on a bicycle.
2. Avoid Driving or Parking: Do not obstruct the bicycle lane with your vehicle.
3. Be Mindful of Cyclists: Give cyclists the right of way and maintain a safe distance.
Bus Lane Sign
Details of the Sign:
• Text: The sign reads “LANE.”
• Colour Scheme: The sign has a black bus symbol above the word “LANE” in black text on a white background, framed by a black border.
Where They Are Commonly Seen:
• High Traffic Areas: To prioritise buses and reduce congestion.
• Near Bus Stops: To provide clear paths for buses.
• City Centres: To enhance public transport efficiency.
Usage Tips:
1. Avoid Driving in These Lanes: Only drive in bus lanes if permitted (e.g., taxis or emergency vehicles may be allowed).
2. Yield to Buses: Allow buses to merge into traffic safely.
3. Observe Time Restrictions: Some bus lanes are only active during specific hours; check signs for details.
Truck Lane Sign
Details of the Sign:
• Text: The sign reads “LANE.”
• Colour Scheme: The sign has a black truck symbol above the word “LANE” in black text on a white background, framed by a black border.
Where They Are Commonly Seen:
• Industrial Areas: To manage truck traffic efficiently.
• Highways: To provide dedicated lanes for heavy vehicles.
• Loading Zones: Near docks and warehouses to facilitate loading and unloading.
Usage Tips:
1. Use Only for Trucks: These lanes are designated for heavy vehicles; other vehicles should avoid them.
2. Maintain Safe Speed: Follow speed limits and safety regulations specific to truck lanes.
3. Be Cautious: Watch for merging trucks and maintain a safe following distance.
Share this article:
Other Articles
View All ArticlesUnderstanding the Hook Turn Rules in Victoria
In this article, we will explore the hook turn rule in Victoria State. We will d...
Read More